I started tatting my Christmas snowflakes, and as Muskaan mentioned, the inner part makes a nice little snowflake all on it's own. Here's what it looks like after the fourth row.
Cute, isn't it? This little snowflake is just over 2 inches across from point to point. It's nice, but not as large as what I was looking for, so I added the 5th row. I managed to draw it up to the point of this little flake, but trying to get the stitch counts in where the chains are lying against one another is giving me problems so there's no pattern yet.
Actually, that's not true. There is a pattern for the the inner part of my Christmas snowflake which I've called Little Flake. That part of the pattern is included below.
Hopefully, I'll get the rest of if drawn out soon.
Saturday, November 17, 2018
Friday, November 16, 2018
I think it'll work...maybe not
My frustration level is getting pretty high about now. Hubby's making noises about sending out our Christmas cards soon which means I need to get a on tatting tear and start whipping out snowflakes.
That's hard to do when you can't even settle on a design. GRRR!
Since things aren't flowing smoothly I thought I'd go back to where they started going off track and resurrected my second try to take another stab at it. I knew the inner section needed to be larger so that the next rows didn't overlap. I began by making the inner ring larger and making the picots longer That made the chains on the subsequent rows correspondingly longer. After that I followed the original design and I think I have a winner. The finished snowflake is 3 inches across from point to point which is what I was aiming for. You can see the first attempt at the design and how the final version came out.
There aren't and split rings or split chains to slow me down and I have a pretty flake that flows off the shuttles easily. I just have to sit down now and tat like mad. Then all I have to do is draw the pattern out, but that might take a while.
Hubby has the camera attached to the car and now has to run wiring from the front bumper to the dashboard. A backup camera is wired to the back up lights and it only engaged when the backup lights come on. Since this camera is being wired to the front of the car, the camera would be on all the time unless it's wired to a switch so that it's only on when needed. It needs wire going to the switch and wire going from the switch to the battery as well as wire going to the display. Running wire through tight spaces needs smaller hands, namely mine. Consequently I'm going to be spending the next little while with my hands covered in black grease.
Black grease and white thread don't make for good bedfellows when you want pristine snowflakes.
Wish me luck.
That's hard to do when you can't even settle on a design. GRRR!
Since things aren't flowing smoothly I thought I'd go back to where they started going off track and resurrected my second try to take another stab at it. I knew the inner section needed to be larger so that the next rows didn't overlap. I began by making the inner ring larger and making the picots longer That made the chains on the subsequent rows correspondingly longer. After that I followed the original design and I think I have a winner. The finished snowflake is 3 inches across from point to point which is what I was aiming for. You can see the first attempt at the design and how the final version came out.
There aren't and split rings or split chains to slow me down and I have a pretty flake that flows off the shuttles easily. I just have to sit down now and tat like mad. Then all I have to do is draw the pattern out, but that might take a while.
Hubby has the camera attached to the car and now has to run wiring from the front bumper to the dashboard. A backup camera is wired to the back up lights and it only engaged when the backup lights come on. Since this camera is being wired to the front of the car, the camera would be on all the time unless it's wired to a switch so that it's only on when needed. It needs wire going to the switch and wire going from the switch to the battery as well as wire going to the display. Running wire through tight spaces needs smaller hands, namely mine. Consequently I'm going to be spending the next little while with my hands covered in black grease.
Black grease and white thread don't make for good bedfellows when you want pristine snowflakes.
Wish me luck.
Thursday, November 15, 2018
Back to the drawing board - again
I posted the snowflake cut out that I was using because I though others might want to use it to create their own snowflake. I created a quick sketch to play around with. I drew over top of the paper cut out like the picture shown here.
Then I deleted the paper cut out and was left with just the drawing and I proceeded to tat it.
I anticipated that I'd have to increase the size of the rings on each row, so I started with inner rings of 5-5 I expected a big hole in the middle of the design because I wasn't starting with a central ring, but I though it might look really cute with long woven picots in the middle so I started with long picots and ran into my first snag. If you want to weave the picots they need to just touch the edge of the ring on the opposite side of the motif, but it's hard to know how long that distance is when you haven't tatted it yet. so I took a guess. I was using a sort of unconnected cloverleaf with the inner rings at 5-5 as mentioned and used 3-3-3-3 for the side rings ending in a split ring up to the next round.
That's where things got squirrely, or I got tired. I needed 4 connected rings of graduated sizes, joining to 2 more larger connected rings. I tatted it, undid it, tatted it again, undid it again, looked at the drawing and reasoned it out and tatted it again, and again. Then I got fed up and cut if off.
At least now I know how long the central picots have to be. Of course I'm obviously NOT using this design which might work when I'm more alert to figure out what I need to do. But I've decided that since the dozen split rings I'd need to tat would slow down my tatting speed and I either need to rework the design or scrap it altogether, I am once more going back the the drawing board.
Tuesday, November 13, 2018
The computer ate my homework
I thought I'd get back to something simple and see where it lead me, so I started with a simple ring in, ring out design, except that half way through the first round I could tell it was going to cup horrendously, so I cut it off and started again.
This time I went with ring chain, thrown off ring and it looked too simplistic, so I cut it off and started again.
The next design looked like it was going to work, but after the second repeat I realized that I had intended to have a starting ring, work up one side and come back down the other side to a second inner ring. I lost track of what I was doing and instead of a second inner ring I attached to the second picot of the first ring. There's no way that's going to work. So it's time to snip again.
Since just tatting without any pre-set plan wasn't working I thought I'd start with a paper snowflake template and use it as a basis for a design. Ages ago I designed a bunch of cut outs on the snowdays web site and saved the images for future reference. I grabbed one of the images, pulled it into my drawing program and began laying out rings following the outline of the paper snowflake cut out.
Before I could plot out the placement of the chains and how to tat the design it created, hubby decided we had to rush right out before the store closed to get some nylon screws for the front bumper. He's putting a camera behind the front grill so that he can see how close he's getting to the curb. The front hood of the car is really long and sloped in such a way that you can't see how close you are to the curb in the parking lot and several times we've gotten out the the car and realized that we're not close enough, or we've gotten too close and scraped the bumper. He removed the grill in order to mount the camera and realized that when the car was repaired after a little fender bender, the shop had remounted the grill and broke off the supports so that the only thing holding it on was the license plate.
That was just about the point where I realized that the new set up of my drawing program had defaulted to an inappropriate drawing platform. When what you are trying to create is lace, an electronic diagram template, just won't do.
That's not a problem, all I had to do was bring up a lace drawing, erase it, paste in my partial new drawing and save it under a new name. Easy peasy. It was at that instant that the computer locked up so that I couldn't save anything, couldn't change screens, couldn't close down any of the five programs I had running, couldn't change to a different drive and in fact couldn't do anything except pull the plug. Pulling the plug meant that anything on screen was lost. Gone! Tonight I get to start again.
And after all that, the store we rushed out to, didn't even have the nylon screws we needed to put the grill back in the bumper.
This time I went with ring chain, thrown off ring and it looked too simplistic, so I cut it off and started again.
The next design looked like it was going to work, but after the second repeat I realized that I had intended to have a starting ring, work up one side and come back down the other side to a second inner ring. I lost track of what I was doing and instead of a second inner ring I attached to the second picot of the first ring. There's no way that's going to work. So it's time to snip again.
Since just tatting without any pre-set plan wasn't working I thought I'd start with a paper snowflake template and use it as a basis for a design. Ages ago I designed a bunch of cut outs on the snowdays web site and saved the images for future reference. I grabbed one of the images, pulled it into my drawing program and began laying out rings following the outline of the paper snowflake cut out.
Before I could plot out the placement of the chains and how to tat the design it created, hubby decided we had to rush right out before the store closed to get some nylon screws for the front bumper. He's putting a camera behind the front grill so that he can see how close he's getting to the curb. The front hood of the car is really long and sloped in such a way that you can't see how close you are to the curb in the parking lot and several times we've gotten out the the car and realized that we're not close enough, or we've gotten too close and scraped the bumper. He removed the grill in order to mount the camera and realized that when the car was repaired after a little fender bender, the shop had remounted the grill and broke off the supports so that the only thing holding it on was the license plate.
That was just about the point where I realized that the new set up of my drawing program had defaulted to an inappropriate drawing platform. When what you are trying to create is lace, an electronic diagram template, just won't do.
That's not a problem, all I had to do was bring up a lace drawing, erase it, paste in my partial new drawing and save it under a new name. Easy peasy. It was at that instant that the computer locked up so that I couldn't save anything, couldn't change screens, couldn't close down any of the five programs I had running, couldn't change to a different drive and in fact couldn't do anything except pull the plug. Pulling the plug meant that anything on screen was lost. Gone! Tonight I get to start again.
And after all that, the store we rushed out to, didn't even have the nylon screws we needed to put the grill back in the bumper.
Monday, November 12, 2018
Look Ma, it's a dud!
I liked the daisy shape on an earlier design so I thought I'd try it again. After completing the daisy I didn't really want something that used a lot of split chains so I thought I'd just outline the daisy shape with more chain. I like the effect and started to create another row that would bring in the snowflake shape. I didn't like the effect I was getting so I undid what I had started and began again. I didn't want a lot of rows so I thought I'd do something that went out instead of around.
Once I had completed one arm I could see it was going to start bunching up again so I quit before I got too invested. This is another dud although I may keep the first rows of chain and revisit the design at a later date. I've already got the next one on the shuttles, but I'm not sure I'm going to like it any better that the first few.
Maybe I'll go back to the original design. I liked it but it was too time consuming, only at this rate I may spend all my tatting time creating and throwing out designs as not suitable and still not have anything ready for the Christmas cards.
I had the same problem the first year I did snowflakes to send out and ended up doing a whole bunch, all different. That would have been OK if I'd remembered to write down what I sent to who so that I could rotate them for the next year. Since I didn't keep record I had to design an all new snowflake, which started this whole thing of sending a different snowflake with our Christmas cards.
I guess I'd better get cracking as the mailing date will soon be upon us. Of course if the post office is on strike, the cards aren't going to go anywhere anyway!
Once I had completed one arm I could see it was going to start bunching up again so I quit before I got too invested. This is another dud although I may keep the first rows of chain and revisit the design at a later date. I've already got the next one on the shuttles, but I'm not sure I'm going to like it any better that the first few.
Maybe I'll go back to the original design. I liked it but it was too time consuming, only at this rate I may spend all my tatting time creating and throwing out designs as not suitable and still not have anything ready for the Christmas cards.
I had the same problem the first year I did snowflakes to send out and ended up doing a whole bunch, all different. That would have been OK if I'd remembered to write down what I sent to who so that I could rotate them for the next year. Since I didn't keep record I had to design an all new snowflake, which started this whole thing of sending a different snowflake with our Christmas cards.
I guess I'd better get cracking as the mailing date will soon be upon us. Of course if the post office is on strike, the cards aren't going to go anywhere anyway!
Saturday, November 10, 2018
Third try
After not blogging for ages, it looks like I'm on a roll and you can probably look forward to more updates as I'm currently in snowflake mode. This is the third snowflake and I like the design, just maybe not as a snowflake. It begins with a central ring with 5 picots and one mock picot. I normally make my picots so that they're about the same height as the stitches, but since I didn't want the centre all cramped up I made the picots on the central ring about twice the size that I normally do. The daisy shape in the middle of the design is made with chains of 6-6-6-6 The chains forming the petals are joined side to side and the last petal ends with a split chain, putting the shuttles in place to begin the second row.
The chains of Row 2 are likewise joined side to side as are the chains of Row 3, again ending in a split chain. But you can see that for yourself as I've included the pattern below.
I've taken another look at the 2nd snowflake. I had to straighten it out to scan it and I wondered if blocking might work so I pinned it out on my board and left it over night. It might not need a lot of coaxing to fix it. It might just take longer picots at the start. I won't know for a while as I'm on to design number 4 and if we watch a movie tonight I may have another pattern to post tomorrow.
The chains of Row 2 are likewise joined side to side as are the chains of Row 3, again ending in a split chain. But you can see that for yourself as I've included the pattern below.
I've taken another look at the 2nd snowflake. I had to straighten it out to scan it and I wondered if blocking might work so I pinned it out on my board and left it over night. It might not need a lot of coaxing to fix it. It might just take longer picots at the start. I won't know for a while as I'm on to design number 4 and if we watch a movie tonight I may have another pattern to post tomorrow.
Friday, November 09, 2018
Another failure
My goal is to create a snowflake that's roughly 3 inches across that looks pretty, works up fairly quickly to insert in the Christmas cards for my family and a few other select individuals. The one I showed yesterday is pretty, but not really quick to tat.
On the next one I started with a 3 round centre to save some tatting time and used the same kind of idea and the previous snowflake for the next row, but I wanted the arms to be more pronounced, which they are. However, there are too many stitches too close together so the whole thing ruffles. The ruffling wasn't too pronounced until the last row. While the design worked up more quickly and had some redeeming features it's not going to lay flat without some aggressive blocking. I might fight with one snowflake, but if I'm going to do a bunch of them I want them to cooperate and lay flat right off the shuttles so I'm calling this one a fail. I'm not going to tweak it to make it work and I'm certainly not doing a drawing for it.
So I'm on to the third design which so far I kind of like, but I'm thinking I might want to do it again as an eight sided design instead of a 6 point snowflake. It isn't snowflake-y enough for my taste so this next one probably won't make it as my Christmas design either, but it probably will get drawn out.
On the next one I started with a 3 round centre to save some tatting time and used the same kind of idea and the previous snowflake for the next row, but I wanted the arms to be more pronounced, which they are. However, there are too many stitches too close together so the whole thing ruffles. The ruffling wasn't too pronounced until the last row. While the design worked up more quickly and had some redeeming features it's not going to lay flat without some aggressive blocking. I might fight with one snowflake, but if I'm going to do a bunch of them I want them to cooperate and lay flat right off the shuttles so I'm calling this one a fail. I'm not going to tweak it to make it work and I'm certainly not doing a drawing for it.
So I'm on to the third design which so far I kind of like, but I'm thinking I might want to do it again as an eight sided design instead of a 6 point snowflake. It isn't snowflake-y enough for my taste so this next one probably won't make it as my Christmas design either, but it probably will get drawn out.
Wednesday, November 07, 2018
First snowflake of the season
I started this snowflake yesterday but when I went to whip out the drawing for it I came to a complete standstill.
I upgraded my computer this summer and a lot of my old software doesn't run on Windows 10 so when Hubby asked if I wanted it installed, I declined. I like having all of my old software, but tweaking it so that it will run adequately on Win 10 is a pain in the butt and I'm not even the one that has to struggle with the stupid thing. But you can't create a drawing without the software so I finally asked my sweetie to install it. Which he did and after it was adequately blessed (or maybe it was cursed) I don't know I left the room, it finally worked.
Some things don't seem to work like they used to, or maybe it's that I've been away from using drawing software for so long, but I finally managed to create a reasonable facsimile of the finished lace.
I'd been playing around with some designs that start with a basic flat rose so that's where the snowflake started. It's a rose plus 3 more rows using a basic shuttle and ball of thread and it's pretty straightforward except for the split chain at the end of row 6. Seven rows seems like it ought to be big enough for a doily, but it's just 3.25 inches from point to point. done in size 20 thread. It doesn't work up quickly enough to use in our Christmas cards so I've already stared on another one, which doesn't look like it with suit either so there's bound to be a few more coming off the shuttles.
Assuming that you'll probably want the pattern, I've already included it here.
Enjoy!
I upgraded my computer this summer and a lot of my old software doesn't run on Windows 10 so when Hubby asked if I wanted it installed, I declined. I like having all of my old software, but tweaking it so that it will run adequately on Win 10 is a pain in the butt and I'm not even the one that has to struggle with the stupid thing. But you can't create a drawing without the software so I finally asked my sweetie to install it. Which he did and after it was adequately blessed (or maybe it was cursed) I don't know I left the room, it finally worked.
Some things don't seem to work like they used to, or maybe it's that I've been away from using drawing software for so long, but I finally managed to create a reasonable facsimile of the finished lace.
I'd been playing around with some designs that start with a basic flat rose so that's where the snowflake started. It's a rose plus 3 more rows using a basic shuttle and ball of thread and it's pretty straightforward except for the split chain at the end of row 6. Seven rows seems like it ought to be big enough for a doily, but it's just 3.25 inches from point to point. done in size 20 thread. It doesn't work up quickly enough to use in our Christmas cards so I've already stared on another one, which doesn't look like it with suit either so there's bound to be a few more coming off the shuttles.
Assuming that you'll probably want the pattern, I've already included it here.
Enjoy!
Tuesday, November 06, 2018
Colour this doily done
I haven't been blogging a lot. Boy, is that an understatement! We (that would be mostly he) did a lot of work on the old washer before we finally decided enough was enough and bought the new one. (So far I love it.) For some reason when hubby is working on a project I get roped into holding the light, holding one side of the probe for a continuity tester, holding up the long end of the lumber going through the saw, or just generally being a second set of eyes and a spare hand for whatever he's doing. So while I don't have much to show for my activity, he finishes up a lot of projects. When we bought out new washer and dryer, hubby wasn't satisfied with putting new machines on the concrete basement floor, so he built stands for both to elevate them off the concrete. He lifts, I position. See, I'm just a third hand.
I did manage to finish off a project I started in April of 2017. I started with a handful of colours and and I wanted to make a doily that progressed from one colour to the next and used the 3 solid and 2 variegated colours.
I posted some of the progress as it happened and I took pictures of each section, but I don't think I ever showed the final row.
Part of the delay was that I didn't like how the final row ended. I had 8 widely separated points and while the design was symmetrical I kind of wanted more shallow points in between and then some more rows finishing off with a single row of chain in pink.
I wanted those shorter in between points, but after 3 or 4 unsuccessful attempts, I put it aside. I must never put things aside. Putting them aside means never finishing. If I don't finish it NOW, it isn't going to get finished. Last week hubby finally decided to do his weight lifting in the basement and cleared his weights off the end table. Since the table looked bare he suggested that I ought to put a doily on it. So I pulled out the unfinished doily and took another crack at it. No. Nope. Nothing was working. Then I spread it out and measured it. 13.75 inches from point to point. That's pretty much the size you want for a finished doily. So I cut off the offending short points that weren't working and called it done.
I don't love it and I don't hate it. It did what I was planning on doing and now I can reel the thread off my shuttles, pack these balls of thread away, free up some space in my end table and start something new.
Snowflakes anyone?
I did manage to finish off a project I started in April of 2017. I started with a handful of colours and and I wanted to make a doily that progressed from one colour to the next and used the 3 solid and 2 variegated colours.
I posted some of the progress as it happened and I took pictures of each section, but I don't think I ever showed the final row.
Part of the delay was that I didn't like how the final row ended. I had 8 widely separated points and while the design was symmetrical I kind of wanted more shallow points in between and then some more rows finishing off with a single row of chain in pink.
I wanted those shorter in between points, but after 3 or 4 unsuccessful attempts, I put it aside. I must never put things aside. Putting them aside means never finishing. If I don't finish it NOW, it isn't going to get finished. Last week hubby finally decided to do his weight lifting in the basement and cleared his weights off the end table. Since the table looked bare he suggested that I ought to put a doily on it. So I pulled out the unfinished doily and took another crack at it. No. Nope. Nothing was working. Then I spread it out and measured it. 13.75 inches from point to point. That's pretty much the size you want for a finished doily. So I cut off the offending short points that weren't working and called it done.
I don't love it and I don't hate it. It did what I was planning on doing and now I can reel the thread off my shuttles, pack these balls of thread away, free up some space in my end table and start something new.
Snowflakes anyone?
Wednesday, October 10, 2018
Not so clean and fresh
We were out shopping the other day and happened to see Tide in a yellow jug on sale. Normally l like Tide, but I had never tried the Tide Simply Clean & Fresh in the Daybreak Fresh scent, but it was Tide and it was on sale, so it had to be a good deal right? Wrong. I loaded up my spanking new machine and added the recommended amount of detergent. The stink coming from the washing machine suggested that the clothes were really dirty, like stinky, sweaty, stale gym bag, dirty. So I was glad to get things washed.
When the cycle was done I was in a hurry and just quickly dumped everything into the dryer. When I went back to get things out of the dryer I could still smell a horrific stench. As I think I mentioned, my nose isn't nearly as sensitive as hubby's so I grabbed the freshly washed load of laundry and made him stick his nose in it. His response? Man does that stuff need washing, it smells like something died in there. Then I grabbed the jug of detergent and made him smell it. Putrid, stinky, foul horrible stuff.
So both of us concur, this stuff just stinks.
I had to put everything through the wash again with a different detergent and then through a second rinse just to get rid of the stench. I bought 2 jugs of the stuff, because, it was Tide and it was on sale. So having 2 jugs of it I thought maybe I could use it for something that doesn't come near our noses, like kitchen towels. No dish washer, so we do dishes by hand and I just wait until I have a bunch of kitchen towels to do and wash them all at once. I tried it again on them with the same results. When I go to dry dishes, the smell makes me want to gag, making me feel like using the towels is actually putting dirt ON the clean dishes.
So, I won't be using it again. Maybe hubby can use it for washing the car, or hosing down the patio. All I know is that there's no way I'm going to be using it on clothes.
I did write to Tide telling them I think their product stinks -LITERALLY STINKS!! and they responded suggesting that scent is one of personal preference, which I agree. Although I can't imaging anyone liking the smell of dirty socks. They also suggested that I might have used the wrong dosage, although since it's a new machine and I'm being careful to do everything according to the recommendations on the packaging to make sure I don't have any problems, that's not likely. There is also the possibility that the combined scent of detergent and fabric softener, might result in weird blendings -- except I don't use fabric softener. I do use dryer sheets, the unscented kind. They were very kind to offer a prepaid debit card which will cover the cost of the detergent. Which isn't really the point.
At any rate, if you happen to see Tide Simply Clean & Fresh in the Daybreak Fresh scent you might want to just pass it by. Or at least give it a sniff test in the jug before you try it. I don't know, you might like washing your clothes in eau de dirty socks.
When the cycle was done I was in a hurry and just quickly dumped everything into the dryer. When I went back to get things out of the dryer I could still smell a horrific stench. As I think I mentioned, my nose isn't nearly as sensitive as hubby's so I grabbed the freshly washed load of laundry and made him stick his nose in it. His response? Man does that stuff need washing, it smells like something died in there. Then I grabbed the jug of detergent and made him smell it. Putrid, stinky, foul horrible stuff.
So both of us concur, this stuff just stinks.
I had to put everything through the wash again with a different detergent and then through a second rinse just to get rid of the stench. I bought 2 jugs of the stuff, because, it was Tide and it was on sale. So having 2 jugs of it I thought maybe I could use it for something that doesn't come near our noses, like kitchen towels. No dish washer, so we do dishes by hand and I just wait until I have a bunch of kitchen towels to do and wash them all at once. I tried it again on them with the same results. When I go to dry dishes, the smell makes me want to gag, making me feel like using the towels is actually putting dirt ON the clean dishes.
So, I won't be using it again. Maybe hubby can use it for washing the car, or hosing down the patio. All I know is that there's no way I'm going to be using it on clothes.
I did write to Tide telling them I think their product stinks -LITERALLY STINKS!! and they responded suggesting that scent is one of personal preference, which I agree. Although I can't imaging anyone liking the smell of dirty socks. They also suggested that I might have used the wrong dosage, although since it's a new machine and I'm being careful to do everything according to the recommendations on the packaging to make sure I don't have any problems, that's not likely. There is also the possibility that the combined scent of detergent and fabric softener, might result in weird blendings -- except I don't use fabric softener. I do use dryer sheets, the unscented kind. They were very kind to offer a prepaid debit card which will cover the cost of the detergent. Which isn't really the point.
At any rate, if you happen to see Tide Simply Clean & Fresh in the Daybreak Fresh scent you might want to just pass it by. Or at least give it a sniff test in the jug before you try it. I don't know, you might like washing your clothes in eau de dirty socks.
Re-visited
I had reason to re-tat a design I created 10 years ago and realized after I did it, that there was a a small mistake in it. As much as possible I try to keep the original sample of the things I tat so I still have the first one I did. I tatted it again according to the diagram, but it didn't look exactly the same so I reexamined the original and counted the stitches in one part at 2-2-2-2 as per the diagram. Then I counted it again at 2-2-2 so I undid a couple of stitches, but that didn't seem right so I added them back in again. I think I went back and forth 3 or 4 times. It's 2 picots, no it's 3, no it's 2...I went with 2 and it worked out although 3 probably would work as well. I did the first sample using size 8 perle cotton and re-did it this time using size 20 Lizbeth. The first one on the right, was 3 inches across and the second one on the left, in Lizbeth ended up being 2.5 inches across.
I like designing, but I'm not crazy about re-visiting old designs. Once I'm done with a design, I'm done, I don't really want to play with it again mostly because I tend to pick it apart and think I should have done this, or that would have been a better idea. Some how the muse that works the first time around just doesn't want to stick around for another kick at the can.
Or maybe it's just that I'm getting old.....Nah, that couldn't have anything to do with it. Can it?
I like designing, but I'm not crazy about re-visiting old designs. Once I'm done with a design, I'm done, I don't really want to play with it again mostly because I tend to pick it apart and think I should have done this, or that would have been a better idea. Some how the muse that works the first time around just doesn't want to stick around for another kick at the can.
Or maybe it's just that I'm getting old.....Nah, that couldn't have anything to do with it. Can it?
Tuesday, October 09, 2018
Out with the old - in with the new
It finally happened. After repeated repairs, we finally decided to call it quits and bought a new washer and dryer. Front loading machines weren't even on the initial list. I understand that for short people they're a great thing, but I'm not, short, that is, and neither is hubby. Why, when you're going to put water in a container, would you put a door on the side of it? It's just stupid. A lot of people I know who have front loading machines end up with leaks, something that rarely happens with top loading machines. If you have a front loading machine and love it, great. I just don't.
Not only that, but the front loading machines need to be dried after every use, or you have to leave the door open for it to dry out naturally. If you're in a small space it just got smaller as you try to maneuver around the perpetually open door. If you don't, the machine begins to stink and the clothes you wash in it stink from the stagnant water that's been trapped in the gasket around the door. Yuck!
Our research showed that machines with agitators get clothes cleaner and that's OK because the old one had an agitator and I wanted an agitator on the new one. I can't see these little impellers in the new machines working all that efficiently, but I guess some people are happy with them. I went for a new Maytag with an agitator, an extra water setting and a second rinse setting.
So far, it does take longer to do a load of wash but the clothes do seem to come out clean and after the last few months of having to coax the old machine to move on to the rinse cycle and having to just put things through a second wash without soap to make sure that things actually got rinsed, I'm a happy camper.
It does take longer to wash a load, but the machine has a quick wash cycle, so I'm guessing that if there's only a couple of items to wash this setting should work. Hubby uses a half capful of detergent for his "load" of a couple of tshirts and a pair of socks. I KNOW, I KNOW! He says it doesn't get clean if he uses less. He has the nose of a bloodhound and he can smell the least little thing. I brought in 1 tiny stalk of lily of the valley last spring and set it on the table downstairs. He was upstairs on the opposite side of the house and within 5 minutes he was asking me if I'd sprayed perfume! Forget hyacinths or lilacs and I love lilacs but I can't have them in the house or it drives him nuts. Consequently, he puts all of his clothes through the machine twice. Once with detergent and once with just water to get all of the detergent out. I refuse to do his laundry because I refuse to wash such a minuscule load especially with so much excess detergent.
With the old machine, that meant waiting for the machine to finish the cycle and then starting it all over again. I used the short setting of 12 minutes wash before the rinse and spin but he always used the 19 minutes plus rinse and spin. I could do a load of bedding wash and dry in an hour. His "load" of 2 tshirts and a pair of socks or a single pair of jeans took and hour to wash and half an hour to dry. If we both had to do laundry at the same time, I tried to get mine in first so that my load was done and in the dryer before he got started. Otherwise it'd be and hour for the first load and another hour for his jeans before the machine was free to do my 20 minute load.
We were concerned that the newer machines don't really use enough water to really get clothes clean, but this machine has an extra water setting that puts in more water to start with which seems to work really well. I washed 3 regular pillows the other day (I think it's a 7 cubic foot tub) and it took all 3 and sloshed them around until they were right at the top of the tub and full of water. Since the machine has an extra rinse setting we don't have to run down and start it all over again. So all in all, even though a cycle takes longer, with the extra rinse and not having to start the whole thing a second time, It actually takes about the same amount of time for hubby to do a "load".
Last week his sniffer didn't like his sheets so I pulled another set out of the cupboard and changed them, but no, they didn't smell fresh to him either and he was persuaded that the sheets had absorbed the smell from the vacuum cleaner stored in that cupboard. So I switched them for a set from another cupboard. Nope, not fresh enough. So I switched the pillowcases and that was okay enough for him to sleep through the night. The next day I went out and bought more sheets to fit the bed and did load after load of bedding and the pillows, (I bought a new one of those too) until everything was clean enough to pass the sniff test.
It's funny, the bedding and towels which I do with regular amounts of detergent and a single cycle are clean enough to pass his nose test, but he's persuaded that things aren't clean unless he uses 4 times the recommended amount of detergent when he does laundry... In all fairness he sometimes has oil and grease on his clothes from working on the car, or tree sap and stain from woodworking which does take a little more washing. At least he isn't using a capful any more. I think I may have persuaded him that it's OK to use the quantity recommended by the manufacturer. I hope so, or my new machine may end up throwing a hissy fit at all the excess detergent.
I've only had the machine for a couple of weeks and other than taking longer to do a load, so far I like it. Here's keeping my fingers crossed.
Not only that, but the front loading machines need to be dried after every use, or you have to leave the door open for it to dry out naturally. If you're in a small space it just got smaller as you try to maneuver around the perpetually open door. If you don't, the machine begins to stink and the clothes you wash in it stink from the stagnant water that's been trapped in the gasket around the door. Yuck!
Our research showed that machines with agitators get clothes cleaner and that's OK because the old one had an agitator and I wanted an agitator on the new one. I can't see these little impellers in the new machines working all that efficiently, but I guess some people are happy with them. I went for a new Maytag with an agitator, an extra water setting and a second rinse setting.
So far, it does take longer to do a load of wash but the clothes do seem to come out clean and after the last few months of having to coax the old machine to move on to the rinse cycle and having to just put things through a second wash without soap to make sure that things actually got rinsed, I'm a happy camper.
It does take longer to wash a load, but the machine has a quick wash cycle, so I'm guessing that if there's only a couple of items to wash this setting should work. Hubby uses a half capful of detergent for his "load" of a couple of tshirts and a pair of socks. I KNOW, I KNOW! He says it doesn't get clean if he uses less. He has the nose of a bloodhound and he can smell the least little thing. I brought in 1 tiny stalk of lily of the valley last spring and set it on the table downstairs. He was upstairs on the opposite side of the house and within 5 minutes he was asking me if I'd sprayed perfume! Forget hyacinths or lilacs and I love lilacs but I can't have them in the house or it drives him nuts. Consequently, he puts all of his clothes through the machine twice. Once with detergent and once with just water to get all of the detergent out. I refuse to do his laundry because I refuse to wash such a minuscule load especially with so much excess detergent.
With the old machine, that meant waiting for the machine to finish the cycle and then starting it all over again. I used the short setting of 12 minutes wash before the rinse and spin but he always used the 19 minutes plus rinse and spin. I could do a load of bedding wash and dry in an hour. His "load" of 2 tshirts and a pair of socks or a single pair of jeans took and hour to wash and half an hour to dry. If we both had to do laundry at the same time, I tried to get mine in first so that my load was done and in the dryer before he got started. Otherwise it'd be and hour for the first load and another hour for his jeans before the machine was free to do my 20 minute load.
We were concerned that the newer machines don't really use enough water to really get clothes clean, but this machine has an extra water setting that puts in more water to start with which seems to work really well. I washed 3 regular pillows the other day (I think it's a 7 cubic foot tub) and it took all 3 and sloshed them around until they were right at the top of the tub and full of water. Since the machine has an extra rinse setting we don't have to run down and start it all over again. So all in all, even though a cycle takes longer, with the extra rinse and not having to start the whole thing a second time, It actually takes about the same amount of time for hubby to do a "load".
Last week his sniffer didn't like his sheets so I pulled another set out of the cupboard and changed them, but no, they didn't smell fresh to him either and he was persuaded that the sheets had absorbed the smell from the vacuum cleaner stored in that cupboard. So I switched them for a set from another cupboard. Nope, not fresh enough. So I switched the pillowcases and that was okay enough for him to sleep through the night. The next day I went out and bought more sheets to fit the bed and did load after load of bedding and the pillows, (I bought a new one of those too) until everything was clean enough to pass the sniff test.
It's funny, the bedding and towels which I do with regular amounts of detergent and a single cycle are clean enough to pass his nose test, but he's persuaded that things aren't clean unless he uses 4 times the recommended amount of detergent when he does laundry... In all fairness he sometimes has oil and grease on his clothes from working on the car, or tree sap and stain from woodworking which does take a little more washing. At least he isn't using a capful any more. I think I may have persuaded him that it's OK to use the quantity recommended by the manufacturer. I hope so, or my new machine may end up throwing a hissy fit at all the excess detergent.
I've only had the machine for a couple of weeks and other than taking longer to do a load, so far I like it. Here's keeping my fingers crossed.
Tuesday, May 22, 2018
Washing Garbage
When I was kid, now admittedly that was a long time ago, I used to open a can, dump out it's contents and throw the can in the garbage. The can, after all, was just a container whose purpose had already been served. So it was open, dump and throw. Back then, microwave ovens hadn't been invented and most people cooked their meals from fresh meat, fish, fowl and vegetables which don't really generate a lot of waste. Meat came from the butcher wrapped in paper and veggies came in whatever natural wrapper God gave them. Potato peels, apple cores watermelon rinds and corn husks all got thrown on the compost heap, which did what compost heaps do, and ultimately furnished rich loamy soil to feed the garden.
Then we got more sophisticated and dinner now comes pre-cooked and pre-packaged to make things more convenient and consequently produces a lot more non usable garbage that we're quickly running out of places to store. The empty plastic and foil containers can't be composted, so now we need to recycle them. Of course gone are the days when you can open, use, and throw. Now after use, the empty container has to be stored for weeks and if you live in a townhouse like I do, there is no room anywhere to store enormous garbage, recyclable, and organic waste bins. There is barely enough room in the garage for the car, let alone these huge bins and smaller bins won't hold weeks worth of garbage. So that means they need to be stored in the house, the only remaining space. To avoid the stench of rotting garbage we have to carefully wash all of these containers before storing them.
This week again I marvel at how far we've come as I wash out cans, bottles and tubs, literally washing garbage before I pitch it out.
I'm all for protecting the environment, but I wonder if governments were really sincere about reducing waste if they couldn't find some way to reduce the garbage at the source. You know what I mean. Every time you bring something home from the store it's wrapped up like a mummy. Component parts are wrapped in plastic bags and then fitted inside protective styrofoam blocks with cardboard spacers holding things in place inside the cardboard box, which is inside shrink seal cellophane. Overkill much?!!??
A long time ago, when a lot of the jobs went overseas because of the cheaper work force, one of the ways a manufacturer could still claim the product Canadian made was if a certain percentage of the product was made here. In practice, that meant that it could be identified as Canadian, even if the only thing Canadian was the packaging, as long as the Canadian content dollar wise, met the threshold. Guess where some of the excess packaging started coming in?
In all fairness, since most of the manufacturing jobs have gone overseas, the products that we use every day have to come back from overseas to be sold here and in all that travel you don't want something like a large TV to get a hole poked in it just because it wasn't sufficiently protected. But somewhere, somehow, there has to be a happy balance.
In the interim, I'm stuck here, washing garbage.
Then we got more sophisticated and dinner now comes pre-cooked and pre-packaged to make things more convenient and consequently produces a lot more non usable garbage that we're quickly running out of places to store. The empty plastic and foil containers can't be composted, so now we need to recycle them. Of course gone are the days when you can open, use, and throw. Now after use, the empty container has to be stored for weeks and if you live in a townhouse like I do, there is no room anywhere to store enormous garbage, recyclable, and organic waste bins. There is barely enough room in the garage for the car, let alone these huge bins and smaller bins won't hold weeks worth of garbage. So that means they need to be stored in the house, the only remaining space. To avoid the stench of rotting garbage we have to carefully wash all of these containers before storing them.
This week again I marvel at how far we've come as I wash out cans, bottles and tubs, literally washing garbage before I pitch it out.
I'm all for protecting the environment, but I wonder if governments were really sincere about reducing waste if they couldn't find some way to reduce the garbage at the source. You know what I mean. Every time you bring something home from the store it's wrapped up like a mummy. Component parts are wrapped in plastic bags and then fitted inside protective styrofoam blocks with cardboard spacers holding things in place inside the cardboard box, which is inside shrink seal cellophane. Overkill much?!!??
A long time ago, when a lot of the jobs went overseas because of the cheaper work force, one of the ways a manufacturer could still claim the product Canadian made was if a certain percentage of the product was made here. In practice, that meant that it could be identified as Canadian, even if the only thing Canadian was the packaging, as long as the Canadian content dollar wise, met the threshold. Guess where some of the excess packaging started coming in?
In all fairness, since most of the manufacturing jobs have gone overseas, the products that we use every day have to come back from overseas to be sold here and in all that travel you don't want something like a large TV to get a hole poked in it just because it wasn't sufficiently protected. But somewhere, somehow, there has to be a happy balance.
In the interim, I'm stuck here, washing garbage.
Monday, April 16, 2018
High Efficiency - NOT
After many many years of faithful service it's about time for my old washing machine to be retired. It washes clothes perfectly in a very short amount of time but lately it's been getting stuck now and then and when I go to throw things in the dryer, the machine is still full of water. It takes a little nudge before the machine will go into the spin cycle and empty out. It's a small irritation, but it's prompted me to look for a new machine.
I loathe front loading machines. I'm tall enough that I don't have a problem reaching down into a top loading machine and I've always considered front loading machines stupid. It makes no logical sense to me to have a door where the water is. In my opinion it's an accident looking for a place to happen. IF there's a leak in the door seal, there will be water all over the floor, which is never an issue with a top loading machine.
A couple of years ago one of my sisters, (I have 5 of them) replaced her old machine with a front loading model because she's short and another of my sisters recommended it. Ever since I've been listening to her complain about how inferior her new machine is, how it doesn't get the clothes clean, and it takes so much longer to do a load of laundry.
Knowing that I might have some issues, I started doing some research. I discovered that in addition to being a dumb idea, 20% of front loading machines develop issues with mold, mildew, bad smells and clothes coming out of the washer dirtier than when they went in. That stupid front door seal needs to be carefully and thoroughly dried after each use, or the build up of stagnant water just stinks and gets dumped into your next load of laundry. Really impressive. Front loaders were never on my shopping list, but finding out about that little problem would have permanently removed them from my wish list if I had been looking at them. I know another alternative is to just leave the door open and let it air dry, but that means the door is permanently open where you can trip over it and if you do frequent washes, the fold over gasket that's used on some machines can still trap water that doesn't fully dry out.
Another thing I discovered is that most top loading "high efficiency" machines don't have an agitator, even when agitators clean better. One of the reasons I was given for not having an agitator is that it wears clothes out. Nonsense. I've always used a machine with an agitator and I have clothes that are older than my machine that are still going strong after hundreds of washings. I've seen dozens of reviews where people have complained that there clothes end up in a tight ball, and badly wrinkled due to the constant spinning of the non agitator machines.
It was at that point that I discovered the new "high efficiency" machines take about 50 minutes to go through a normal cycle. Really? 50 minutes?!?!! My old machine takes about 20 minutes to wash a load of bedding. The delicate cycle takes about 7 minutes. The dryer takes about 30 minutes to dry a load of bedding, maybe 40 minutes if it's flannel sheets. Which means I can wash and dry a load in less than an hour.
The comes the kicker. The longer 50 minute cycle, because it doesn't use enough water will probably not actually get really dirty clothes clean. They'll probably have to go through a second cycle if they're really dirty. So, my old machine can take badly soiled clothes, like the things hubby wears to work on the car and have them clean and fresh smelling in 20 minutes, but a new "high efficiency" machine will take 50 minutes to go through a cycle, but probably it will take 2 cycles to actually get the clothes clean, or nearly 2 hours.
I asked the sales people to explain to me how that was more efficient. Nobody had an answer, so I went back and did some research. It turns out that what the new machines are more efficient at is using less water and less detergent. They're not really more efficient at all, when efficient is measured in terms of cleaner clothes, less use of electricity, or more important to me, less use of my time. In a small household, we still have a couple of loads of bedding, a couple of loads of towels and 3 or 4 loads of clothes every week. I can't imagine how a large family copes with the issue. Especially when you're trying to fit that in around the less expensive hours of electricity consumption.
So, the so called high efficiency washing machines, use less water and less detergent to do a less effective job of cleaning clothes. Some machines reportedly don't use enough water to even get all of the clothes wet. Without an agitator, they ball the clothes up in a knot leaving them badly wrinkled. Supposedly, these high efficiency machines spin the clothes so well that they need less dryer time which is where they save on electricity. Except that the new dryers now have a steam cycle to put moisture back in the clothes to take out the wrinkles that the washing machine put in!!!!!!
I think I'll just get my Mr Fix It to replace the worn parts on my old machine so that I can efficiently enjoy really clean clothes in short amounts of time.
An extra note: I heard several sales people telling me that people are adding a wet towel to their wash which adds the water in the towel as well as increasing the weight of the load to trick the machine into adding more water. Which is probably good for most things, but some items are liable to come out with a lot of extra fuzzy bits from the towel.
I loathe front loading machines. I'm tall enough that I don't have a problem reaching down into a top loading machine and I've always considered front loading machines stupid. It makes no logical sense to me to have a door where the water is. In my opinion it's an accident looking for a place to happen. IF there's a leak in the door seal, there will be water all over the floor, which is never an issue with a top loading machine.
A couple of years ago one of my sisters, (I have 5 of them) replaced her old machine with a front loading model because she's short and another of my sisters recommended it. Ever since I've been listening to her complain about how inferior her new machine is, how it doesn't get the clothes clean, and it takes so much longer to do a load of laundry.
Knowing that I might have some issues, I started doing some research. I discovered that in addition to being a dumb idea, 20% of front loading machines develop issues with mold, mildew, bad smells and clothes coming out of the washer dirtier than when they went in. That stupid front door seal needs to be carefully and thoroughly dried after each use, or the build up of stagnant water just stinks and gets dumped into your next load of laundry. Really impressive. Front loaders were never on my shopping list, but finding out about that little problem would have permanently removed them from my wish list if I had been looking at them. I know another alternative is to just leave the door open and let it air dry, but that means the door is permanently open where you can trip over it and if you do frequent washes, the fold over gasket that's used on some machines can still trap water that doesn't fully dry out.
Another thing I discovered is that most top loading "high efficiency" machines don't have an agitator, even when agitators clean better. One of the reasons I was given for not having an agitator is that it wears clothes out. Nonsense. I've always used a machine with an agitator and I have clothes that are older than my machine that are still going strong after hundreds of washings. I've seen dozens of reviews where people have complained that there clothes end up in a tight ball, and badly wrinkled due to the constant spinning of the non agitator machines.
It was at that point that I discovered the new "high efficiency" machines take about 50 minutes to go through a normal cycle. Really? 50 minutes?!?!! My old machine takes about 20 minutes to wash a load of bedding. The delicate cycle takes about 7 minutes. The dryer takes about 30 minutes to dry a load of bedding, maybe 40 minutes if it's flannel sheets. Which means I can wash and dry a load in less than an hour.
The comes the kicker. The longer 50 minute cycle, because it doesn't use enough water will probably not actually get really dirty clothes clean. They'll probably have to go through a second cycle if they're really dirty. So, my old machine can take badly soiled clothes, like the things hubby wears to work on the car and have them clean and fresh smelling in 20 minutes, but a new "high efficiency" machine will take 50 minutes to go through a cycle, but probably it will take 2 cycles to actually get the clothes clean, or nearly 2 hours.
I asked the sales people to explain to me how that was more efficient. Nobody had an answer, so I went back and did some research. It turns out that what the new machines are more efficient at is using less water and less detergent. They're not really more efficient at all, when efficient is measured in terms of cleaner clothes, less use of electricity, or more important to me, less use of my time. In a small household, we still have a couple of loads of bedding, a couple of loads of towels and 3 or 4 loads of clothes every week. I can't imagine how a large family copes with the issue. Especially when you're trying to fit that in around the less expensive hours of electricity consumption.
So, the so called high efficiency washing machines, use less water and less detergent to do a less effective job of cleaning clothes. Some machines reportedly don't use enough water to even get all of the clothes wet. Without an agitator, they ball the clothes up in a knot leaving them badly wrinkled. Supposedly, these high efficiency machines spin the clothes so well that they need less dryer time which is where they save on electricity. Except that the new dryers now have a steam cycle to put moisture back in the clothes to take out the wrinkles that the washing machine put in!!!!!!
I think I'll just get my Mr Fix It to replace the worn parts on my old machine so that I can efficiently enjoy really clean clothes in short amounts of time.
An extra note: I heard several sales people telling me that people are adding a wet towel to their wash which adds the water in the towel as well as increasing the weight of the load to trick the machine into adding more water. Which is probably good for most things, but some items are liable to come out with a lot of extra fuzzy bits from the towel.
Sunday, April 01, 2018
Resurrection
Easter, is for Christians, a celebration of the resurrection of Jesus from the dead. There are some atheists and skeptics who not only don't believe that Jesus was raised from the dead, but they also question whether or not he was crucified. These people however are very few and no historical authority gives them any credence. It is a historical FACT that Jesus was crucified and died on the cross.
Since I want to talk about history, not speculation, here is a significant FACT. The writer of 1 Corinthians, who is believed to be Paul, wrote his letter sometime between 52 and 56 AD. What is significant about the date, is that it is only about 20 years after the death and resurrection of Jesus which was somewhere between 30 and 33 AD. To put it in perspective, the attack of 9/11 was 2001 or 17 years ago. An eye witness of the attack could give you a very precise and accurate description of what happened on that day. There are a lot of people alive today who were eye witnesses of those events and well able to corroborate what happened.
I mention this because Paul gives in the first letter to the Corinthians in chapter 15 verses 3-8, an impressive list of people who saw Jesus die, get buried and live again.
"For I delivered unto you first of all that which I also received, how that Christ died for our sins according to the scriptures;
And that he was buried, and that he rose again the third day according to the scriptures:
And that he was seen of Cephas, then of the twelve:
After that, he was seen of above five hundred brethren at once; of whom the greater part remain unto this present, but some are fallen asleep.
After that, he was seen of James; then of all the apostles.
And last of all he was seen of me also, as of one born out of due time."
So according to Paul there were over 500 people that saw Jesus alive again after the crucifixion. People who were eye witnesses to his death and eye witnesses to the fact that he was alive again afterward. You can trick one or two people, you might trick 30 or 40 people, but there is no way you could trick 500 people into believing a lie.
Why does this matter? Simply because if Jesus did not rise from the dead, then he was a liar and a charlatan. But he wasn't a liar, he didn't perpetrate an elaborate hoax. Just like the events of 9/11, the events of Jesus' resurrection took place in the open where people could see for themselves the truth of it. You, yourself know about what happened on 9/11, or if you're too young, you know of several people that can tell you what happened because they experienced it first hand. 9/11 is roughly as far in our past, as the death and resurrection of Jesus was in Paul's past, when he wrote that letter to the Corinthians. So we're not talking ancient past, we're talking about a current past.
If Jesus didn't rise from the dead, Christianity is a vain hope. 500 eye witnesses makes for very reliable information. Jesus DID rise from the dead and since He did we have hope for our own resurrection from the dead.
1 Corinthians 15:55-57 goes on to state, "O death, where is thy sting? O grave, where is thy victory?
The sting of death is sin; and the strength of sin is the law.
But thanks be to God, which giveth us the victory through our Lord Jesus Christ."
Death has no power over the person who puts their trust in Jesus.
Do you know where you will spend eternity? If you're not sure, you can be. Romans 3-23 says "For all have sinned, and come short of the glory of God" You've sinned. If you've ever lied, stolen, or cheated, you've sinned. Romans 6:23 states, "For the wages of sin is death; but the gift of God is eternal life through Jesus Christ our Lord." So you've sinned and the penalty for sin is death, BUT God gives you the gift of eternal life. Romans 5:8 tells us, "But God commendeth his love toward us, in that, while we were yet sinners, Christ died for us." Jesus paid the penalty for OUR sin by sacrificing himself. Romans 10:9 says, "That if thou shalt confess with thy mouth the Lord Jesus, and shalt believe in thine heart that God hath raised him from the dead, thou shalt be saved." The penalty has already been paid, you just have to avail yourself of it by confessing the Lordship of Jesus and believing in your heart the God has raised him from the dead. Then go share with someone what you have done. The Gift of everlasting life is yours just for believing on Jesus.
John 3:16 "For God so loved the world, that he gave his only begotten Son, that whosoever believeth in him should not perish, but have everlasting life."
If you have followed those steps you have passed from death to life everlasting. You belong to Jesus and He'll never let you go, you will spend eternity with him. You don't have to doubt about where you'll be, you'll be in heaven with Him. There's no better time than Easter to make that decision that will change your life forever and you too can be resurrected.
Since I want to talk about history, not speculation, here is a significant FACT. The writer of 1 Corinthians, who is believed to be Paul, wrote his letter sometime between 52 and 56 AD. What is significant about the date, is that it is only about 20 years after the death and resurrection of Jesus which was somewhere between 30 and 33 AD. To put it in perspective, the attack of 9/11 was 2001 or 17 years ago. An eye witness of the attack could give you a very precise and accurate description of what happened on that day. There are a lot of people alive today who were eye witnesses of those events and well able to corroborate what happened.
I mention this because Paul gives in the first letter to the Corinthians in chapter 15 verses 3-8, an impressive list of people who saw Jesus die, get buried and live again.
"For I delivered unto you first of all that which I also received, how that Christ died for our sins according to the scriptures;
And that he was buried, and that he rose again the third day according to the scriptures:
And that he was seen of Cephas, then of the twelve:
After that, he was seen of above five hundred brethren at once; of whom the greater part remain unto this present, but some are fallen asleep.
After that, he was seen of James; then of all the apostles.
And last of all he was seen of me also, as of one born out of due time."
So according to Paul there were over 500 people that saw Jesus alive again after the crucifixion. People who were eye witnesses to his death and eye witnesses to the fact that he was alive again afterward. You can trick one or two people, you might trick 30 or 40 people, but there is no way you could trick 500 people into believing a lie.
Why does this matter? Simply because if Jesus did not rise from the dead, then he was a liar and a charlatan. But he wasn't a liar, he didn't perpetrate an elaborate hoax. Just like the events of 9/11, the events of Jesus' resurrection took place in the open where people could see for themselves the truth of it. You, yourself know about what happened on 9/11, or if you're too young, you know of several people that can tell you what happened because they experienced it first hand. 9/11 is roughly as far in our past, as the death and resurrection of Jesus was in Paul's past, when he wrote that letter to the Corinthians. So we're not talking ancient past, we're talking about a current past.
If Jesus didn't rise from the dead, Christianity is a vain hope. 500 eye witnesses makes for very reliable information. Jesus DID rise from the dead and since He did we have hope for our own resurrection from the dead.
1 Corinthians 15:55-57 goes on to state, "O death, where is thy sting? O grave, where is thy victory?
The sting of death is sin; and the strength of sin is the law.
But thanks be to God, which giveth us the victory through our Lord Jesus Christ."
Death has no power over the person who puts their trust in Jesus.
Do you know where you will spend eternity? If you're not sure, you can be. Romans 3-23 says "For all have sinned, and come short of the glory of God" You've sinned. If you've ever lied, stolen, or cheated, you've sinned. Romans 6:23 states, "For the wages of sin is death; but the gift of God is eternal life through Jesus Christ our Lord." So you've sinned and the penalty for sin is death, BUT God gives you the gift of eternal life. Romans 5:8 tells us, "But God commendeth his love toward us, in that, while we were yet sinners, Christ died for us." Jesus paid the penalty for OUR sin by sacrificing himself. Romans 10:9 says, "That if thou shalt confess with thy mouth the Lord Jesus, and shalt believe in thine heart that God hath raised him from the dead, thou shalt be saved." The penalty has already been paid, you just have to avail yourself of it by confessing the Lordship of Jesus and believing in your heart the God has raised him from the dead. Then go share with someone what you have done. The Gift of everlasting life is yours just for believing on Jesus.
John 3:16 "For God so loved the world, that he gave his only begotten Son, that whosoever believeth in him should not perish, but have everlasting life."
If you have followed those steps you have passed from death to life everlasting. You belong to Jesus and He'll never let you go, you will spend eternity with him. You don't have to doubt about where you'll be, you'll be in heaven with Him. There's no better time than Easter to make that decision that will change your life forever and you too can be resurrected.
Friday, November 10, 2017
Merry Christmas Flutter
The pattern for the butterfly is here and colour coded. I don't usually colour code diagrams as they end up being uniform black and white when they are printed. The butterfly is done in 3 sections, body, left wing, right wing. In size 20 thread wind 2 shuttles CTM with about 1.5 yards on each shuttle of the colour being used for the body.. The first and last ring are normal rings and the others are split rings. I used a scrap piece of card about a half inch wide to measure the picots for the antennae to make sure they were the same length and tied a knot in the tip of each picot. After struggling with the first one, I used a piece of thread through the tip of the antenna to give me something to hold onto while I tied the knot, then pulled it out when the knot was done.
For the wings I wound about 1.5 yards of the solid colour on one shuttle and about 1.5 yards of the variegated colour on the second shuttle. I hate trying to match up the colour distribution in variegated threads when I'm part way through a project so I tend to use more thread than I think I'll need so that I don't have to play match up. On the other hand I don't like to waste thread. It's a constant battle. "use more!/don't waste it!" I also don't use precise measurements. I generally pull off an arm's length of thread and then add a bit more if I think I need it.
The wings begin at the bottom and when using 2 colours, start the first ring with one colour and hide the ends of the second colour as you tat it. RW and tat the short chain with the second colour and begin the first large ring with the second colour, doing the split part with the first colour. The next ring is also a split ring split on the side. The third large ring is a normal ring done with the second colour. The last large ring begins with the second colour and the first colour is used on the split side.
There's a short chain followed by one inward ring in the second colour and one outward facing ring done in the first colour. When you reach the bottom of the wing again, switch shuttles and tat with the second colour. The next two inward facing rings are done in the first colour and the outward facing ring is done in the second colour, which is also used to finish off the wing.
The second wing is done the same as the first wing, except that if you choose to do front side/back side tatting, you'll need to switch stitch order. Personally, I think life is too short to play around with fs/bs but do it the way you want.
Anyway, here's the pattern. Let me know if there's anything missing on it and just to make it easier to refer to both picture and pattern, I've added in the green and yellow butterfly again.
Edited: Green just didn't do it for me. I just had to tat it in red. So now the butterfly is in red and white.
For the wings I wound about 1.5 yards of the solid colour on one shuttle and about 1.5 yards of the variegated colour on the second shuttle. I hate trying to match up the colour distribution in variegated threads when I'm part way through a project so I tend to use more thread than I think I'll need so that I don't have to play match up. On the other hand I don't like to waste thread. It's a constant battle. "use more!/don't waste it!" I also don't use precise measurements. I generally pull off an arm's length of thread and then add a bit more if I think I need it.
The wings begin at the bottom and when using 2 colours, start the first ring with one colour and hide the ends of the second colour as you tat it. RW and tat the short chain with the second colour and begin the first large ring with the second colour, doing the split part with the first colour. The next ring is also a split ring split on the side. The third large ring is a normal ring done with the second colour. The last large ring begins with the second colour and the first colour is used on the split side.
There's a short chain followed by one inward ring in the second colour and one outward facing ring done in the first colour. When you reach the bottom of the wing again, switch shuttles and tat with the second colour. The next two inward facing rings are done in the first colour and the outward facing ring is done in the second colour, which is also used to finish off the wing.
The second wing is done the same as the first wing, except that if you choose to do front side/back side tatting, you'll need to switch stitch order. Personally, I think life is too short to play around with fs/bs but do it the way you want.
Anyway, here's the pattern. Let me know if there's anything missing on it and just to make it easier to refer to both picture and pattern, I've added in the green and yellow butterfly again.
Edited: Green just didn't do it for me. I just had to tat it in red. So now the butterfly is in red and white.
Thursday, November 09, 2017
One more flutter
I started modifying the pattern for the butterfly so that I could post it and it occurred to me that without some clear direction on when to switch shuttles, other folks might have difficulty with this one. I decided to tat another one in 2 solid colours so that you can clearly see which shuttle needs to be use. Turns out it's not half bad done in solid colours. I was using up bits of thread off these 2 balls and had to add in both the yellow and the green on this one. I used my standard method for adding in thread and it's really hard to see where the joins occurred.
The pattern still requires hiding 6 thread ends, 2 for the body and 2 for each wing, which isn't bad when you consider it's done in 2 colours of thread. I'm thinking that if I tried really hard I might be able to figure a way of tatting it in one pass, but the mental gymnastics to do it might not be worth the effort in the end.
When I finally get this pattern done I may have to use 2 colours to make it readable, but that's a job for another day.
The pattern still requires hiding 6 thread ends, 2 for the body and 2 for each wing, which isn't bad when you consider it's done in 2 colours of thread. I'm thinking that if I tried really hard I might be able to figure a way of tatting it in one pass, but the mental gymnastics to do it might not be worth the effort in the end.
When I finally get this pattern done I may have to use 2 colours to make it readable, but that's a job for another day.
Wednesday, November 08, 2017
No snowflakes, just butterflies
For years I have been tatting snowflakes to send out with our Christmas cards to special people. You tat. You know that not everyone deserves the time and effort that goes into making a piece of tatted lace. So not everyone gets a snowflake. I do a few extras to give away to visitors during the holidays and as we all know, tatting is a great stress reliever so it accomplishes both keeping things calm and collected as well as providing little gifts. However, as the family ages there are more and more households without children and the need for the sparkle of Christmas trees. That means that I'm sending out snowflakes that don't ever get used.
As I considered this situation last year I thought that it might be preferable to send out butterflies that could be used all year long. For people who have Christmas trees they can still hang the butterflies. For those that don't, the butterfly can be displayed elsewhere or used on clothing or stored wherever they've been keeping the rest of them, which is hopefully not file 13 aka the circular file.
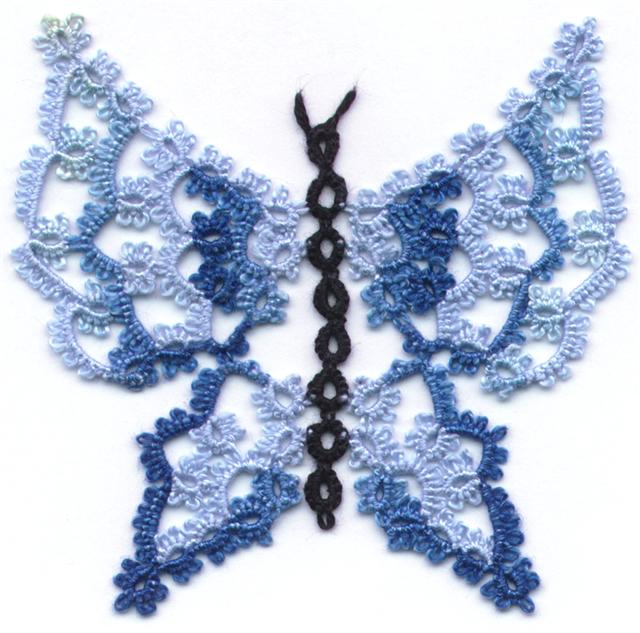
I have a butterfly pattern which can be done in one pass, but I don't really like the look of it. See what I mean?
I took the basic design and replaced the body section.You can see that I was playing around with how the wings fitted onto the body. That meant that the body, which is done with split rings needed to be done with 2 shuttles wound CTM
After working in size 20 thread I did it again in some size 80 using a solid thread colour for the body and the small rings that attach to it with a complimentary variegated thread for the rest of the wings. For the body I loaded enough solid coloured thread for the body and one wing. After tatting the body, I started the first ring of the wing and added in the variegated thread working from a section where the colours matched. (I used my method of adding thread which you can find in the sidebar to the right.) It didn't turn out to bad, but I didn't like the antennae.
When I tatted it again in the size 20 Lizbeth thread I made the antennae longer and tied a knot in the tip. I wasn't really paying attention to the placement of the variegated colour except on the starting ring to minimize the amount of contrast between the first ring and chain of the wing especially since the split rings were probably going to show a marked contrast anyway. Then again, these were butterfly wings and I wanted a lot of variation.
On some of the later butterflies I made more of an attempt at matching the wings, but sometimes, with the way the colours were arranged especially on a colour like Summer Fun, it was almost impossible. Some match better than others, although with the solid colours being in fixed positions, that certainly helps.
I'm not at all anxious about front side/back side tatting, so I didn't get bent out of shape trying to keep everything going in the same direction. On the second wing I just turned it to the back and repeated. For anyone who is, they'd have to reverse their order of tatting for the second wing.
Here's what the collection looks like. Each butterfly is approximately 3.75 by 3.5 inches which is just about perfect for what I was looking for.
And here's a picture with the one done in size 80 at the top for contrast. I'm thinking I'll glue that one onto my cell phone. I have the pattern drawn out for what I started with, but of course I tweaked it as I progressed. At some point I'll adjust the pattern to what the final version worked out at and get it posted.
As I considered this situation last year I thought that it might be preferable to send out butterflies that could be used all year long. For people who have Christmas trees they can still hang the butterflies. For those that don't, the butterfly can be displayed elsewhere or used on clothing or stored wherever they've been keeping the rest of them, which is hopefully not file 13 aka the circular file.
I have a butterfly pattern which can be done in one pass, but I don't really like the look of it. See what I mean?
I took the basic design and replaced the body section.You can see that I was playing around with how the wings fitted onto the body. That meant that the body, which is done with split rings needed to be done with 2 shuttles wound CTM
After working in size 20 thread I did it again in some size 80 using a solid thread colour for the body and the small rings that attach to it with a complimentary variegated thread for the rest of the wings. For the body I loaded enough solid coloured thread for the body and one wing. After tatting the body, I started the first ring of the wing and added in the variegated thread working from a section where the colours matched. (I used my method of adding thread which you can find in the sidebar to the right.) It didn't turn out to bad, but I didn't like the antennae.
When I tatted it again in the size 20 Lizbeth thread I made the antennae longer and tied a knot in the tip. I wasn't really paying attention to the placement of the variegated colour except on the starting ring to minimize the amount of contrast between the first ring and chain of the wing especially since the split rings were probably going to show a marked contrast anyway. Then again, these were butterfly wings and I wanted a lot of variation.
On some of the later butterflies I made more of an attempt at matching the wings, but sometimes, with the way the colours were arranged especially on a colour like Summer Fun, it was almost impossible. Some match better than others, although with the solid colours being in fixed positions, that certainly helps.
I'm not at all anxious about front side/back side tatting, so I didn't get bent out of shape trying to keep everything going in the same direction. On the second wing I just turned it to the back and repeated. For anyone who is, they'd have to reverse their order of tatting for the second wing.
Here's what the collection looks like. Each butterfly is approximately 3.75 by 3.5 inches which is just about perfect for what I was looking for.
And here's a picture with the one done in size 80 at the top for contrast. I'm thinking I'll glue that one onto my cell phone. I have the pattern drawn out for what I started with, but of course I tweaked it as I progressed. At some point I'll adjust the pattern to what the final version worked out at and get it posted.
Thursday, October 26, 2017
An embarrassment of riches
I have started and discarded a dozen posts over the summer covering such topics as the various silly trials we have had, the tatting I've done, the designs that have worked and those that have flopped, but it seems that something has come up before I was able to complete the post and I just never got to the point of uploading anything.
One of the things that happened this summer is that I retired. It was very anticlimactic seeing as I've worked from home for over 20 years, so retirement didn't really change things all that much. One of the things that did happen is that I declared 2016 as my last year of doing business for tax purposes. That means that I no longer have to keep track of expenditures for business and I no longer have to complete pages of business income tax forms. Yay!!!
I closed out all of the order pages on my web site and removed references to books that I previously had available so that people couldn't order them, and looked forward to not dealing with the business side of creating tatting patterns and information. I love you guys, but the remuneration isn't really worth the hassle. So there it was gone. Done and dusted. Kaput. Fini. Over.
Or so I thought. Since I closed things up, I periodically get notices from PayPal that people have sent me money. They aren't completing an order form. It isn't coming from my web site, I just get notices of money being sent to me for this book or that. Then I have to go back into my PayPal account and refund the money and apologize that I can't send the requested book---because I'm no longer in business.
I thought I'd closed the door on this part of my life, but somewhere folks are finding reference to books and tutorials and they're sending me money looking to buy them. I'm guessing that people are reading old blog entries or something and that's what's generating these payments, so I figured the only way to stop them is to let everyone know officially that I'm closed for business.
That doesn't mean that my patterns are no longer available. Some patterns are free from my web site and my blog and as time goes on, other things will show up there. If you're desperate for something You've seen on line, let me know and I'll see what I can do. Otherwise, please stop sending me money.
Pretty please. With sugar on top.
One of the things that happened this summer is that I retired. It was very anticlimactic seeing as I've worked from home for over 20 years, so retirement didn't really change things all that much. One of the things that did happen is that I declared 2016 as my last year of doing business for tax purposes. That means that I no longer have to keep track of expenditures for business and I no longer have to complete pages of business income tax forms. Yay!!!
I closed out all of the order pages on my web site and removed references to books that I previously had available so that people couldn't order them, and looked forward to not dealing with the business side of creating tatting patterns and information. I love you guys, but the remuneration isn't really worth the hassle. So there it was gone. Done and dusted. Kaput. Fini. Over.
Or so I thought. Since I closed things up, I periodically get notices from PayPal that people have sent me money. They aren't completing an order form. It isn't coming from my web site, I just get notices of money being sent to me for this book or that. Then I have to go back into my PayPal account and refund the money and apologize that I can't send the requested book---because I'm no longer in business.
I thought I'd closed the door on this part of my life, but somewhere folks are finding reference to books and tutorials and they're sending me money looking to buy them. I'm guessing that people are reading old blog entries or something and that's what's generating these payments, so I figured the only way to stop them is to let everyone know officially that I'm closed for business.
That doesn't mean that my patterns are no longer available. Some patterns are free from my web site and my blog and as time goes on, other things will show up there. If you're desperate for something You've seen on line, let me know and I'll see what I can do. Otherwise, please stop sending me money.
Pretty please. With sugar on top.
Tuesday, August 01, 2017
Another bookmark
I did another bookmark, this one a really simple design, but I like how it turned out. It's a row of split rings surrounded by a row of ring and chain. What makes it effective is that the row of split rings in the middle is done with a variegated thread which is also used for the outer chain. The solid colour for the rings perfectly matches the blue in the variegated thread.
I chose to use a zigzag chain and tassel for the tail end. Making the tail and tassels often seems to take as long as it does to make the bookmark, but tassels just seem to finish the bookmarks off better than a tatted motif. I do used tatted motifs especially if the bookmark incorporates a motif like the flower shape in the previous bookmarks. I used a five ring flower for the bookmark I gave away, but the 2 I just finished had tassels. In fact, I spent yesterday doing nothing but tails and tassels for these three bookmarks.
As much as tassels are a pain in the butt, they are an effective use of the thread left on the shuttles. I know some people use up the thread on their shuttles tatting little motifs, 4 ring butterflies or one ring flowers for decorating stationary, but I don't. I have only so many hours in my day and I refuse to spend them doing "make work" projects that serve no real purpose. On the other hand, I'm stingy and hate wasting anything, even thread. So using up the remaining shuttle thread on tassels, as time consuming as they are, satisfies my need to be frugal and at the same time empties my shuttles.
I chose to use a zigzag chain and tassel for the tail end. Making the tail and tassels often seems to take as long as it does to make the bookmark, but tassels just seem to finish the bookmarks off better than a tatted motif. I do used tatted motifs especially if the bookmark incorporates a motif like the flower shape in the previous bookmarks. I used a five ring flower for the bookmark I gave away, but the 2 I just finished had tassels. In fact, I spent yesterday doing nothing but tails and tassels for these three bookmarks.
As much as tassels are a pain in the butt, they are an effective use of the thread left on the shuttles. I know some people use up the thread on their shuttles tatting little motifs, 4 ring butterflies or one ring flowers for decorating stationary, but I don't. I have only so many hours in my day and I refuse to spend them doing "make work" projects that serve no real purpose. On the other hand, I'm stingy and hate wasting anything, even thread. So using up the remaining shuttle thread on tassels, as time consuming as they are, satisfies my need to be frugal and at the same time empties my shuttles.
Monday, July 31, 2017
I stuck with it
OK so I'm stubborn. Rather than give up and pitch it, I carefully fixed it, undoing the ring carefully around the hidden core threads. I didn't want to deal with hiding a bzillion threads in a single ring. So, I put aside one of the shuttles I had cut off and took the other one and unwound enough thread to tat a couple of rings and attached the end to a SPARE shuttle, so my thread was CTM again. (I could have finger tatted with the end, but I was already dealing with lots of loose ends and it was easier to keep track of this end when it was attached to a spare shuttle.) Then I used the shuttle to start the last split ring again carefully hiding one of the old ends (and the alternate colour) in the first half of the ring. I used the spare shuttle to tat the second half of the split ring while hiding the alternate colour and the other old thread end. That got rid of the two old cut ends.
Then I switched to the alternate colour to tat the next split ring, hiding the first colour in it's core. I proceeded to tat with the second colour until I was finished with it. When I switched back to the first colour, (the one that broke) I was running out of thread on the spare shuttle. That's OK, it had served it's purpose, I was now far enough from where I had joined in the new thread and hidden the 2 old ends that I could hide the ends of the new thread. I picked up the second shuttle and started tatting with it, hiding the end of the thread from the spare shuttle. On the next ring I hid the starting end of thread from the second shuttle. By the next ring all thread ends were hidden and I was back to tatting with 4 shuttles.
Whew! All that, just so that I could see what this design looked like done in 2 colours. Actually I guess that's 3 colours. (So I can't count. What else is new? It's not as bad as telling hubby to go left while pointing to the exit off the highway to the right- He only had to back up on the highway 100 yards.)
OK, back to serious stuff. I started this design thinking about doing bookmarks with 4 ring motifs. Then I thought about a 5 ring motif, joined alternating 3 rings on the side with 2 rings on the side, flip flopping them so that it resembled a flower and resulted in a straight line. When it was done, the 5 ring flower just merged together into a solid band of rings and the flower effect was lost. See the bookmark done in red and green. The individual flowers just disappear. Which is why I wanted to see the effect with 2 different colours used for the flowers.
See this one done with the 5 ring motifs alternating in red and pink. The flower shapes are evident and the green on the outside suggests leaves.
I don't like the 4 green rings on the ends. I'm not sure what I did on the original, I might have just used plain chains going around the end of the bookmark. Whatever it was, it didn't result in the lop sided effect the 4 rings give, but maybe I'm just being critical. It doesn't matter now anyway because I've done the design again and this time I have pictures of it.
Now that that's out of the way I can go back to embroidering that second picture I was working on. Or maybe not, as I've just thought of something else I could tat....
I told you I have the attention span of a flea.
Then I switched to the alternate colour to tat the next split ring, hiding the first colour in it's core. I proceeded to tat with the second colour until I was finished with it. When I switched back to the first colour, (the one that broke) I was running out of thread on the spare shuttle. That's OK, it had served it's purpose, I was now far enough from where I had joined in the new thread and hidden the 2 old ends that I could hide the ends of the new thread. I picked up the second shuttle and started tatting with it, hiding the end of the thread from the spare shuttle. On the next ring I hid the starting end of thread from the second shuttle. By the next ring all thread ends were hidden and I was back to tatting with 4 shuttles.
Whew! All that, just so that I could see what this design looked like done in 2 colours. Actually I guess that's 3 colours. (So I can't count. What else is new? It's not as bad as telling hubby to go left while pointing to the exit off the highway to the right- He only had to back up on the highway 100 yards.)
OK, back to serious stuff. I started this design thinking about doing bookmarks with 4 ring motifs. Then I thought about a 5 ring motif, joined alternating 3 rings on the side with 2 rings on the side, flip flopping them so that it resembled a flower and resulted in a straight line. When it was done, the 5 ring flower just merged together into a solid band of rings and the flower effect was lost. See the bookmark done in red and green. The individual flowers just disappear. Which is why I wanted to see the effect with 2 different colours used for the flowers.
See this one done with the 5 ring motifs alternating in red and pink. The flower shapes are evident and the green on the outside suggests leaves.
I don't like the 4 green rings on the ends. I'm not sure what I did on the original, I might have just used plain chains going around the end of the bookmark. Whatever it was, it didn't result in the lop sided effect the 4 rings give, but maybe I'm just being critical. It doesn't matter now anyway because I've done the design again and this time I have pictures of it.
Now that that's out of the way I can go back to embroidering that second picture I was working on. Or maybe not, as I've just thought of something else I could tat....
I told you I have the attention span of a flea.
Friday, July 28, 2017
Have you ever?
In this long saga of working with multiple colours and multiple shuttles, I have run into yet another snag. I'm an experienced tatter and having to un-tat is just a part of tatting. Unfixable problems get cut off and really horrible disasters just get pitched in the garbage.
After fighting with the screws, bits, pieces and horrible tension of working with double bobbins I resorted to using 4 shuttles. Unwieldy, but doable.
Then on joining the 10th ring, while fighting with all 4 shuttles and hiding the alternate colour, the thread split and frayed.
There's no help for it the last ring had to be cut. This is one of the rings in which the alternate colour has been hidden, so it's carefully undoing each stitch of the split ring and unwinding it from around the hidden thread.
Now since my CTM thread has been cut in the middle and it means hiding 6 threads - the two cut ends - the two new ends and the two alternate colours, I can either bite the bullet and fuss with it, salvaging the thread, or I can pull the thread off the shuttles, scrap it, and start again. Have you ever run into a project where every solution seems to bring out more problems? I'm dreading hiding the cut end of the old thread and the alternate colour on the split side of the ring.
I hate wasting thread. I hate having to fuss with a "relaxing" pastime. Which will win out?
After fighting with the screws, bits, pieces and horrible tension of working with double bobbins I resorted to using 4 shuttles. Unwieldy, but doable.
Then on joining the 10th ring, while fighting with all 4 shuttles and hiding the alternate colour, the thread split and frayed.
There's no help for it the last ring had to be cut. This is one of the rings in which the alternate colour has been hidden, so it's carefully undoing each stitch of the split ring and unwinding it from around the hidden thread.
Now since my CTM thread has been cut in the middle and it means hiding 6 threads - the two cut ends - the two new ends and the two alternate colours, I can either bite the bullet and fuss with it, salvaging the thread, or I can pull the thread off the shuttles, scrap it, and start again. Have you ever run into a project where every solution seems to bring out more problems? I'm dreading hiding the cut end of the old thread and the alternate colour on the split side of the ring.
I hate wasting thread. I hate having to fuss with a "relaxing" pastime. Which will win out?
Thursday, July 27, 2017
Alternating colour split rings
I have tatted 2 colour work involving split rings without using a double bobbin shuttle. It involved a doily where the alternating colour split rings were required to climb out from round to round. I gave it to my mother in law who kept it on a little side table under glass and I'm not sure what happened to it when she passed away. I suspect it probably got thrown out as the folks that cleared out her home wouldn't have known what it was.
The instructions written for it in my newsletter were:
Here's a picture of the doily in question. It's a simple continuous design once the centre block is done.
The instructions written for it in my newsletter were:
"This doily is worked in 2 complimentary colours of size 20 Opera
thread, one Light and one Dark, and is approximately 10 inches square.
The stitch count is 8-8 for both the rings and the chains. You’ll notice
that it shows 4 shuttles being used for this design and that is because
you need to use either 2 spare shuttles wound in the colours used or
you need to use two double bobbin shuttles each wound with both
colours in order to tat the many split rings in the right colours."
Here's a picture of the doily in question. It's a simple continuous design once the centre block is done.
The instructions state that when tatting the split ring using a double bobbin shuttle you can just use the Dark colour on the second shuttle. If you are using 2 spare shuttles you will have to hide the end of the spare Dark thread in the first half of the ring and then tat over the bottom of the ring thread and the Light colour shuttle thread with the spare Dark thread.
Since I don't own 2 double bobbin shuttles, I obviously didn't do that when creating this doily. By using my method of adding thread and hiding ends shown in my side bar you add and remove the alternate colours as you work. It's fussy, but I think not as fussy as having to deal with double bobbin shuttles that don't let the individual bobbins wind freely.
I've just finished the split ring part of the bookmark in one colour and now I'll go grab a couple of extra shuttles and see what it looks like done with 2 colours.
Tuesday, July 25, 2017
Double, double toil and trouble
I designed a bookmark in pink and green that worked out OK, but I thought it would look better in two colours with the green.
I grabbed my double bobbin shuttle and the trials began. I absolutely loathe having to unscrew the centre post in order to load the shuttle. I hate little bits and pieces that can get lost. The centre post on my shuttle is tight because I don't use it often and I had to open up a paperclip and use it to push the outer half of the centre post out before I could get to the bobbins to wind them. Once they were wound, I had just as much trouble trying to get the centre post back in. GRRRR! I hadn't even started and already my blood pressure was going up.
I wound one bobbin in red and one in pink and then I started tatting. I only got the first ring started when I remembered that split rings were an intrinsic part of the design. So I cut the thread and went looking for another couple of shuttles. I only own one double bobbin shuttle because it isn't something I use often, so for the split rings I was going to need to use 2 shuttles stuck together.
I re-wound the thread with half on the double bobbin shuttle and half on the two separate shuttles and commenced to tat again, only to realize that releasing enough thread from one bobbin to tat a ring was also unwinding the second bobbin because the double bobbin shuttle held them together so tightly. I took the screw out of the post and managed to rewind the second bobbin to a manageable length. I got one half stitch done and the shuttles twisted around so that the second half stitch only got one thread! There has got to be a better way!!!!
I went online to see about buying another double bobbin shuttle, but just to experiment on one design It's going to cost more than $50. I'm not that curious. I own one double bobbin shuttle. I have it. I've used it. I've designed a pattern that uses it. Admittedly, it was only required for the green leaves.
I can't really see that it's of great benefit for ordinary tatting. It has it's place, but it's never going to be a favourite technique, especially when winding and unwinding the bobbins is such a pain in the butt.
I did see a different style of double bobbin shuttle.
Has anyone tried this style? Any thoughts on it? They still have that blasted screw, but the bobbins look like they'd be easier to adjust separately. Comments PLEASE!!!!
I wonder if a sleeve could be developed that you could just push 2 regular shuttles into. It might make the whole process easier.
At this point I'd spent more time mucking around with getting thread onto the shuttles than I had tatting and I could see it was going to have me pulling my hair out. I just wanted to get tatting and see how this design would look in two colours and it would take me less time to add in alternate thread colours as I needed them for the split rings, than what it would take to mess around with 1 double bobbin shuttle and 2 separate shuttles, so I just separated the double bobbin shuttle again and unwound the thread off of it.
Maybe when I've calmed down a bit, maybe in another century or so, I'll try it again. Or maybe I'll just wind the thread on some card stock, it might be easier especially for split rings. In the mean time, just colour me frustrated.
I grabbed my double bobbin shuttle and the trials began. I absolutely loathe having to unscrew the centre post in order to load the shuttle. I hate little bits and pieces that can get lost. The centre post on my shuttle is tight because I don't use it often and I had to open up a paperclip and use it to push the outer half of the centre post out before I could get to the bobbins to wind them. Once they were wound, I had just as much trouble trying to get the centre post back in. GRRRR! I hadn't even started and already my blood pressure was going up.
I wound one bobbin in red and one in pink and then I started tatting. I only got the first ring started when I remembered that split rings were an intrinsic part of the design. So I cut the thread and went looking for another couple of shuttles. I only own one double bobbin shuttle because it isn't something I use often, so for the split rings I was going to need to use 2 shuttles stuck together.
I re-wound the thread with half on the double bobbin shuttle and half on the two separate shuttles and commenced to tat again, only to realize that releasing enough thread from one bobbin to tat a ring was also unwinding the second bobbin because the double bobbin shuttle held them together so tightly. I took the screw out of the post and managed to rewind the second bobbin to a manageable length. I got one half stitch done and the shuttles twisted around so that the second half stitch only got one thread! There has got to be a better way!!!!
I went online to see about buying another double bobbin shuttle, but just to experiment on one design It's going to cost more than $50. I'm not that curious. I own one double bobbin shuttle. I have it. I've used it. I've designed a pattern that uses it. Admittedly, it was only required for the green leaves.
I can't really see that it's of great benefit for ordinary tatting. It has it's place, but it's never going to be a favourite technique, especially when winding and unwinding the bobbins is such a pain in the butt.
I did see a different style of double bobbin shuttle.
Has anyone tried this style? Any thoughts on it? They still have that blasted screw, but the bobbins look like they'd be easier to adjust separately. Comments PLEASE!!!!
I wonder if a sleeve could be developed that you could just push 2 regular shuttles into. It might make the whole process easier.
At this point I'd spent more time mucking around with getting thread onto the shuttles than I had tatting and I could see it was going to have me pulling my hair out. I just wanted to get tatting and see how this design would look in two colours and it would take me less time to add in alternate thread colours as I needed them for the split rings, than what it would take to mess around with 1 double bobbin shuttle and 2 separate shuttles, so I just separated the double bobbin shuttle again and unwound the thread off of it.
Maybe when I've calmed down a bit, maybe in another century or so, I'll try it again. Or maybe I'll just wind the thread on some card stock, it might be easier especially for split rings. In the mean time, just colour me frustrated.
Sunday, July 23, 2017
Tatting and not tatting
I got the fourth colour change done and I like how it looks. Generally a doily is intended as a decorative way to protect a table of other surface. The holes in a lace doily let you see the beauty of the wood underneath while still protecting the wood from scratches and dents. This doily isn't intended for practical purposes, It's just a study in colour changes. It might get used on a table or it might get framed. Then again it might just get thrown in a drawer. I like the spokes effect that happened in the turquoise row and intend to repeat it on the next colour which will be the dark blue.
I actually had the dark blue done ages ago, but I'm not liking how it's looking and I'm cogitating on how to get the effect I want. This will be that last colour change and I'm kicking around maybe adding a single row of chain in the starting pink to follow the contours of the design and bring a little more of the pink into it. Which I could maybe do if I could just get the dark blue to work out the way I want. I've tried three variations so far and don't really like any of them. So I put it aside.
What I've been doing instead, is embroidery. Several years ago I did a bunch of butterflies on squares roughly 8x8 inches. I had ideas of doing enough squares for a quilt alternating embroidered butterflies and birds with plain squares. So far I've done 6 squares one of which is a little "cartoonish" and I just don't see that happening, so I thought I'd frame them and hang them on the wall.
I started with 8x8 thinking it was a decent size for a quilt square, but in order to block it and mount it in a frame it needed more material to be able to pull it into shape. So I added more fabric to the outside making a sort of fabric "frame" and then blocked it by putting a square of masonite behind it and running a thread back and forth into the fabric, first left and right, and then up and down. This pulled the fabric and the stitching, which had puckered due to the denseness of the stitching, until it was flat and smooth. This worked great on the first 4 designs. The last one didn't work so they've been sitting there ever since.
Last year I thought I'd just start with a picture with the intention of framing it. I scoured the internet and finally came across a picture of a bird with flowers that I thought would work. I printed it out on standard 8.5x11 and then ironed it onto the fabric just using a laser printer. The toner wears off so I worked quickly just sewing enough of the outline so that I could work from it. Then it got put aside while I worked on something else. I found it several weeks ago and decided to work on it again.
TaDa! More embroidery finished. I want to get this one framed and hung, and knowing that I might have puckering issues I was careful to keep it taut while working it. When I washed this one and pinned it out, it stayed flat. Now to do something about framing it. 8.5x11, like 8x8 isn't exactly a standard frame size.
Just in case you think I've forsaken tatting, I did do a couple of bookmarks. One which I think turned out quite nice, but I for got to take a picture of it, so I'll have to do it again. Maybe this time I'll use a double bobbin shuttle so I can get a better effect. That will probably have to wait because I have another picture already started in my embroidery hoop.
I actually had the dark blue done ages ago, but I'm not liking how it's looking and I'm cogitating on how to get the effect I want. This will be that last colour change and I'm kicking around maybe adding a single row of chain in the starting pink to follow the contours of the design and bring a little more of the pink into it. Which I could maybe do if I could just get the dark blue to work out the way I want. I've tried three variations so far and don't really like any of them. So I put it aside.
What I've been doing instead, is embroidery. Several years ago I did a bunch of butterflies on squares roughly 8x8 inches. I had ideas of doing enough squares for a quilt alternating embroidered butterflies and birds with plain squares. So far I've done 6 squares one of which is a little "cartoonish" and I just don't see that happening, so I thought I'd frame them and hang them on the wall.
I started with 8x8 thinking it was a decent size for a quilt square, but in order to block it and mount it in a frame it needed more material to be able to pull it into shape. So I added more fabric to the outside making a sort of fabric "frame" and then blocked it by putting a square of masonite behind it and running a thread back and forth into the fabric, first left and right, and then up and down. This pulled the fabric and the stitching, which had puckered due to the denseness of the stitching, until it was flat and smooth. This worked great on the first 4 designs. The last one didn't work so they've been sitting there ever since.
Last year I thought I'd just start with a picture with the intention of framing it. I scoured the internet and finally came across a picture of a bird with flowers that I thought would work. I printed it out on standard 8.5x11 and then ironed it onto the fabric just using a laser printer. The toner wears off so I worked quickly just sewing enough of the outline so that I could work from it. Then it got put aside while I worked on something else. I found it several weeks ago and decided to work on it again.
TaDa! More embroidery finished. I want to get this one framed and hung, and knowing that I might have puckering issues I was careful to keep it taut while working it. When I washed this one and pinned it out, it stayed flat. Now to do something about framing it. 8.5x11, like 8x8 isn't exactly a standard frame size.
Just in case you think I've forsaken tatting, I did do a couple of bookmarks. One which I think turned out quite nice, but I for got to take a picture of it, so I'll have to do it again. Maybe this time I'll use a double bobbin shuttle so I can get a better effect. That will probably have to wait because I have another picture already started in my embroidery hoop.
Wednesday, May 03, 2017
So far....and rambles on the English language
Well, I'm not sure where I'm going on this, but it's going.
There's a mistake on the first repeat of this latest row where I didn't join 2 rings together because I didn't think I needed to. On the next repeat I joined them and liked the effect better, so I joined those rings on all the subsequent repeats. After it was done I sewed in a thread, ran it through both picots and then sewed it on the first side. Then I repeated on the second side and trimmed off the excess thread so it's all nice and snug now. I want to use my colour choices only once in the doily so that it makes a consistent transition. It may end up looking like crap. Or not. That's what happens with designing. You never know how its going to look until it's finished.
On a totally different subject, we put in a new counter and had to trim off some bits close to the wall, which the instructions said to do with a router. Problem is, the size of the router puts the cutting blade 3 inches out from the wall and the bit that needs trimming is 1 inch from the wall. Grrrr!
They make angle drills so I went looking for an angle router. A standard router looks like this:
I was looking for something that looked like this:
What kept showing up were things like this:
No wonder people who don't speak English have such a hard time learning the language. Two totally different objects, one a tool for cutting wood, the other a device for connecting networks, and yet they are spelled and pronounced exactly the same way.
I can understand when people confuse the contraction they're, meaning they are, with their, denoting ownership and there, meaning location, since they all sound the same. Learning English as a second language must drive people up the wall. (and of course the idioms like "drive people up the wall" must confuse things even more)
All languages have rules, but English has exceptions to the rules which change from time to time. Like I before E except after C, except in words like neighbour and weigh.
English really is a crazy language.
To make things even worse, is the poor grammar and poor diction which makes even native English speakers massacre the language. A personal peeve are the hundreds of people who say axed instead of asked. I always want to interject an inquire if the person needed stitches.
O the vagaries of language, makes you think, doesn't it.
There's a mistake on the first repeat of this latest row where I didn't join 2 rings together because I didn't think I needed to. On the next repeat I joined them and liked the effect better, so I joined those rings on all the subsequent repeats. After it was done I sewed in a thread, ran it through both picots and then sewed it on the first side. Then I repeated on the second side and trimmed off the excess thread so it's all nice and snug now. I want to use my colour choices only once in the doily so that it makes a consistent transition. It may end up looking like crap. Or not. That's what happens with designing. You never know how its going to look until it's finished.
On a totally different subject, we put in a new counter and had to trim off some bits close to the wall, which the instructions said to do with a router. Problem is, the size of the router puts the cutting blade 3 inches out from the wall and the bit that needs trimming is 1 inch from the wall. Grrrr!
They make angle drills so I went looking for an angle router. A standard router looks like this:
I was looking for something that looked like this:
What kept showing up were things like this:
No wonder people who don't speak English have such a hard time learning the language. Two totally different objects, one a tool for cutting wood, the other a device for connecting networks, and yet they are spelled and pronounced exactly the same way.
I can understand when people confuse the contraction they're, meaning they are, with their, denoting ownership and there, meaning location, since they all sound the same. Learning English as a second language must drive people up the wall. (and of course the idioms like "drive people up the wall" must confuse things even more)
All languages have rules, but English has exceptions to the rules which change from time to time. Like I before E except after C, except in words like neighbour and weigh.
English really is a crazy language.
To make things even worse, is the poor grammar and poor diction which makes even native English speakers massacre the language. A personal peeve are the hundreds of people who say axed instead of asked. I always want to interject an inquire if the person needed stitches.
O the vagaries of language, makes you think, doesn't it.
Sunday, April 23, 2017
Colour play
I thought I'd play with colour, but I'm not sure where this is going to go.
At this point I'm not even sure where I want it to go. I started and I'm not sure if I like what's gone on so far. There's a saying that necessity is the mother of invention and it's at this point where a design either starts to come together or it necessitates some inventive work.
I'm not feeling very inventive right now
At this point I'm not even sure where I want it to go. I started and I'm not sure if I like what's gone on so far. There's a saying that necessity is the mother of invention and it's at this point where a design either starts to come together or it necessitates some inventive work.
I'm not feeling very inventive right now
Sunday, April 16, 2017
Subscribe to:
Posts (Atom)