Showing posts with label flowers. Show all posts

Friday, March 15, 2019

A long time coming

For a really long post, but it's worth it, I think.

I started designing flowers for my wedding. They were really ugly first attempts but I persisted creating several credible blossoms. One of the flowers most used in wedding bouquets are roses, but they are also difficult to create. Mary Konior has a design called Rosa Frivola which is essentially a length of scalloped edging rolled into a coil that only looks as good as the way you coil it. I haven't tatted it, but I wonder how well it will hold it's shape and my suspicion is that it won't.

Roses get their shape from layered petals and to repeat that in tatting means tatting lots of individual petals. Typically roses used in bouquets are buds and not full blown roses. Years ago I made an attempt at many layers but I ended up with a lump of tatting that didn't have any real shape so I tatted a cup shape to enclose it. Lots and lots of tatting and when I was done, it was just a lumpy mess like this and I might have persisted with it, but who wants to invest hours and hours to tat one single flower?


The trick is how to get something roughly rose shaped with a suggestion of layered petals without having to tat and tat and tat, while at the same time making the petals have some kind of shape. I considered one possibility would be to start with a small styrofoam ball, cover it in a base of tatting and add petals around the outside. The ball would give it the bud shape and structure and then the tatted petals wouldn't have to do anything more than attach to the ball base. I discarded the idea because the styrofoam ball would show through the lace which would necessitate figuring out a simple way of making the ball the same colour as the thread. Over the years I've made several attempts, but they just didn't work for me.

One of the other flowers I wanted to create was a blue florist iris. Not the big flashy bearded iris, but the simple skinny florist iris, not only because I like them, but also because it's one of the few flowers that is blue. The trouble is that those skinny little flat petals are hard to hold in shape. Then I looked at some of the irises used in bouquets and I realized that they were mostly buds that haven't opened out flat and it gave me and idea. It looks like the idea worked and maybe I can extend the idea to create a more open iris.

In the interim, working on the iris gave me and idea for tatting a rose and I think I might have got it. It isn't quite what I want, but it does have dimension and shape and individual petals that give the suggestion of a rose. It doesn't require oodles of tatting, although it does take a fair amount of work. from the base of the sepal to the top of the petals it's roughly 2 inches in size 20 thread, and about 2 inches wide. The petals can be wrapped around one another or the tips can be curled out just like a real petal. It isn't perfect, but it's the closest I've come. Want to see?

Ta Da!


This design works only because the chains are tatted tightly. Let me repeat, tat the chains tightly, it's the only thing that gives the design shape. Usually you don't want your tatting to curl, but in this instance that's exactly what you want. The flower is worked in 2 layers, both of which are joined to the same starting ring. The starting ring has 6 picots and the inner layer is joined to picots 1, 3 and 5, while the outer layer is joined to picots 2, 4 and 6. The inner layer is done in 3 segments so you begin tatting up one side of the first segment and then down the second side, joining back into the first picot of the starting ring. Cut the thread leaving 5 or 6 inches, tie and knot and insert the thread ends through the starting ring. Skip over to the 3rd picot and start again working up the first side of the segment joining to the appropriate chain of the first segment. You'll see insanely long picots in the diagram with tiny red star markers on them. DON'T TAT THEM THAT LONG! They are normal size picots, but the drawing is flattened out resulting in those enormous lines. It's one of the things that happens when you show 3D tatting in 2 dimensions. Tat the second section leaving long ends, tie and insert through the starting ring. Tat the 3rd section joining the chains to the other 2 sections. You'll end up with an odd sort of tube shape.

Start the second layer joining to the 2nd picot of the starting ring shown grey in the diagram because it's already tatted. Tat a chain of 5, RW tat a tiny ring of 3 and join to the picot on the first layer where marked with the star and finish the ring with 3 more stitches. Continue following the diagram working up one side of the petal. There are 3 smaller rings are joined to the larger ring which doesn't exist yet. Tat the first of the 3 rings with a fairly large picot and join the other small rings into it as you tat them. Tat the large split ring joining it into the 3 ring grouping as you go, then join it to the single small ring at the bottom of the petal, finishing it as a split ring. Tat the next large split ring and work around the second side of the petal. At the bottom of the petal join back into the 2nd picot of the starting ring

For the second row, tat the chain up the side of the petal joining into the base of the tiny ring. Tat the next chain joining to the base of the small ring, and follow the diagram up the side of the petal. At the top of the petal tat one small ring joining it to the base of the large ring on the first row. Then make a join at the star on the first layer at the top of the petal followed by another small ring joined to the base of the second large ring. Tat down the second side of the petal. Cut the thread leaving 5 or 6 inches and tie the ends poking them down through the starting ring.

Repeat for the other 2 petals. You'll note that the petals formed by the second layer are joined to the first layer once at the bottom at the beginning where the tiny ring is and once at the top near the end of the petal between the two small rings at the top.

Now all that's left is to tat the sepal. You can begin with the starting ring of the sepal and enclose all of the thread ends in the ring before you close it, or pull the thread ends down through the sepal after it's tatted. Tat the split ring to climb out of the staring ring and continue tatting ring and chain ending with a split chain. Start the next row with a split ring. The inward facing rings are joined side to side, but  the larger outward facing rings are not. Cut the threads 5 or 6 inches long, tie and feed down through the sepal. Insert one end through the starting ring of the rose and knot the ends. This will tie the sepal and the rose together. Pull all of the thread ends of the rose down through the sepal and pull up on the outer rings of the sepal pushing the bottom of the rose firmly inside the sepal. 

Take an eighth inch dowel and file down one end. Push it up through the centre of the starting ring of the sepal, it's going to be tight, and if you can, through the starting ring of the rose. Wrap dowel and thread ends with florist tape. The thread ends are what hold it onto the dowel. You can omit the leaves if you choose, or tat them,  ending with a chain or just threads and wrap the chains or threads with florist tape joining it to the stem of the flower.

So here it is at long last.
The diagram is necessarily huge, so if you have trouble viewing it, please let me know.

Monday, March 04, 2019

Daffy - dil

This design nearly drove me daffy. If I haven't mentioned it before, I have rather strict guidelines for flowers. They need to be relatively life size and life-like. They need to hold their shape without the use of wire. I figure that if you want a tatted flower you want it for display and you don't want it to flop over like a wet noodle. I also figure that if you're going to invest that much time in tatting it, that you want it to last for a lot of years and wire, even coated wire can leave rust spots. The flowers I designed for the Transitions in Tatting book have been sitting in vase for years and they're still holding up 20 years later. I vacuum the dust off regularly and I did wash and fluff them once about 5 years ago but without wire, starch or glue they're still looking like flowers.  Those requirements add a few more constraints to your designing.  Having designed a daffodil before, I knew what I needed and just had to execute it.

Sounds easy, right? Not so. I complicated things by wanting the yellow part of it to have more than just concentric rows of ring and chain and distinct petals unlike the earlier design shown here:

After referring to various pictures I wanted the trumpet section to have a slight flare and finish with a ruffled edge. Everything I tried was too tall too short, too wide, too loose, too ugly and in short, it took multiple tries to get a finished result I could live with.

Then I started drawing it and if the tatting made me want to throw shuttles, the drawing made me want o throw the computer. It's not the computer's fault, more like I was just tired and frustrated with the design already. You never realize how hard it is to explain the construction of 3D lace until you try it. In simple terms the flower is a flat back with a tube stuck in the middle of it. Trying to show a tube shape in a flat drawing is a bit of a problem, so what I've done is to draw it as if it were stretched out so you'll see what appears to be insanely long picots between rings. I initially used normal picots with a dotted line between them, but that seemed more confusing because it might have been interpreted as picots that weren't joined.

I also considered breaking the design down row by row, but that would have made for an enormous drawing, so for now it's just 2 drawings, the back and the trumpet. The yellow petals will overlap a little bit, just like in a normal flower. The chain that is drawn in red on the base is where the trumpet attaches to the base. There is a chain in yellow tatted for the base. When beginning the trumpet tat the same chain in orange joined to the same points as the underlying yellow chain. There is a picot in the middle of the yellow chain but at the same point in the orange chain there is a left and right ring pair 7-7, with each pair joined to the pair beside them. Clear as mud, right?

Anyway, here's the pattern. If anyone tries it out and has a problem, let me know and I'll see if I can't make things clearer.

I forgot to mention, this flower is about 4 inches stretched point to point and the trumpet is about 1.25 inches tall.

Friday, February 22, 2019

Paperwhite - Ow!

I thought that since I was in the mood for spring, that I'd continue in the daffodil family and tat a paperwhite. Paperwhites are little and they grow in clusters. To get the right shape I thought that I'd tat up one side of a petal and down the next using graduated ring sizes to get the wider middle section. The trumpet shape on a paperwhite isn't very pronounced so I decided that beads would give enough of a suggestion of stamens and a single row of tatting would do for the trumpet shape. The central ring is tatted with 3 beads on alternate picots of the centre, beginning with a bead on the first picot leaving the last one as a mock picot. The first row has short chains with a picot in the middle. You'll note tiny stars on this picot in the diagram as row 2 and the trumpet shape both join into this picot.

The rings forming the petals are tiny with lots of joins. The rings at the tips are 3-1-2 or 2-1-3, with the longer side (3) to the outer edge of the petal, and the other side joined to the ring beside it. Over 10 joins on each petal for 6 petals, made for jabbing the hook through the picot and against my finger over and over again nearly 100 times for each flower and since they grow in clusters I did 3 of them in a 24 hour period, finally wearing a hole into the side of my finger -owie.

The flower is about 1.75 inches across done in size 30 thread. I think it might work in size 20 thread if one ring and chain repeat was omitted from the middle of each petal, but I'm not going to try it as my finger is presently out of commission. Size 40 thread would make a slightly smaller flower, but it still roughly the right size for a paperwhite.


The pattern for this little gem is really very easy without any split rings or split chains or really anything special but it does make a cute little flower. There are a lot of stitch counts in a very small space, so let me know if the pattern isn't readable and I'll get it reposted in a larger format.
                                                                                                                                                                                                

Monday, February 18, 2019

Would you believe?

You know all those twisty turny tangles we try so hard to keep out of our tatting? Well I've just spent a ridiculous amount of time trying to get them in. Aaannnddd once I got them in they didn't stay in. So I opted for teeny tiny knots. Would you believe it took almost as much time to tie these idiot knots as it did to tat all of the yellow bit?

No, you wouldn't. Well you ought to. And why would you want to tie itty bitty knots? To make stamens of course. I'm tired of cold and snow so I was thinking spring. Does this say spring to you? It does to me.

3D tatting can be challenging, but you just have to take it one step at a time. Beginning with these frustrating knots I started with a central ring in yellow of 2-2-2-2-2-2, but that left things empty in the middle. Then I tried alternate small picots and large picots with a stitch count of 1 between. Bend those ridiculous stamens out of the way tat the split ring and carry on joining into the small picots. Stretched out I allowed about 1.5 inches for the long picots. Just enough so that I could tie a knot in the tip of the picot. You want to keep all the long picots about the same size. See what the first round looks like - alien antennae.

Take note of the little stars shown on the first row. More about them later.

The large rings on row 2 are 4-4-4-4 and I made the side picots a little bit longer than usual so that the trumpet part of the flower would have a bit more flare. You'll notice that although the pattern shows this row as being outside the first row, the tatting is actually perpendicular to it. At this point you may want to pull on the tatting and stretch it into shape. It should kind of look like a thimble. Here it is completed.

Change to white thread and join to row 1 of the yellow trumpet where marked with stars. You'll actually be joining to the picots on the bit with the antennae. There's already a row 2 of the yellow trumpet in these joins at the tip of the picot, so you have to make the white join into the picot beside the yellow. You can join to the left or the right of the yellow join, but be consistent. Once you have the first row of white done you can start to see the flower taking shape.

Blocking 3D objects can be problematic which is why I don't usually bother with blocking it. I pull the lace into shape tugging and stretching the lace. On this design, you could block the white part of the lace, but on the yellow part you'll have to be content with finger blocking. Finish it off by grasping all of those tiny knots and pulling them up to sit neat and pretty in the middle of the flower. The finished flower is about 2.5 inches from point to point done in size 20 thread. These samples were done in Lizbeth Lemon Yellow and White.

I guess you need a pattern to do that don't you?  Row 2 shows a dashed line connecting the side picots of the rings. The picots are obviously not as long as that. Row 2 is vertical and to show it from the
top all you'd get on the visual is a straight line. Showing it flattened out  makes for those longer lines.

You'll note that on the rest of the diagram row 2 is omitted because you join into row 1 and continue on from there. I probably should have taken a picture after the first row of white was done, but I didn't think of it.


I tatted the first one using twisted picots and tiny outward facing rings on each petal. I did the second one with teeny tiny knots on the stamens and omitted the outer ring on each petal. I think I prefer it with the outer rings and that's the way it's drawn, but you can use them or omit them, whichever way you like it.

For those of you thinking I'd go for a spate of tatted eggs, sorry to disappoint, I'm more in the mood for flowers.

Monday, January 07, 2008

Look ma, I'm going to be on TV.


Well it looks like the CBC - Living in Toronto episode about tatting will air Wednesday January 9th at 1:00 PM. If you aren't able to get CBC you can view it on the web site. This is the part where I cross my fingers and hope I don't look like a total idiot on national TV. You know those times in your life when in retrospect you do a lot of thinking about woulda, coulda, shoulda? That's how I've been feeling about this show lately. I keep hoping that their editing department makes me look smarter than I am.
The flower pictured here is from my book Transitions in Tatting from Flat to Floral. It measures about 2.5 inches across and it was tatted in Opera size 20. The construction is such that it doesn't flatten out like the carnations I did for my wedding veil.


Thursday, September 06, 2007

Catch up

I feel like I sort of dropped off the face of the earth blog wise. This last month or so has been kind of crazy. Hubby over worked himself and was consequently in pain so I got him a hot water bottle. Heating pads are nice but there aren't always electrical outlets in reach. While filling the bottle it "burped" spilling boiling water over the back of my hand. I had blisters right where the tatting thread lays across the back of my hand.

My sweety was diagnosed with Meniere's and some days he gets to feeling pretty dizzy. On a scheduled trip to the hospital we took a cab and the cab driver closed the door (not just pinched, the door actually latched) with my hand still in it. My left hand was swollen for a while so not much tatting or typing got done.

Then I got news that my brother was in the hospital and we kind of hung around the phone/computer waiting for updates. So again, not much got done. Then we got the news that he had passed away. The first funeral was in Connecticut where he and his wife have lived for that past 11 years. Some of the family made it down to the States. His wife and kids and 3 of my siblings were there. My BIL officiated and had some of the service taped.

The following week there was a service up here in Canada and we saw the taped portion of the service from the week before. It was interesting that his boss from IBM was at the funeral and he spoke of Bob in quite glowing terms and mentioned that the team he was working with set up programs for IBM globally and each person knew their own section well, but Bob was the only one who understood how all of it worked together. He seemed at a loss as to how he was going to replace Bob. I can understand it. Bob was brilliant, capable and well able to organize other people and encourage them to tackle and surmount any obstacles.

There was some talk at the funeral on Thursday of cancelling the family reunion, but we decided to go ahead with it and the whole tribe except for Bob's family attended. Sue probably wasn't in the mood for a festive occasion, but had she attended, the mood would have been more subdued, but we would have just closed in around her and comforted her. I think 2 funerals after a month of camping out in a hospital was just too much for her and I expect she just crashed with the kids.

Knowing that I'd have a long car ride going up to the camp where the reunion was held, I decided it was a great opportunity to sew some tatting onto my bag. I mentioned in an earlier post that my jeans are black and the 2 craft bags I use are also black so I figured that I would eventually add tatting to all of them. The other day I was cleaning up and had to move some tatting aside, so I slid it onto one of my bags and decided that it looked pretty good. I used the ride to sew it all down. I had intended to attach this to a pillow, but in 2 years I haven't attached it yet, so a bag is as good a place as any to display it.
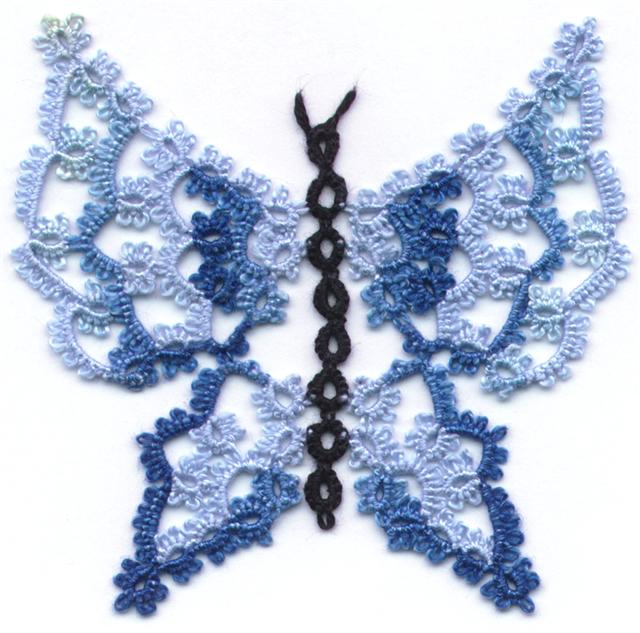
Attaching tatting to a bag already filled with lumpy stuff makes it difficult to do anything neatly or accurately. I noticed after I had it all sewn down that there was a big blank spot in the middle so I filled it in with a butterfly that happened to be stuffed in one of the bag's zippered compartments.
It doesn't show very well in the picture, but the flowers are 3D. I tacked them down around the edges but left them so that they still stand out. One bag done, 2 more to go.

Wednesday, February 21, 2007

Splish, Splash

Drip, drip, drip. It's the sound of snow melting in the sunshine, but why is it coming from the computer desk? And why is there that splashing sound coming from the bedroom? I'll tell you why, it's another ice dam on the roof.

Third time this year we have water leaking in, as the water from the melting snow expands as it freezes and gets forced up, the roof and under the shingles, then melts again and seeps down through every crevice it can find. Dripping water in the closet with all my tatting supplies, fortunately they're in a large plastic tub. Seeping water coming off the garage roof is once again soaking into the bedroom carpet and our latest incursion is leaking around the windows in the computer room and down onto the desk/scanner/printer/power supply battery back up and in the spare room dripping down onto the bed soaking the mattress.
If you've been wondering why there's been no blog lately, it's because I've been busy trying to dry everything out.

Just to show you what I've been up to when I haven't been doing laundry and mopping floors. Here's one of the items in the next newsletter, a hyacinth, just in time for spring.

Friday, February 09, 2007

Just One Pattern

The subject of copyright has come up on the tatting lists again. It's a tough problem because it can get boring for people who have heard it all before, but it's important for everyone to hear it at least once. I have only published one book and it was a major headache. The book had a lot of patterns in it, but the most interesting ones were the life size flowers. You can't really do a book of flowers and not use colour. Colour printing increases the cost of publishing.

At the risk of giving you a long ramble about my publishing efforts, here are some of the things I ran into. I began by thinking of the types of flowers that would be suitable for things like wedding bouquets and then I planned out how to tat them. The most complex flower I did was a cattleya orchid. I began by going through all of my gardening books and looking at the structure of the flower, then I searched the internet for a picture of the kind of flower I wanted to tat. This one here.

I did one of the base petals, but didn't like the shaping so I scrapped it and tried again. The second variation was closer to what I wanted. I tatted the base part and then scanned the lace. Then I drew on top of the scanned picture so that I would have a template of the rings and chains I used for proportions.


Next I took my drawing of the base and laid it over top of the flower picture I found on the internet and re-sized the picture so that the corresponding base petals of the picture were the same size as my drawing. Then I drew the outline of the side petals and sketched in some rings. The drawing was flat and the flower needed to be 3 dimensional so I did some adjusting of the ring sizes to shape the petal and tatted a rough version of the right petal. It wasn't quite right but it showed me where I needed to adjust my count. Then I needed to repeat everything for the left petal. I couldn't just tat 2 petals the same as the petal had definite top and bottom connecting points. When it came to drawing the second side petal I had to do it as a complete reverse of the first side.

Then I had to create the labellum, the middle bottom petal, which had a whole different shape. This was not only a mind boggling piece to tat, it was equally difficult to draw. Once I had the pattern drawn I went back and counted the stitches on the flower I had tatted and put the numbers on the pattern. The numbers didn't fit in. Some places there were 3 numbers in the same place where ring joined to ring with chains connecting both. Creating clear drawings for three dimensional objects is very challenging. You need to be able to show where each part connects to the next part on 3 different planes. Once I had everything in place I tatted the flower again working only from the diagram. Then I sent the drawings out to a couple of accomplished tatters so they could give it a try and give me their comments and I adjusted the pattern again to make it easier.

This was a very complex pattern, but you can see some of the necessary steps up to this point. I had invested about 4 months of time going from idea to drawn pattern. Think it was ready? Guess again. Now I had to bring the drawing into the publishing software and lay it out so that it would be easy to follow. My first obstacle was getting everything to fit on the pages. The base when it was large enough so that the stitch count could be read, didn't fit on the page. I could crop part of the pattern but that didn't look right and it left a lot of empty background space. So I re-drew one segment with enough information on where the other two fit.

Then I had the two side petals one had to be worked clockwise and the other had to be worked counterclockwise and the whole petal diagram was too big to fit on a single page. I ended up breaking it down into individual rows. I grayed out the previous row to make the working row stand out a little in the diagram. Of course breaking it into individual rows meant a certain amount of re-drawing.

The bottom petal curled around and joined to itself which was difficult to explain on a flat diagram and it also required several re-draws because the final version wouldn't fit on a single page without being shrunk and then the numbers were unreadable so a lot of things had to be shifted around. Then to make things clearer, taking into consideration the input from my test tatters I went back and added in some markers on the diagram. I included some text at key points to explain what needed to be done. Finally, so that the picture might more easily convey the different petals, I re-tatted it in 3 colours to show the base, side and bottom petals.
Occasionally a publication will show the steps of a pattern with each piece done by itself. That wasn't something I had to do, but if an author knows that will be required ahead of time she can take a picture of it as it develops. If not, then it means tatting each piece separately. Think of a cooking show where you watch the dish being prepared and popped into the oven and as the freshly made one goes in a finished one is pulled out. It means that the dish has been prepared 2 or 3 times so that you can see it at each step.
Think that's the end of it? Not yet. Once I had the drawings and the text to go with it... Did I mention text? Even when I use visual diagrams, they are often improved by text that gives additional explanation especially with a complex pattern. This is very true with three dimensional work like flowers. Thinking of what to say making sure what I am saying is clear and can't be misconstrued, avoiding repeating myself, these were just a few of the challenges.
Then what are drawings and text without pictures. The lace had to be photographed. Flat things fit on a scanner so it's easy to get a digital image, but flowers or pin cushions need a camera. Even if it is flat, I wanted a group picture of the laces in the publication for the front cover at least. Ideally, I wanted a group picture for the front cover and individual pictures to go with each pattern. Anyway, you get the idea.
Sometimes you want props to go with the lace. A doily on a table is nice but a little porcelain figure on it is more attractive. Depending on the colour of the lace, you may want to try several different tables to see which makes the most attractive background. A dark thread will look nicer on a light colour wood, and a multi colour doily needs a neutral background, all of these are considerations and you may have to take dozens of pictures to get what you really like. If you take a picture of a flower do you take the picture from the front or the side. Maybe the picture from the front looks prettier, but the one from the side gives the tatter a better idea of the flower's construction. One picture of front and side is better, but that means tatting a second flower.
Of course this is only one pattern. Since a publication has several patterns you also have to remember that they all need to fit in. If you have a picture, a drawing and text they all have to be fit in on adjacent pages. Sometimes the end of one pattern will leave half a page of space That means that you occasionally have to break a pattern into smaller pieces so that all of the pieces will fit together in the allowable space, and sometimes that means re-drawing a pattern.
Maybe a picture of the finished piece taken from several angles would be better, but what if you have already fit everything in nicely and there isn't any room for those extra pictures? Do you add the pictures and shift everything else around to fill up the extra space, or leave the picture out.
That brings us back to the cost of printing. You could run things off on your home printer. Before the advent of colour home laser printers this wasn't a viable option, but things have changed. Commercial printing involves a lot of money. Businesses don't like to set their equipment up for small jobs. Commercial equipment will pump out lots of copies with good quality output, but it takes a long time to set them up and you pay for that. So for a small volume you pay a large amount of money. If you do a lot more copies you still pay for the initial set up cost, but after that you're only paying for paper, ink and the amount of time the equipment is running.
As tatters we know that we aren't going to sell millions of copies, but we might sell a few thousand. So we fit into not quite personal printing and not quite commercial printing. We need to make enough copies to satisfy the demand, but we don't really want to store thousands of copies. We want to keep the price of our books low so that people will buy them and that means cutting some things out to reduce costs. Colour images are lovely, but they cost so colour is one of the first things to get cut. Extra pages over the bare essentials cost too, so they go. Then comes the editing to see if everything the author wants included really has to be there. Maybe a design has to be redrawn to pare down the number of pages needed or maybe several items can be photographed together to cut down on the number of colour pages used.
Finally the publication has been tweaked as much as it can be tweaked and it's ready for the printer. The money is spent for the required volume of books and the work is ready for sale. You hope that people will like your designs, you hope that you earn at least a little bit of money for all your blood, sweat and tears. You hope that you can recoup what it cost to produce all of those copies and you also hope that you don't browse through the internet one day and find your design being sold under somebody else's name.
Is copyright an issue? Probably not, for those who don't publish their patterns. Or for those who don't design their own laces. Or for those without a conscience.
By the way, the lovely purple orchid pictured here was tatted by Sue Hanson. In spite of her assertions that she doesn't "do big" she struggled through this pattern and sent me her flower so that I could photograph it for the book.
Authors, especially authors of tatting books don't make a lot of money from their publications, and most of us do it because we love tatting, and creating new designs. When we see things that were created out of our own imaginations stolen out from under us, we get a little cranky. A comment about copying patterns was made on one of the tatting lists.
"As long as we are not making a big profit and just sharing, then go ahead and SUE US !! "
When you see what an author has to go through to create a publication, is it any wonder that we see red when such comments are made? It's like saying to us that you have no regard for our effort, that you don't care about what it cost us to produce those designs for you. You know that we don't make enough money from our designs to be able to afford the cost of taking you to court so you can abuse us and it won't matter.
But it will matter. It will matter when all of the designers look at the abuse and decide that it isn't worth the effort. When the designers do with their books, what they did recently with their web sites and just close things down. No new patterns, no tatting innovations, just some century old designs. Think of all the new things being created and shared. Then imagine all of it gone because people were greedy. So it's just one pattern you copy out of a friend's book. That's one book less that the author was able to sell. Now multiply that by all of the other people who copy "just one pattern". Is a tatting author going to be able to reduce their printing costs? Not while people copy "just one pattern".

Monday, January 01, 2007

Floral Tatting

Several years ago I self published a book called Transitions in Tatting from Flat to Floral which is no longer in print. I'm thinking about re-printing just the floral part of the book as people keep asking me for flower patterns. The front cover shows you the flowers.
My criteria for these flowers was that they had to be life size, and they had to be constructed in such a way that wire wasn't needed for the flower to hold it's shape. The purple orchid on the upper right was tatted by Sue Hanson and was returned to her after the photo was taken. All of the other flowers have been sitting in the vase exactly like the picture since 2000 when the book was published. None of them have wilted yet!
The little white flower in the middle is a
Daisy
Then counter clockwise from the bottom left
Stargazer Lily
Daffodil
Red Carnation
Purple Tulip
White Carnation
Purple Cattleya Orchid
Daffodil
Delphinium
Orchid done in Purple Mauve and White
Red Tulip
Also included were Leaves for the Tulip and Daffodil and an English Ivy.
The designs were made especially for use in bridal bouquets and wedding veils.
I have the hard copy that I could have photocopied, but I'm not sure about the original drawings. In the course of going through several computer upgrades and changing hard drives 4 times I'm not sure if the old files are still intact. Having the hard copy to work from I could probably re-draw the flowers so that I could make them available again. Anyone interested in a book of flowers?