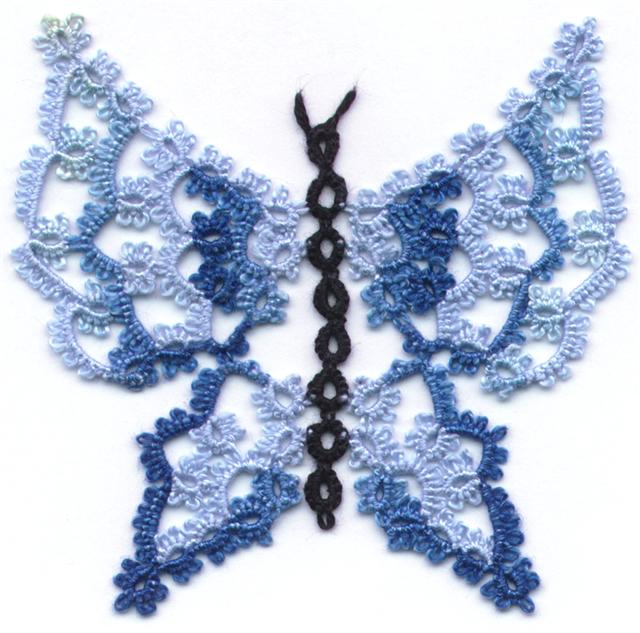
I used to think that people who designed patterns whether they were tatting, knitting, crocheting or sewing, had some mystical ability whereby they just sat down and made things that were right the first time. When I started designing tatting, it came out of necessity. I needed flowers for my head piece and only had one pattern. One pattern, no decent book, craft, or yarn store in the neighborhood, and no time to order online and wait for delivery of books that may or may not have had suitable flower patterns in them. On a one month deadline I tatted furiously doing an assortment of variations of the one pattern I did have, and several little fill in bits to make up the rest of it. You can see the results
here.
One year when we were out of town visiting family for Christmas I had my shuttles with some beads but no patterns. I had been making a lot of simple ring and chain motifs for a vest so I had that pattern memorized. It wasn't quite the right stitch count or the right shape, but it was good enough for me to make a small beaded snowflake for my mother in law. Since we were snowed in I had lots of time on my hands so I kept making snowflakes changing the stitch count and bead arrangement slightly on each one. As different family members showed up they went away with beaded snowflakes, all of them similar to
this one.
Then Georgia needed a beading patterns for the online class and I used a similar pattern minus the outward rings and added lots of different coloured beads to make the
rainbow earrings. A bag of assorted coloured beads had been sitting on my desk for a while tempting me to use them in something and all that came to mind was a rainbow. The need to use lots of different coloured beads and the need for a beaded pattern just fit together well.
The patterns for both of these and several other designs are on my web site
here.
However, these designs are small. If you make a mistake with a snowflake, it's no big deal because you really haven't invested much time in it. If you make an earring pattern and it doesn't work, you can just scrap it and start again. Now, I know if you are a beginner, every ring you complete is a hard won battle, and just the idea of throwing away all that work is just incomprehensible, but trust me, tatting gets easier as you do it more and a single ring that takes you 20 minutes to make today will take you only 2 minutes a year from now.
When you get bored with snowflakes and want to move on to something a little larger, making a doily is just adding a row of edging to a snowflake. If you want a larger doily, you add another row. At this point, it starts to become more challenging for two very different reasons. First of all, each new row that you add becomes larger and you can just add edging after edging, but as you do minute adjustments to the stitch count have to be made because edgings are straight and doilies are round so the inner edge has to be smaller than the outer edge. If the outer edge isn't wide enough it will cup, but if it's too wide it will ruffle.
The second reason it becomes more difficult is that if you want the finished piece to look like a whole design instead of a bunch of rows slapped together, you have to do some planning and thinking ahead. If you have a pattern segment, an area where 2 rows together look really good, or an emerging shape that you want to see continued, you have to plan on how to create the shape or repeat the motif.
Very often doing this is a matter of trial and error. You make the best guess at how things ought to proceed and you try it. Sometimes you get it right the first try. Of course some times the first try looks awful. What is even worse, is when you are working on a motif that has several rows to it. That may mean that you won't know if your idea will work until after you have completed all of the rows. And what do you do if your idea doesn't work? You cut if off and start again.
Want to know how I developed my method of adding in new thread shown in the tutorial? Lots and lots of cut off mistakes. As a designer, I don't worry about carefully starting with pre-wound CTM shuttles. I begin with whatever half wound shuttle is handy. I pull out enough thread to get started and I add in a second half wound shuttle and keep going. Adding in new thread and hiding ends doesn't have to be something you avoid. When I add in new thread I leave the loose ends hanging until I have finished the piece. That way, if my pulling and tugging on it pulls the thread ends I'm not going to have anything pull out and if I've had to add the thread in at an awkward place and I'm concerned that the thread end will be too short and might pull out, I just sew it in and out between a few more stitches of the finished piece before cutting the ends off close to the work.

Sometimes when you like how a design is shaping up, but you're not sure if it's going to lay flat or if you're not sure what direction to take the design or where your next section needs to connect into it, blocking helps. I'm now on row 13 of this one and I'm still not sure about it other than I know it will take at least 2 more rows. It's about 7 inches across shown here, and I'm now at 10 inches across. The design will require 2 more rows which should add 1.5 inches but I was looking for a finished size of about 12 inches. If it works out it will be a happy accident since it seems to be one of those designed to fall off the shuttles without much forethought. If it doesn't, it will be about a week's worth of tatting down the drain.

 Gina posted a picture of a crocheted rose and I had to give it a try in tatting. It needs work, but I'm on a roll so it will have to wait until I can re-visit it. The rose shape would look better if the layers were done in different colours possibly with another layer on top. Notice the extra ring in the middle of one side. I started out with one idea and forgot by the time I was on the second side. By the time I noticed, I was on the last side so I just finished it. The white round is going to get cut off anyway, so I'm not too worried about it. I think it would be easier to see the 3D effect if it were in a lighter colour, and if anyone would like to do it and send me a picture, I'll send you the pattern. without the mistakes of course :-)


 Then there was this 38 inch edging of hearts that I thought I'd add on to a pillowcase, but it needed a foundation row to make it straight along the top edge. I got bored with it and never made the second edging.


 I have been tatting but I haven't posted much recently because I've been tied up with some other projects. There are some new round robins about to start. I just need people to tell me what they would like to be making. If you haven't had a chance to look at the round robin blog, go look now, but make sure you take tissue with you so you can wipe the drool off your keyboard.

 I may try some other thread and sequin colour combinations some time because I think it might have possibilities. I suppose what puts me off a little is just the idea of lace mixed with plastic. I made the necklace in the last post and I don't know anyone who would wear it. It's too... chintzy.


 I knew there was something wrong with it because even though it's unblocked it should have looked more square than this. Then I noticed that I joined one of the cloverleafs to the top instead of the side of the ring adjacent. That's what has it looking rather skewed where the left and right sides meet. The gap should look like the one between the top and bottom pair.


 Then I needed to try out another variation of the first motif while the idea was still fresh in my mind. Here's the second trial. again not what I was looking for, but it has possibilities. It's square, although it doesn't look as square as the first trial and the mistake I made on the lower right corner certainly doesn't help!
 It's still not what I had in mind, but getting closer. I think I may tat 4 of each of these and then do a matching border to finish them up. They'd look OK just joined but a border will give them a more finished look. By the way, for those interested in stats, both motifs were done in South Maid size 10 and unblocked the first is 3 inches across and the second is 3.25 inches across. Both motifs are 3 rounds of tatting.
 That picture is a tease, because as we all know, tatters want to see the lace not the model.
 How about this one? Isn't it Gorgeous!?


 I have seen recently an abundance of comments about doilies being old fashioned and out of keeping with today's modern decorating trends, which may very well be true. When you consider the Victorian era where decorative flair enjoyed it's heyday, you also had an assortment of beautiful and irreplaceable wooden tables, desks, sideboards and hutches which were easily marked with water or the placement of heavy, rough objects on their shiny surfaces. It was much better to protect these delicate surfaces with ornate laces that to suffer scratches on a tabletop or water stains on a piano.
  The men of that day liberally applied Macassar oil to their hair in the same way that people today would use mousse and hair gel. The oil often left stains on the woven fabric of upholstered chairs and sofas which, unlike our present furniture, was not easily cleaned. To avoid permanently stained fabric, lace pieces were created to fit over the back of the furniture. Additional lace pieces were created to protect upholstered arms from wear, so that you often see patterns for sets of anti-macassars. These lace pieces, although beautiful in their own right, were essentially rags (pretty "rags", but rags none the less) used to protect valuable pieces of delicate furniture.
 Fast forward to today and take a look around your own living space. Most dinnerware is stored in a kitchen cupboard, not in a mahogany china cabinet, The tables are often covered by sheets of shatter proof glass negating the need for any other protection. The piano has been replaced by an entertainment centre made out of plastic which requires no protection from watermarks and scratches. Modern hair care products don't leave greasy splotches on upholstery and even the furniture itself is said to have a "life span"
 So do doilies and the like serve a purpose in our modern environment? Most emphatically YES! Doilies give a splash of colour, an element of interest, and a feeling of hom-i-ness to a sterile environment. We don't use them with the same abandon of the Victorian era, but doilies still have a roll to play in decorating our homes. Since they are no longer just rags used to protect more valuable pieces, it is all the more important that the doilies we use be especially beautiful, and particularly well executed. An assortment of doilies lets you give a quick lift to the room just by changing the lace on display. You could hide them behind glass like the art they are, but how much better to lay them out on a table and change them with the seasons.