Showing posts with label motif designing. Show all posts

Tuesday, January 13, 2009

Mystery revealed

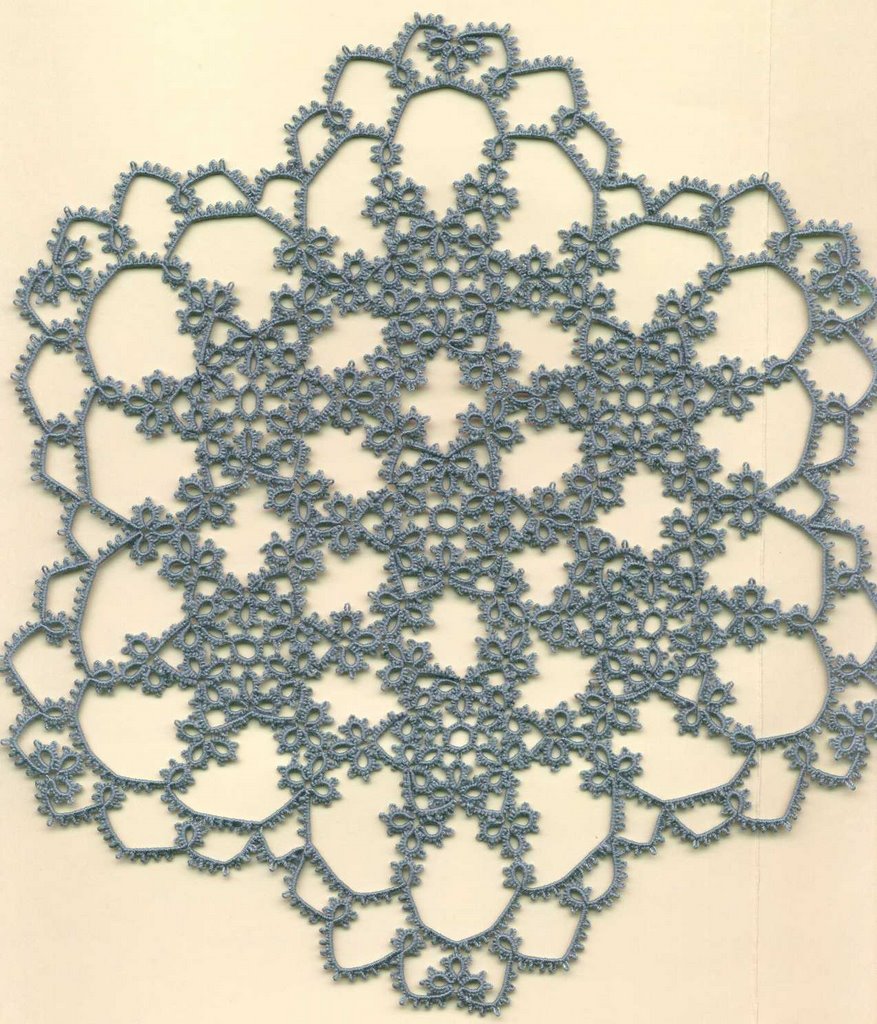
With square motifs I always want to do 4 so that I can see what the connecting corners look like, so is it any surprise that if I work on a six sided motif that I want to see what their connecting corners look like? The mystery bit that I was working on has evolved into this. Did you guess what it was? I'm not sure if I like it or not. I mean I like how it looks, but it needed some serious blocking to lay flat. I pulled it off the shuttles, cut off about 30 already hidden ends from adding in new thread, sewed in 14 finishing ends and dry pinned it to my blocking board at about 5 last night. Er... make that about 5 AM this morning. Once I got the last bit done I was determined to see how it looked finished and I just kept going until my curiosity was satisfied.
Now that it's done to this point I'm wondering if I should just leave it as is or add a finishing row. I'm not crazy about designs with rings on the outer edge. They may look good but the rings often twist and turn every time the lace is moved so my usual preference is to add a row to nail them in place, although the extra row may actually detract from the overall design on this one.

For the stats, it's worked in size 8 perle cotton and it took less that 2 balls of thread and it's produced a doily about 10 inches across. There are 7-three row motifs in it and a motif can be completed in a single evening. So one week's worth of tatting can produce a respectable size doily with lots of interest. I joined only the larger central ring at the points, but now that it's completed I am wondering if it would look as good, or better if the smaller side rings were joined too, or would that make it pucker. I suppose I'll never know because now that the mystery of how it looks is solved I'm done with this design. I've done the same thing nearly 9 times once as the first trial, once to see if a slight adjustment to the central ring was sufficient to straighten it out and 7 more to see what it looks like. Now it's time to move on to something else.

....unless I add a row...

So now I am at that place I hate to be. In between design ideas. Once I start an idea I can happily march on tatting furiously day after day as I search for the finished design. Often new designs are at work in my head as my hands are working so that I can't wait for this project to be finished so that I can start the next. But sometimes I finish a project and there is a complete blank. Oh there are things I could do, just nothing that really intrigues me, nothing that grabs my attention and says "Create me!"

Maybe I need to doodle with adding a row and see if in the middle inspiration hits. Then again maybe I need to play with some of the images in my drawing file and see about turning them into something interesting. Maybe I should go back to square motifs and see what I can come up with that works well for a shawl. Maybe take a break from bigger stuff and work on earrings and necklaces for a bit. Maybe I should play around with some button designs. Maybe I should work on a tatted bag design. Maybe a pillow would be nice. Maybe a baby outfit. Maybe.........

Friday, January 02, 2009

Oops!

What happened? It isn't square.

Amended to add: Motif stats, 4 inches from point to point using size 20 thread. Seven repeats of the drawing look like it will make a pretty doily. By the way, notice anything familiar about it?

Thursday, January 01, 2009

Square Trial 4

Here's the next one. I don't like it at all. I knew I wouldn't even before I tatted it because I could tell from the drawing that it would leave too much space between motifs. The only way to join this one is at the corners, which will leave a large empty diamond shape between motifs. For that reason I'm discarding this one as a potential candidate. Besides, it's only 3.5 inches across which isn't big enough for what I want.

I did put a picture together of 4 of them as you can see here. Notice the large gap between the motifs? I think it would need a small fill in motif to make it use able for my purpose. The idea of having to tat more pieces and have more ends to hide isn't something I want in a project that is already likely to be large enoughI knew there was something wrong with it because even though it's unblocked it should have looked more square than this. Then I noticed that I joined one of the cloverleafs to the top instead of the side of the ring adjacent. That's what has it looking rather skewed where the left and right sides meet. The gap should look like the one between the top and bottom pair.

This design does have one thing in it's favour. You can make a diagonal motif and still be able to tat it. I started the design along one side, but I could have started it at the point. If the pattern were cut in half you could either leave the small inner rings off or use them as connection points for an outer edging or for some other part of a garment. If I were making a triangular shawl, I'd probably create and edging that would join to those unattached rings. A lot of the time when a triangular piece is needed, it's because it has to fit at armholes or necklines of a vest or jacket so those extra rings would come in handy for fitting to the required shape.

I have another drawing I need to tat up to see how it will look, then it's back to the drawing board to work on some other designs.

By the way, all of these square designs, they weren't originally square. I have some interesting ideas I'm playing around with. Stay tuned for more fun stuff.

Tuesday, December 30, 2008

Third Trial

Another square motif. This one was done in size 8 perle cotton just because I had to test out the thread and see if it was any good to tat with. I came across some 10 gram balls of size 8 perle crochet cotton in my local dollar store, and at 50 cents a ball I couldn't resist. Having bought it, I had to try it out to make sure it tats. It does, and so far the colour hasn't bled on my fingers, which bodes well for it not bleeding when it's washed.

I'm not impressed with this motif either. It was a quick rendition of a snowflake design adjusted to have only 4 sides. It will be too open and flimsy in size 10 thread and it isn't very big. The bigger the motif the fewer repeats I have to do. Here's a quick photo of what 4 might look like together. It will definitely make a pretty corner join, but I'm not going to tat more just to prove it, as the design is too small for my needs. It's 2 inches across in size 8 perle and that works out to roughly 4 inches in size 10 thread, but look how open and flimsy it is. Those open spaces would be enormous in size 10 thread.

I really think a nice 12 inch square would make a nice motif. Before you say anything, I know that a 12 inch motif constitutes a doily, but think how much faster it would work up and how many fewer ends there would be to deal with. I can easily do a 12 inch doily continuously climbing from row to row. Actually if I design 2 different but similar 12 inch motifs, with matching picots on the last round, I could alternate them for a very interesting effect.

Does anyone else get bored with tatting the same thing over and over again? I tatted a vest using a simple one round motif and there were so many of them that I barely got it to the wearable stage. So much repetition nearly drove me bonkers.

Of course, I could also design the shawl as one long rectangle. Imagine a whole shawl with only 2 ends to hide!!!!

Motifs X 4

I always like to know what a motif will look like when joined to others of it's kind. The pictures kind of give an idea, but photgraphs don't behave the same way that thread does. I am trying out designs for a possible shawl so I want some good all over coverage for some warmth. I want something that draws the eye to the whole motif and not just a tiny repeated central focal point.

I'm working in size 10 thread of some kind. It doesn't have a label, but it feels like South Maid. Here are all the ends from adding in new thread. This is what I cut off before I hid the 2 final ends for each motif. One of the things I've realized is that I'm going to need to use a larger shuttle so that I don't have to add in thread quite so often.
The first design does have a central focal point, but the corners are solid enough that they draw the eye too and the vision dances between both the centres and the corners. You can see each motif, but when you see it as a whole cloth might look, you don't instantly see where the motif begins. For one moment you think the centre might actually be where the corners meet. I joined the centremost rings and the side rings to one another. This would make a good design for any large project like a border on a square neckline or around a cuff, or as an edging on a guest towel.
The second design doesn't appear quite so square. It almost looks as if there are large round motifs joined together at the corners by a smaller motif of joined cloverleafs. It carries the same pattern segment throughout and is more like a whole piece of cloth than individual motifs. I joined it at the corners only by the central ring as I wasn't sure if joining the side rings would pull it out of shape. Now that I've done the 4 I can see it too could have been joined at the side rings. It looks like another motif that would work well for any large project, but it gives me the impression of a more solid and formal design.
I don't think I want a shawl done out of either of these designs though, so I will have to try something else.

Is anyone interested in playing along with me?

Wednesday, December 17, 2008

First Trial

I decided that I want to work on a project that uses a square motif so I sat down tonight and did this one. I want something that is sort of uniformly dense with even amounts of semi solid tatting. I want the focal point to be both the centre of the motif and the corners where 4 motifs meet.

This one has some semi dense bits in the centre and at the corners, but 4 together doesn't make for an interesting join. I'll have to scrap this one and try another design. By the time I find a design that I like, I should have enough pretty designs that don't quite fit my plans, to fill a book. This one is done in size 10 thread and I think it's about 3 inches across. I should re-do it in 80 to see what it would look like as a bookmark especially if I do the rings in a solid colour and the chains in a variegated colour.

I mentioned some ideas for tatting books on one of the tatting lists and one of the members wrote to me off list and remarked that I shouldn't share my thoughts because someone else would take the ideas and use them to create their own book. The thought that someone else would take my idea and run with it doesn't really bother me, although I do think about it from time to time when I mention an plan for a book. I suppose anyone could take the idea, but they aren't me, and they won't come up with my designs. Does that sound conceited? I don't mean to be. If I do provide an idea that someone can springboard off of, then the tatting world is all the richer for it.

There are several books of snowflake patterns available. Does that mean that the possibilities for snowflake patterns have been exhausted? Seems to me that I read somewhere that the could be millions of real snowflakes and no 2 would be alike. So it seems like there could also be lots of different snowflake patterns.

What about hearts, or butterflies or bookmarks, do we have enough of those? And doilies, there are lots of patterns for those too. Does that mean that we shouldn't expect any more patterns for those either?

There are lots of designs for dresses and shirts and pants, but we keep seeing new variations of those things. They change around the designs for those things 4 times a year and there is always something new, so why shouldn't it be the same for tatting patterns.

Some people buy tatting patterns because they are collectors. Some people buy them because they want to make that one special item. Some people buy them because they find that a particular designer sets out patterns in a way that is easy for them to follow. Some people don't buy many books, choosing rather to make the things they like over and over again. Should a designer stop producing books because there already are some publications on the market with those things in it? I don't think so. I think there is room for old and new books, old techniques and new techniques. It's all good and it all has it's place.

Me? I'm going to whip up a bookmark, then I'll try another idea for a square motif. Happy tatting all.

Wednesday, July 23, 2008

Design Challenge 1B

I did another variation of from the design challenge and when it was done I wondered how it would look as a doily.

It has possibilities, but I'm not sure if I like it well enough to design an outer border that would bring it all together. Before you go shooting yourself for being slow, this doily is just a photo image copied and pasted. I wanted to see what the negative space would look like where they join. I like the join, but I'm not crazy about the outer edge. I think maybe it would need something to bring it all together and connect the outer points. I had no idea that the points were going to look so square, but it does make for an interesting design element.

Now there's an idea for an eight person round robin. The first person does a snowflake, the next 6 just make and attach a repeat of the first snowflake, and the last person has to do an outer round to finish it off before sending it home. So everyone would make 7 snowflakes, all different, and one round to finish off a doily, and everyone ends up with a doily which is mostly their own design.

Monday, July 21, 2008

Taking my own challenge

Since I started this challenge it's only fair that I give my rendition of the challenge image. I started with a couple of ideas and began tatting. This was my first drawing. The drawing only mildly resembles the initial image,


but that didn't matter because no matter how much I tried to make a hexagon with it, it just wanted to be an edging, so I cut it off and started again...with the same results.

That wasn't working so I sat back and looked at the image that Bev called a Rorschach blot. At first all I could see was the letter 'W' but when I looked at it again I saw butterflies. So I played around and came up with another drawing. This one looks a little more like the original image.

So I started tatting. I wasn't sure of the spacing between the butterflies and the chains at the bottom looked weird and disconnected, so as I did more repeats I changed it, adding a short chain between the large rings and adding a join on the tiny split ring at the bottom. It got closer to what I wanted. So I cut the thread and started over again.

See all the ends hanging? When a design gets tweaked over and over again, I just work with whatever thread is still on the shuttles and add more thread in as I need it. There's no point in starting out fresh with fully loaded shuttles because chances are that I'm going to have several tries at it. I weave the threads in as I go if I can, but if I can't, I just let them hang and then sew them in when everything is done. I don't attempt designing with specialty threads as it's most likely just going to be a waste of thread. Sometimes I load the shuttles and tat the design that's in my head start to finish and it comes out perfect the first time. Other times it doesn't.

Here is the latest result. I think I should re-do it adding a longer chain between the large rings at the top because it wants to cup a little. One extra stitch between the butterflies would probably work out better. It's heard to tell since this piece hasn't been blocked yet.

This was one variation of the image. I have another one I'm still working on. After 3 false starts, I'm about half way through it.

Friday, March 09, 2007

Circles and Squares


While surfing the other day I saw picture of a corner of a crocheted bit that had a fairly solid circular motif with lacier bits making square corners and I thought of doing something like it in tatting. I got the circle part done and stared on the lacy part, but it didn't work so I un-did an entire row. I liked the rings in the corner and added a row to join them all together. I'm not sure if I want to add another row of chain or just stop here. I made a mistake I'll have to correct, but it's at the beginning of the prvious row. I'll either have to cut off 2 rows or cut out part of the previous row. Or not, I'm not planning on doing anything with it, I was just playing around.

Saturday, March 03, 2007

Shawl anyone?


I woke up this morning thinking that the design I created for the V-neck would make a nice triangular shawl. Not attached to fabric as I had been thinking, but all by itself. I had to do a quick drawing to see how it would look. It might need a little something in between motives or maybe small rings thrown off the tops of the chains at that point so that four of them would join in the middle. It might make for a more solid fabric. Hmmm. Do I want to take on a big project. I used size 30 and got a motif that's 3 inches across. I figure about 50 inches across the long side or roughly 18 motives. That's enough calculating. It'd be like making a bedspread and I don't have enough spare time to launch into anything that big. It would be pretty though.

Friday, March 02, 2007

Yippee the Newsletter's out!

The February newsletter is finally out. I know it's March, but I almost made it for February, in spite of spending part of each day this last month soaking up water from soggy carpets and consequently doing a ton of laundry. I 'm getting closer to my target date with each issue so I'm a happy camper.

Remember that mess I showed you earlier, where my left side didn't match my right side and I had to cut it out several times to get it right?

Take a look at it now.
I not only designed a motif for the challenge, I tatted 9 of them, added a border and attached it to a T-shirt. Here's a shirt with some WOW factor.
Here's a close up of the motif. I knew it was going to be added to a garment and I didn't want to spend ages blocking it every time it was washed, so there are very few free picots. In fact there are just a few in strategic places so that the motives can be tacked down so they stay in place during laundering.
Designing the motif was the easy part, matching the border to it filling in the gaps between the points of the motives and making a wide enough straight edge to it that it covers up the band around the neck V was a bit more of a challenge. Which is why I had a lot of messes before I had something useful.

I am pleased with the way it turned out, especially since the border fits around the V-neck but it is actually a 90 degree turn so that it could be added to the edge of a hanky, used as a border on a shawl, mat, tablecloth or whatever you have that needs a square corner. I used a Coats thread size 30 for this one but you could use any size thread you want and just add or subtract motives to lengthen or shorten the border to fit the fabric.

Wednesday, January 17, 2007

Where did I go wrong? Answer: Everywhere.


See this mess? It's enough to make you throw your shuttles across the room. Of course after you've screamed a little in frustration you have to go collect the shuttles and start fixing. Since we were talking about designing previously. I thought you'd like to see what an elegant piece of tatting looks like in process.


This picture shows both the left and the right side of a multi motif project that I've been working on. Since this will be one of those designs that's going into the newsletter I don't want to show it all right now as it will spoil the surprise. Both sides are supposed to be the same and as you can see they're not. See all those threads hanging off? They're the bits where I started over again several times.

The motif is a standard snowflake shape with 6 points. To make it into the ---- project it needs to have a straight side. When you join six pointed snowflake shapes together you have big gaps in the dip between points. While maintaining the design elements of the motif I need to fill in the gap and build the whole thing up to a straight edge. Then I need to make a somewhat solid band along the straight edge.

I worked one side the way I thought it would look good, remembering to add picots at strategic points, outward facing rings, where I needed them and got into the second pattern repeat of the first row. That's where I decided to do something different, that I thought would look better. It did, so I just carried on. I knew I'd have to fix the first bit before I did the next row but, hey that's the way it goes when you're designing on the fly.


When I got to the other end I had to invent a different arrangement for the edge of row one. I liked the second variation better so all I had to do was cut off the beginning of row one and make it the same. No problem I'd just fix that part when I got row 2 done. Six split rings into row 2 I realized that the long chain I had begun the row with wasn't going to work right.


AGAIN, I changed what I was doing and here I am at the point of tatting row 2 into row 1 in places where this part of row 1 doesn't have places. I've already cut off part of row 1 on the left and this is where I need to retro tat a split ring or 2, some chain and a couple of regular rings.

Fortunately the end on the right I only have to cut out the chain and replace it with 2 rings and 2 chains. Except that, as this is where row 1 turns and becomes row 2 I kind of think I'd like to replace the whole section, just so there aren't a bzillion ends all hidden in that one chain. Chains are easy to retro tat, but they're harder to hide ends in. Not normal ends, you understand, but the 40,000 ends you have when you need to cut out multiple bits because you were just winging it as you designed and it didn't quite work.

Stay tuned for the fixed version.

Thursday, November 09, 2006

More things to do with snowflakes

One of the easiest things you can do with a snowflake is join several of them together. Snowflakes are supposed to have six sides as that just happens to be the natural shape of ice crystals. When you put a grouping of hexagons together in a round shape you use 7 hexagons, one in the middle and one attached to each of the six sides.

Several years ago I needed to create a doily in a hurry. My inspiration was nothing more than I just needed a quick gift. Having crocheted a lot of granny squares, knew that 7 joined hexagons would make a doily and I had 8 different hexagon shapes to choose from. The largest of the 8 designs was Snowflake 4, so it was my obvious choice. I tatted the 7 motives and joined ten together by their points.

That made a nice little grouping, but the motives were very pointy and they didn't have a nice smooth outer edge so the doily looked unfinished. If you have ever tatted a doily, you know that the further from the centre you get the longer it takes to tat a round and I didn't have a lot of time.

The simplest method of bringing it all together was just to tat a row of chain around the circumference of the motives. At the point where 3 motives were joined there were 3 cloverleaves. On the outer edge that meant that there were only 2 cloverleaves, so for continuity I tatted a cloverleaf of matching proportions at that point. Where there was just one cloverleaf, I tatted a single ring and joined them together by a chain.

The chains of the first row were deliberately made long both to save time and to separate the edging from the motives. The less connected it was, the less I had to figure out as far as matching the motif design. I could have worked the edging around each ring of the cloverleaf and followed the outer contour of the motives but it would have taken a lot more tatting and a lot more thinking. As it was, the negative space added a design element and made it easier to work the edging.

The single row had no depth or substance to it. It was just a big floppy chain. Adding the second row with more connecting points made it more solid and gave it shape. When you add an edging to something you want to repeat part of the theme to make it match and look like it belongs. The sparse 2 rows of edging added to the motives is kind of skimpy because I was short of time and had to make this in less than a week, but it still works.