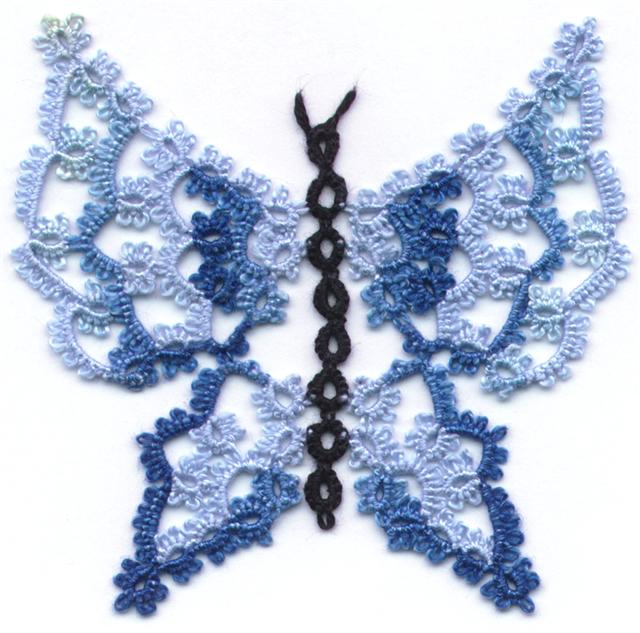
Wednesday, May 02, 2007

Toying with Squares

Way back when...I used to do a lot of crochet and I remember seeing lots of things created with crocheted squares. Not just granny squares, but beautiful, gloriously lacey squares. Trouble is I can't find anything in my old pattern books. OK, I admit it, I didn't look really hard, digging through a file cabinet full of old books, magazines and leaflets just doesn't appeal to me. I spent last week doing the accounting in preparation for doing the income tax, last weekend helping hubby replace the spark plugs and wires on the car, Monday helping him clean out the garage and Tuesday sorting through it all again at the recycling depot. More wasted tatting time looking through books just wasn't going to happen.

Searching the internet is something that my bruised and battered body CAN handle and along the lines of interesting things you can do with a square I found a couple that I'd be willing to try reproducing in tatting. Here's a Bolero
The layout shows how to position the squares so it would be easy enough to convert this to tatting.

Or how about this very open shrug?
It's nothing more than a short scarf laced up with ribbon to form arms. I could do that in tatting. without much trouble, although I think I'd like a little more back to it for warmth. If it's done in little squares it's easy to add a short row or two along the back.


Then there was this one.
Very open, and very easy to reproduce in tatting.

Or there is this idea of square motives used to embellish a T-shirt.
This one reminds me of the rose motif in my last post.

I could see any of these reproduced in tatting. Except that tatting usually isn't done with yarn, and cotton doesn't stretch. I have added tatted motives to sweatshirts and T-shirts without any problem but if the finished product needs to stretch it has to be made with yarn or another type of flexible elasticized "thread". Needle tatting would be more appropriate for that type of project.

I need to do some major thinking before I attempt a project like this. The newsletter keeps me pretty busy designing and the 25 motif challenge takes most of my blogging time. I've already decided that I'm going to try to tat a bookmark to send each of my 8 siblings on their birthdays. I'm not sure that I can do it. I'd like to design new ones, but I may just go with something simple like this one I designed a couple of years ago for the 5 girls in the family and then create something more masculine for the 3 boys.
Nothing like jumping into a whole pile of work is there? 20 new patterns a year for the newsletter, while tatting 8 bookmarks on top of the 8 snowflakes or whatever I decide to do for Christmas, on top of tatting for the 25 Motif Challenge and blogging for the challenge blog and I'm still thinking of taking on a major project! I must be nuts. Still...it would be nice.

Friday, April 27, 2007

One is not enough

Motif, that is, especially when they are square. Designing a motif is fun because no matter what you thought you were making, sometimes the design just takes on a life of it's own and tells you what it wants to be.


I used to do a lot of crochet until tatting became my passion obsession and you can't do much crochet without being infected by the need to do granny squares, which will lead to all kinds of square things being done. Squares make afghans and tablecloths. Squares make vests and slippers. Squares make bags and...you get the idea. Squares are nifty things.


One of the really interesting things about squares, or any motif really is that they are pretty on their own or in groups. Like this one I designed a few years ago for the newsletter which you can see here
(By the way you can see all of the previous issues in the archives by just changing the Volume and Issue number at the end. So vol-1-4 here is changed to vol-3-1 or whatever volume you want to see. http://www.gagechek.com/slb/news/vol-1-4/ )

I think this one might be my favorite design. It's just pretty as it is. I did it in size 20 Opera thread. Which is about the same size as size 40 Olympus and a smidgen finer than size 20 Flora and it came out about 3 inches across or about coaster size.


But look at this.


That lovely little border edging around the rose becomes this gorgeous dainty lattice work.
Look at the intersecting corner. Isn't that just too cute for words? I love motif designs that work so well as a whole cloth that you have trouble telling whether the centre of the motif is the centre or the corner. This one is obvious, of course because of the coloured flower in the centre.
That's the trouble with a motif. One is never enough. you have to work enough of them to see what the intersecting corner is going to look like. Sometimes the intersection is better than the motif.

Just think of all of those old granny square designs that you could turn into elegant pieces by doing tatted squares.

One really isn't enough. I have received numerous e-mails from people asking for the pattern and many of them already have it. This motif was featured in the August 2003 newsletter but due to lack of space the cover page only shows a single motif. Often the true beauty of a motif doesn't show itself until it's part of a bigger whole. Then some of them truly are greater than the sum of their parts.

Wednesday, April 11, 2007

Blocking, Stiffening and Storing Tatting

Here are some of my thoughts on Blocking, Stiffening, Framing and Storing your tatting. Some years ago I had several lengthy conversations with the textile conservator at the Royal Ontario Museum. She dealt with ancient and fragile textiles and I spoke to her about the proper way to treat those textiles and newer laces. So while I'm not an expert, I did get my information from one. I know what ought to be done to preserve our laces, but my feeling on the subject is that unless the lace is a special occasion piece such as wedding laces or christening outfits, it ought to be treated like any other fabric. So while I don't pamper my tatting, I don''t abuse it either.

This is going to be a long, wordy, picture free post which I may add pictures to later, but for now I'll just stick it here as a reference tool. So if you're looking for pictures, move along there aren't any here. If you're looking for information, grab a cup of tea, coffee or whatever and sit down and read to your heart's content.

There's whole bunch of things that are helpful to know. So here it is divided into 2 categories. Tatting with modern threads will stand up to washing as well as any fabric. I regularly throw my tatting in the wash with the rest of the laundry. So there goes the theory that you have to treat it with special care. LOL

Colours can bleed. I did a bunch of the Grace snowflake on my web site and the red did bleed into the white, but when I kept rinsing it, the red bleeding disappeared. Modern cottons (at least in North America) use processes that resist the bled out dyes. That particular thread bled every time I used it, but with additional washings the dye disappeared so it wasn't permanent. The best solution of course is to use colourfast threads, but when you don't know how the thread will react to water it's always best to test a bit of thread before investing a lot of time into tatting with it.

What I do with small projects is wash my hands, pick up the motif and rub it in the suds, then rinse it out. Orvus is the recommended soap for fragile laces, but ordinary Ivory soap is a good choice and available in most grocery and department stores. According to the conservator who did the research Ivory laundry flakes compared favorably with Orvus. Any face and hand soap can be used (preferably not detergent) the major difference between the soaps is the dyes and the perfume additives. Newly made projects usually only have the soil from your hands on them so they aren't really dirty unless the dog/cat got to play with it. So gentle washing is usually sufficient.

Most of the threads that we tat with are cotton and cotton wants to curl when it gets wet. Blocking uncurls the fibres. If the project is small I block it on the ironing board and if it needs symmetrical blocking I throw a checked tea towel on the ironing board first. It gives a nice grid to pin things out on.

I am not as precise as some people who do tatting for exhibition and judging so I'm a little haphazard about my blocking, but I am also very good at eye balling it and don't use a grid most of the time. You know your own ability so work accordingly.

Lay the damp tatted piece on the board and spread it out. Pin the centre down. When I use the ironing board some pins will go through the holes in the board and others will hit the metal, so I turn them sideways so that they go through the padding and turn to lay between the padding and the metal of the board. Use stainless steel or brass pins for pinning to avoid rust.

Then pin out the outside edge at the compass points North, South, East, and West stretching the tatting as you go. It will stretch out. Then pin out in between NE, SW, NW, SE. Once you have the outer edges pinned out, start pinning out the shape of the piece. I don't like the look of pointed picots so sometimes I pin the ring or inside a chain, but pinning the picots does do a better job of crisping up the work because it pulls on the stitches. If you are doing an exhibition piece, pin every picot. Yes that's a lot of pins, do it anyway!

Next I push the pins flat, (sideways between the padding and the metal frame of the ironing board) and lay a pressing cloth or paper towel over the work. Press the lace with a hot iron. (What, your rayon thread melted? I told you this was for cotton. If you're working with something else use common sense.) Be careful of doing this if you use plastic beads. I use glass beads almost exclusively and had a horrid mess the one time I pressed a piece with large plastic beads on it. When the piece is almost dry pull the pins out. Lay the pressing cloth over it again and press flat.

Why use a pressing cloth? Because if you don't you'll flatten out the lace so that it doesn't look as pretty. The raised portions will be shiny where they were in contact with the iron.

For fragile, antique pieces and inherited heirloom pieces where you want to take more care use a large mason jar or any (glass) container with a secure lid. Add Orvus or Ivory laundry flakes or shavings of a pure soap and distilled water (or tap water depending on how careful you want to be about it). Add the lace and shake gently to agitate it. Rinse the piece thoroughly until the (distilled) water coming off of it is clean enough that you would drink it. Pin it out gently. New threads are tough and will take a lot of pulling, but ancient threads aren't, be careful.

If the piece is too big for the ironing board purchase a block of construction foam (styrofoam). It comes in big 8 foot pieces about 2 inches thick, so you can cut it into smaller chunks for blocking. I use a couple of small chunks for edgings and a big 2 foot square piece for things like doilies and collars. With these pieces I pin them out wet the same as on the ironing board and just leave them pinned to dry. Often I'll pin them first and then wash them already pinned, as it saves time. I just hold the whole thing under the shower, soap up my hands and lather the lace, then rinse again under the shower. I sometimes have one project pinned on one side and a second or third on the other side depending on their size/shape. If you need a grid to work from, you can attach a square of gingham cloth to the board and use it for your grid.

For exceptionally large pieces, tablecloth size big, you need to pin it out on the mattress. A job which is best done early in the morning unless you have a spare bed you can use. If it's too wet you can dry it with the hair dryer. Make sure you get all the pins out when you're done. You don't want anyone rolling over and getting stuck with a straight pin.

Pieces of white lace may be periodically laid out on the grass or over bushes so that they can be bleached by the sunlight as it does brighten them up. Hurray for ultra violet light!
------------------------------------------------------------------------
Stiffening can be done with sugar, starch, glue or commercial treatments. They all have their pluses and minuses. Note: If the piece has beads on it, the stiffener may make the beads look dull and ugly. Rather than dipping the piece in the stiffener you may want to apply it with a brush.

Sugar - heat sugar water until all of the sugar has been absorbed. Dip the piece in the solution and pin it out. If your solution is too thick it will clog the picots and look ugly, water it down and try again. The good thing about sugar starch is that it washes out and doesn't harm the fabric. The bad thing is that critters will eat the lace to get to the sugar. If you have a problem with pests in the house don't use sugar.
Starch - wheat, rice, or corn starch can be used and the purer the better. For the kitchen challenged, things like corn starch go in first then add cold water. Heat the mixture until it's clear. Immerse the lace and pin out to dry (see the note on beads). This is the ONLY archival quality stiffening that can be used as it does stiffen, it can be washed out and it isn't attractive to most critters.
Starch, Commercial - can be used but generally doesn't give results as stiff as the first 2 choices and there's no guarantee that it won't harm the fibres. Different products give different results and have different drawbacks. Experiment with little pieces first before you throw a large piece of lace it these.
Glue - White glue of the kind that children use also known as PVA glue can be diluted with water and applied to a blocked piece of lace. Most of these glues either don't wash out at all or don't wash out completely. The long term results (long term as in 50 or more years) is that the pieces will yellow to varying degrees. That may be OK on some things but not so nice on snowflakes.
Clear Nail Polish - I have heard of people using this for small projects like earrings both to seal the finishing knot and to stiffen the tatting but I have no personal experience with using it so I can't comment on it.
Commercial stiffening products - things like Stiffy and a bunch of other brands of fabric stiffeners will stiffen the lace. Many of them are permanent. Some of them yellow with age. Some of them are made with polymers which do break down with age. Plastics off gas when they break down and cause damage to textiles. So use these with discretion unless you don't care about the lace.
-------------------------------------------------------------
A lot of people like to frame their lace for display. If you are permanently mounting the lace make sure you use acid free archival quality materials. Use a pure cotton fabric backing and sew down every picot using cotton thread (or match the fibre, eg silk on silk). You can mount it under glass but the glass must not touch the lace so there has to be spacers between the glass and the lace. The framing must allow for air circulation. Sealing the lace behind glass results in condensation from temperature changes which will damage the lace.

If the lace is just being stored make sure to use acid free paper, or 100%cotton sheets, between the laces and store them flat. Larger laces which must be folded should be stored either with sheets of acid free paper between them or with sheets of cotton fabric between them. All laces should be taken out and aired at least once a year and re-folded in different places to avoid permanent creases which result in permanent damage to the fibres.

Laces should never be stored for a long term in plastic boxes or bags as this will result in yellowed fibres. Likewise they shouldn't be stored in shoe boxes or other similar boxes as they often have a higher acid content which will harm the fibres.

Monday, April 09, 2007

What was I thinking?


I tatted this cross and I swear that the colours on the thread spools looked good together. Here in it's pre-blocked glory it doesn't look too bad. Maybe it was the lighting in the room at the time but my orange rose looked good with the yellow and variegated threads, but now that it's done, I don't think I like it. I wanted to slip this one in with the card for my sister's birthday, but I think I'll have to re-do it. I could cut the orange out and re-tat the centre, or drop the whole thing in a cup of tea and see it that mellows things out, or.....Or maybe I should just chuck it.
The pattern is a simple one from my latest newsletter which you can access by clicking on the link at the right. Shall I call it a motif, just so that the work isn't a total waste?
For those who have asked, the cross from the previous post was in my Tatted Crosses book which is available from my website.

Saturday, April 07, 2007

Hallelujah! He is Risen!


The cross is empty.

The tomb is empty.

He is a risen Lord.

He is coming again.

Are you ready?

Monday, April 02, 2007

Embroidery!

You'd think that since all I ever talk about is tatting, that I don't occasionally dabble in other fibre arts. These days that's true, but I have worked in other mediums. Here are some rather blurry scans of a skirt I embroidered. I took me about a year to do complete this project. It was started at the end of summer one year and was a finished skirt the following summer. Parts of it I'm really pleased with, but other bits I didn't really care for.

The birds for instance, I really liked. I blended strands of thread so that the body was one shade lighter than the wings and tail. Crumpling the skirt to fit it in the scanner doesn't help, but you get the idea.
The border of the skirt front had 3 separate bouquets of flowers, but to give it a bit of continuity I cut pieces of the flower transfers and placed bits of them in each bouquet so while there were 3 areas of flowers they sort of bled into one another.

I sort of like this section but the pink flowers detract from it as do the wine red flowers in the corner of the picture. Unfortunately, these were some of the flowers that I chose to intersperse. The Queen Anne's lace and leaves were nice and while you can't see it in the scan. the buttercups had nice textured stitching.

The centre border had this section which I mostly like, the pink flowers were done in blue and gold here which went better with the purple. The butterfly is just plain ugly. In trying to keep the green leaf shades all different I made the mistake of pairing this continuity flower in a blue-y green that was just too jarring matched up with the vibrant pink. The pink was pretty when I used it in the butterfly elsewhere on the skirt.....

This is the last section of the skirt. The red and brown butterfly on the left is hideous. It was ugly before I stitched it and my colour selection of red and brown didn't improve it. the colours blended well with the flowers but they didn't liven up the butterfly itself. The other sort of morning glory shape flower was also incorporated into each section. The colours didn't work so well in some of the bouquets.

This was one of those projects that I enjoyed but it took a huge amount of time and it was made for me. The skirt shrunk and it no longer fits (that's my story and I'm sticking to it). I am not willing to part with it, mostly because I don't know anyone who will appreciate the effort that went into it. The embroidery, since it follows along the edge of a circle skirt is curved along the bottom edge and isn't suitable to be cut up and turned into pillows or some other practical object so every year when I do spring cleaning I pull it out, look at the work that went into it and contemplate other uses for it. Then I fold it up and stuff it back in the cupboard.

Black thread GRRRR!

I've been working on a project with black thread and beads that has a lot of split rings. It's a deadly combination. First of all black thread is hard to work on unless you have exceptional lighting. I do a lot of my tatting in the evening while hubby and I watch the boob tube together. My usual spot, whilst near the kitchen so that I can make a quick cup of tea or a bowl of popcorn, doesn't have the greatest lighting.

I like to use a fine hook #14 also known as .o6 mm to do bead joins. It's quick, and usually painless to stab a bead, pull up the joining picot with the tip of the hook and then do the join. One of the things that I have noticed is that a #14 hook is a sharp little stinker. If you're like me you hold the join across the side of the knuckle of your left forefinger just by the pad of the finger and pull on the work so that you can insert the hook and pull up a loop of thread. This action, if you are not careful, or haven't developed calluses from years of tatting can result in piercing your skin.

Before the squeamish, among you have yelled ouch in sympathy, or pitched your cookies at the mere thought of blood, let me assure you that I have not drawn blood. What I have done is shredded my thread. That teeny, tiny hook has a sharp little bend and since it is tiny, it doesn't always grab all of the thread. As often as not I go to make the join and discover that the strand of thread is finer that it ought to be. When I check, sure enough I have one strand instead of 3 on my hook. The other strands are all bunched up on the other side of the join.

Normally this doesn't bother me. I'm a tatter, I work in fine thread, therefore I have the patience of Job. So what's the problem, you ask? The thread is black, that's what's the problem. Making one attempt at doing a join with shredded thread is bad enough, but shredding the thread once means that it is more likely to shred again on the next join since the originally tightly spun fibres have now been separated.

Can you imagine anything worse that trying to work with thread that is determined to separate like wet toilet paper? Shall I tell you what's worse? What's worse is getting to the last few rings and knowing that if you stress this blessed thread much more, it WILL come apart and you'll have to add in 2 new threads (split rings remember) and hide 4 ends, in the last tiny ring. Could it be any worse? You can count on it.


Worse, is having all of this, and hot flashes too (or high fever, at this point I'm not sure which, but the effect is the same) the result of this is that the shredded black thread is now wet! Fortunately, I have been tatting for years and I know when it's time to quit. I don't care that this sucker was down to the last 4 rings before completion. I put it away until morning. Dry thread, cool hands and bright sunlight, make a world of difference and this baby is DONE.
Well, not quite, there's a zillion ends to hide and some more bead work to add, but the tatting's done. Now on to the next project.

Monday, March 19, 2007

No Tatting Today


I haven't been able to tat for days. Friday we had a minor mishap in the bathroom which resulted in doing some major repairs. It took 2 days to put everything back in order. Did you know paint has an expiration date? I didn't. Last year I pulled out a gallon of white paint to touch up some bits in the bathroom. The paint went on funny with occasional lumps in it, but I didn't care as long as it covered over the repair bits. The problem came later. It stunk. For weeks it stunk. I was embarrassed having people visit it smelled so bad. Not just the bathroom, the. whole. house. I knew that fixing it was going to mean sanding all of the old paint off. I just didn't want to do it.

You're probably wondering why I just didn't get my wonderful hubby to do it. Any other job he would have done it a minute, but paint fumes do him in. Closed in a room with chemical smells will put him down and out for days. So we have an understanding, if it involves smelly stuff, it's my job. He removed everything removable. The last time we did the bathroom that included the toilet. (Dude, in a one bathroom house I need that! We are NOT removing the toilet this time.)

So, after several hours with my hands in various strong chemicals which caused my hands to swell, I sanded, washed and painted every surface in the bathroom including the cabinetry. Two coats. The pale yellow is gone and now everything is pristine white. Some new outlet and light switch covers and everything will be fresh and sparkling.

The tatting, by the way, is a test piece done last week. The project has been restarted 3 times and cut off. As soon as the swelling and muscle ache dies down I'll give it another try.

Wednesday, March 14, 2007

Tatting, what else?


Here's a picture of the shamrock bookmark I did for the newsletter. It isn't anything really special, but certainly appropriate for anyone you know who's Irish. It could be longer, but I started off thinking 5 repeats would be about right and only loaded that amount of thread onto my shuttle. About the time I thought it could do with being longer, I ran out of thread and just quit. I think it's kind of cute, others may disagree, but they're welcome to just move along and read another blog with something they do like
I've been doing a lot of tatting, but nothing to show yet. I'm working on a beaded design and for the zillionth time missed my lost crochet hook. I bought a #14 (.6mm) hook for doing bead joins. That sucker had such a sharp point it went through anything I stored it in, jeans, purse, sewing kit, you name it. I suspect that poking a hole through whatever I was carrying it in was how I lost it. Trying to find a replacement was a challenge as most stores only carry common sizes. You'll never guess where I found one, it was in the local dollar store, which means I not only found one, it was cheap to boot. (Note to self get back to the store and get another one before they're all gone.
Now that I have another teeny tiny hook I can get back to my beaded design and I don't mind that I need to start all over again because I have a hook now!

Friday, March 09, 2007

Circles and Squares


While surfing the other day I saw picture of a corner of a crocheted bit that had a fairly solid circular motif with lacier bits making square corners and I thought of doing something like it in tatting. I got the circle part done and stared on the lacy part, but it didn't work so I un-did an entire row. I liked the rings in the corner and added a row to join them all together. I'm not sure if I want to add another row of chain or just stop here. I made a mistake I'll have to correct, but it's at the beginning of the prvious row. I'll either have to cut off 2 rows or cut out part of the previous row. Or not, I'm not planning on doing anything with it, I was just playing around.

Sunday, March 04, 2007

Hearts


One of the designs I created for the February newsletter were these simple earrings. Hearts are always appropriate and never more so than for Valentines day. I don't play with beads a lot and I've never designed something the used beads on the core thread. So I sat down one day and whipped up this little design. I really like the way that the beads on the core thread forced a nice even outline. As heart designs go, this is about as simple as you can get so it isn't surprising that there are several on the internet that are very similar.

Saturday, March 03, 2007

Shawl anyone?


I woke up this morning thinking that the design I created for the V-neck would make a nice triangular shawl. Not attached to fabric as I had been thinking, but all by itself. I had to do a quick drawing to see how it would look. It might need a little something in between motives or maybe small rings thrown off the tops of the chains at that point so that four of them would join in the middle. It might make for a more solid fabric. Hmmm. Do I want to take on a big project. I used size 30 and got a motif that's 3 inches across. I figure about 50 inches across the long side or roughly 18 motives. That's enough calculating. It'd be like making a bedspread and I don't have enough spare time to launch into anything that big. It would be pretty though.

Friday, March 02, 2007

Yippee the Newsletter's out!

The February newsletter is finally out. I know it's March, but I almost made it for February, in spite of spending part of each day this last month soaking up water from soggy carpets and consequently doing a ton of laundry. I 'm getting closer to my target date with each issue so I'm a happy camper.

Remember that mess I showed you earlier, where my left side didn't match my right side and I had to cut it out several times to get it right?

Take a look at it now.
I not only designed a motif for the challenge, I tatted 9 of them, added a border and attached it to a T-shirt. Here's a shirt with some WOW factor.
Here's a close up of the motif. I knew it was going to be added to a garment and I didn't want to spend ages blocking it every time it was washed, so there are very few free picots. In fact there are just a few in strategic places so that the motives can be tacked down so they stay in place during laundering.
Designing the motif was the easy part, matching the border to it filling in the gaps between the points of the motives and making a wide enough straight edge to it that it covers up the band around the neck V was a bit more of a challenge. Which is why I had a lot of messes before I had something useful.

I am pleased with the way it turned out, especially since the border fits around the V-neck but it is actually a 90 degree turn so that it could be added to the edge of a hanky, used as a border on a shawl, mat, tablecloth or whatever you have that needs a square corner. I used a Coats thread size 30 for this one but you could use any size thread you want and just add or subtract motives to lengthen or shorten the border to fit the fabric.

Wednesday, February 21, 2007

Splish, Splash

Drip, drip, drip. It's the sound of snow melting in the sunshine, but why is it coming from the computer desk? And why is there that splashing sound coming from the bedroom? I'll tell you why, it's another ice dam on the roof.

Third time this year we have water leaking in, as the water from the melting snow expands as it freezes and gets forced up, the roof and under the shingles, then melts again and seeps down through every crevice it can find. Dripping water in the closet with all my tatting supplies, fortunately they're in a large plastic tub. Seeping water coming off the garage roof is once again soaking into the bedroom carpet and our latest incursion is leaking around the windows in the computer room and down onto the desk/scanner/printer/power supply battery back up and in the spare room dripping down onto the bed soaking the mattress.
If you've been wondering why there's been no blog lately, it's because I've been busy trying to dry everything out.

Just to show you what I've been up to when I haven't been doing laundry and mopping floors. Here's one of the items in the next newsletter, a hyacinth, just in time for spring.

Wednesday, February 14, 2007

Happy Valentines Day

Since it's Valentine's day I thought I'd post some earrings I designed ages ago. They're quick to do and make an easy little gift.
Enjoy!
Edited to add:
Experienced tatters will find the diagram above sufficient to tat these earrings, but for newer tatters here are some more specific instructions. In size 20 thread you will need about a yard of thread for each earring. You need 2 shuttles. Load 21 beads and the earring hook* onto the thread. Wind each shuttle leaving all the beads in the middle between them. Divide off six beads to be used in the rings and leave all the others for the chains and the outward ring at the bottom.

Begin the first ring with all 6 beads in the ring. You could use only 5 beads, but the earring hook will sit better lying between 2 beads than it does on top of 1. Tat 6 stitches and slide all 6 beads and the hook into the picot. Leave a little extra thread in the picot for all the joins, tat the last 6 stitches and close. RW. Tat the chain sliding a bead into each picot as shown on the diagram. RW.

When you tat the next ring join into the beady picot leaving one bead between the first and second ring. Finish the ring. RW. Tat the next chain sliding beads into place. RW.

Tat the next ring joining into the beady picot, just like the last ring leaving one bead between rings. RW.

With the second shuttle, slide one bead into the ring and tat the outward ring at the bottom of the heart sliding the bead into place on the picot. Finish the ring and switch shuttles to tat the chain.

Continue around the heart leaving 2 beads and the hook in the join between the first and fifth rings.

* Some earring hooks have a closed hole at the end and it's necessary to start with the hook in place before you begin. Some have a little gap that you can slide the thread under after the earring is completed. With a closed hole you have the hook in the way as you tat, but the hook isn't going to fall off when the earring is finished. With an open gap, to slide the thread under, it's easier to tat the earring and add the hook later, but the thread that can slide under the gap can also slide out and the hook can fall off the earring.

Friday, February 09, 2007

Just One Pattern

The subject of copyright has come up on the tatting lists again. It's a tough problem because it can get boring for people who have heard it all before, but it's important for everyone to hear it at least once. I have only published one book and it was a major headache. The book had a lot of patterns in it, but the most interesting ones were the life size flowers. You can't really do a book of flowers and not use colour. Colour printing increases the cost of publishing.

At the risk of giving you a long ramble about my publishing efforts, here are some of the things I ran into. I began by thinking of the types of flowers that would be suitable for things like wedding bouquets and then I planned out how to tat them. The most complex flower I did was a cattleya orchid. I began by going through all of my gardening books and looking at the structure of the flower, then I searched the internet for a picture of the kind of flower I wanted to tat. This one here.

I did one of the base petals, but didn't like the shaping so I scrapped it and tried again. The second variation was closer to what I wanted. I tatted the base part and then scanned the lace. Then I drew on top of the scanned picture so that I would have a template of the rings and chains I used for proportions.


Next I took my drawing of the base and laid it over top of the flower picture I found on the internet and re-sized the picture so that the corresponding base petals of the picture were the same size as my drawing. Then I drew the outline of the side petals and sketched in some rings. The drawing was flat and the flower needed to be 3 dimensional so I did some adjusting of the ring sizes to shape the petal and tatted a rough version of the right petal. It wasn't quite right but it showed me where I needed to adjust my count. Then I needed to repeat everything for the left petal. I couldn't just tat 2 petals the same as the petal had definite top and bottom connecting points. When it came to drawing the second side petal I had to do it as a complete reverse of the first side.

Then I had to create the labellum, the middle bottom petal, which had a whole different shape. This was not only a mind boggling piece to tat, it was equally difficult to draw. Once I had the pattern drawn I went back and counted the stitches on the flower I had tatted and put the numbers on the pattern. The numbers didn't fit in. Some places there were 3 numbers in the same place where ring joined to ring with chains connecting both. Creating clear drawings for three dimensional objects is very challenging. You need to be able to show where each part connects to the next part on 3 different planes. Once I had everything in place I tatted the flower again working only from the diagram. Then I sent the drawings out to a couple of accomplished tatters so they could give it a try and give me their comments and I adjusted the pattern again to make it easier.

This was a very complex pattern, but you can see some of the necessary steps up to this point. I had invested about 4 months of time going from idea to drawn pattern. Think it was ready? Guess again. Now I had to bring the drawing into the publishing software and lay it out so that it would be easy to follow. My first obstacle was getting everything to fit on the pages. The base when it was large enough so that the stitch count could be read, didn't fit on the page. I could crop part of the pattern but that didn't look right and it left a lot of empty background space. So I re-drew one segment with enough information on where the other two fit.

Then I had the two side petals one had to be worked clockwise and the other had to be worked counterclockwise and the whole petal diagram was too big to fit on a single page. I ended up breaking it down into individual rows. I grayed out the previous row to make the working row stand out a little in the diagram. Of course breaking it into individual rows meant a certain amount of re-drawing.

The bottom petal curled around and joined to itself which was difficult to explain on a flat diagram and it also required several re-draws because the final version wouldn't fit on a single page without being shrunk and then the numbers were unreadable so a lot of things had to be shifted around. Then to make things clearer, taking into consideration the input from my test tatters I went back and added in some markers on the diagram. I included some text at key points to explain what needed to be done. Finally, so that the picture might more easily convey the different petals, I re-tatted it in 3 colours to show the base, side and bottom petals.
Occasionally a publication will show the steps of a pattern with each piece done by itself. That wasn't something I had to do, but if an author knows that will be required ahead of time she can take a picture of it as it develops. If not, then it means tatting each piece separately. Think of a cooking show where you watch the dish being prepared and popped into the oven and as the freshly made one goes in a finished one is pulled out. It means that the dish has been prepared 2 or 3 times so that you can see it at each step.
Think that's the end of it? Not yet. Once I had the drawings and the text to go with it... Did I mention text? Even when I use visual diagrams, they are often improved by text that gives additional explanation especially with a complex pattern. This is very true with three dimensional work like flowers. Thinking of what to say making sure what I am saying is clear and can't be misconstrued, avoiding repeating myself, these were just a few of the challenges.
Then what are drawings and text without pictures. The lace had to be photographed. Flat things fit on a scanner so it's easy to get a digital image, but flowers or pin cushions need a camera. Even if it is flat, I wanted a group picture of the laces in the publication for the front cover at least. Ideally, I wanted a group picture for the front cover and individual pictures to go with each pattern. Anyway, you get the idea.
Sometimes you want props to go with the lace. A doily on a table is nice but a little porcelain figure on it is more attractive. Depending on the colour of the lace, you may want to try several different tables to see which makes the most attractive background. A dark thread will look nicer on a light colour wood, and a multi colour doily needs a neutral background, all of these are considerations and you may have to take dozens of pictures to get what you really like. If you take a picture of a flower do you take the picture from the front or the side. Maybe the picture from the front looks prettier, but the one from the side gives the tatter a better idea of the flower's construction. One picture of front and side is better, but that means tatting a second flower.
Of course this is only one pattern. Since a publication has several patterns you also have to remember that they all need to fit in. If you have a picture, a drawing and text they all have to be fit in on adjacent pages. Sometimes the end of one pattern will leave half a page of space That means that you occasionally have to break a pattern into smaller pieces so that all of the pieces will fit together in the allowable space, and sometimes that means re-drawing a pattern.
Maybe a picture of the finished piece taken from several angles would be better, but what if you have already fit everything in nicely and there isn't any room for those extra pictures? Do you add the pictures and shift everything else around to fill up the extra space, or leave the picture out.
That brings us back to the cost of printing. You could run things off on your home printer. Before the advent of colour home laser printers this wasn't a viable option, but things have changed. Commercial printing involves a lot of money. Businesses don't like to set their equipment up for small jobs. Commercial equipment will pump out lots of copies with good quality output, but it takes a long time to set them up and you pay for that. So for a small volume you pay a large amount of money. If you do a lot more copies you still pay for the initial set up cost, but after that you're only paying for paper, ink and the amount of time the equipment is running.
As tatters we know that we aren't going to sell millions of copies, but we might sell a few thousand. So we fit into not quite personal printing and not quite commercial printing. We need to make enough copies to satisfy the demand, but we don't really want to store thousands of copies. We want to keep the price of our books low so that people will buy them and that means cutting some things out to reduce costs. Colour images are lovely, but they cost so colour is one of the first things to get cut. Extra pages over the bare essentials cost too, so they go. Then comes the editing to see if everything the author wants included really has to be there. Maybe a design has to be redrawn to pare down the number of pages needed or maybe several items can be photographed together to cut down on the number of colour pages used.
Finally the publication has been tweaked as much as it can be tweaked and it's ready for the printer. The money is spent for the required volume of books and the work is ready for sale. You hope that people will like your designs, you hope that you earn at least a little bit of money for all your blood, sweat and tears. You hope that you can recoup what it cost to produce all of those copies and you also hope that you don't browse through the internet one day and find your design being sold under somebody else's name.
Is copyright an issue? Probably not, for those who don't publish their patterns. Or for those who don't design their own laces. Or for those without a conscience.
By the way, the lovely purple orchid pictured here was tatted by Sue Hanson. In spite of her assertions that she doesn't "do big" she struggled through this pattern and sent me her flower so that I could photograph it for the book.
Authors, especially authors of tatting books don't make a lot of money from their publications, and most of us do it because we love tatting, and creating new designs. When we see things that were created out of our own imaginations stolen out from under us, we get a little cranky. A comment about copying patterns was made on one of the tatting lists.
"As long as we are not making a big profit and just sharing, then go ahead and SUE US !! "
When you see what an author has to go through to create a publication, is it any wonder that we see red when such comments are made? It's like saying to us that you have no regard for our effort, that you don't care about what it cost us to produce those designs for you. You know that we don't make enough money from our designs to be able to afford the cost of taking you to court so you can abuse us and it won't matter.
But it will matter. It will matter when all of the designers look at the abuse and decide that it isn't worth the effort. When the designers do with their books, what they did recently with their web sites and just close things down. No new patterns, no tatting innovations, just some century old designs. Think of all the new things being created and shared. Then imagine all of it gone because people were greedy. So it's just one pattern you copy out of a friend's book. That's one book less that the author was able to sell. Now multiply that by all of the other people who copy "just one pattern". Is a tatting author going to be able to reduce their printing costs? Not while people copy "just one pattern".

Wednesday, February 07, 2007

Tatting that didn't make it.

If you went by how often I post about what I'm tatting, you'd get the impression that I don't tat very much. Nothing could be further from the truth. I tat a lot, just nothing that I can post most of the time. Every quarter I work on the designs that will go into the next newsletter. Like this one on the left. It isn't quite right.


Neither is this one. It's too big and the shaping isn't what I need.


This one is getting closer to the right shape but it's still too big.


This one is getting there but it has empty spaces where I want it solid and the edges aren't pointy enough. When I get it right I'll have to tat a whole bunch of them. Just what I like -tatting a whole bunch of the same thing over and over again. NOT.


See - lots of little tatted bits but nothing really worth showing. These little mis-shapen bits will eventually work up into something worth while, they just don't look like it at this stage. It would be nice to post my progress on things more often, but since almost everything I create ends up in the newsletter I can't really show you what I've done until after the fact. I suppose I could start a whole bunch of drafts and publish them one at a time after the newsletter is sent out. Talk about anti-climax.

Wednesday, January 17, 2007

Where did I go wrong? Answer: Everywhere.


See this mess? It's enough to make you throw your shuttles across the room. Of course after you've screamed a little in frustration you have to go collect the shuttles and start fixing. Since we were talking about designing previously. I thought you'd like to see what an elegant piece of tatting looks like in process.


This picture shows both the left and the right side of a multi motif project that I've been working on. Since this will be one of those designs that's going into the newsletter I don't want to show it all right now as it will spoil the surprise. Both sides are supposed to be the same and as you can see they're not. See all those threads hanging off? They're the bits where I started over again several times.

The motif is a standard snowflake shape with 6 points. To make it into the ---- project it needs to have a straight side. When you join six pointed snowflake shapes together you have big gaps in the dip between points. While maintaining the design elements of the motif I need to fill in the gap and build the whole thing up to a straight edge. Then I need to make a somewhat solid band along the straight edge.

I worked one side the way I thought it would look good, remembering to add picots at strategic points, outward facing rings, where I needed them and got into the second pattern repeat of the first row. That's where I decided to do something different, that I thought would look better. It did, so I just carried on. I knew I'd have to fix the first bit before I did the next row but, hey that's the way it goes when you're designing on the fly.


When I got to the other end I had to invent a different arrangement for the edge of row one. I liked the second variation better so all I had to do was cut off the beginning of row one and make it the same. No problem I'd just fix that part when I got row 2 done. Six split rings into row 2 I realized that the long chain I had begun the row with wasn't going to work right.


AGAIN, I changed what I was doing and here I am at the point of tatting row 2 into row 1 in places where this part of row 1 doesn't have places. I've already cut off part of row 1 on the left and this is where I need to retro tat a split ring or 2, some chain and a couple of regular rings.

Fortunately the end on the right I only have to cut out the chain and replace it with 2 rings and 2 chains. Except that, as this is where row 1 turns and becomes row 2 I kind of think I'd like to replace the whole section, just so there aren't a bzillion ends all hidden in that one chain. Chains are easy to retro tat, but they're harder to hide ends in. Not normal ends, you understand, but the 40,000 ends you have when you need to cut out multiple bits because you were just winging it as you designed and it didn't quite work.

Stay tuned for the fixed version.

Tuesday, January 09, 2007

How to Tat

I have how to tat demos on my web site which were done when the internet was new and it was important for files to be small. There have been other videos done since, but I don't think any of them have been filmed from the tatter's point of view.

I frequently receive e-mail from people asking for help and often the problem is that they haven't wrapped the thread around their hand properly. Having written the same thing a bunch of times, I now keep a spare How to Tat draft e-mail. So for your pleasure and benefit, here are detailed instructions that should really de-mystify the process.

HOW TO TAT
There are several different methods of shuttle tatting, some of which are, the Riego method, the loop method and the traditional method. Each of these methods uses different motions to create the doublestitch that is used in all tatting. That can make it very confusing to a novice using more than one set ofreference material. The following instructions arefor the traditional method.

Double stitches (DS) are used to form rings (R)and chains (CH) and it is easiest to learn how to form the double stitches when working with 2 contrasting colours of size 10 thread. For example; red and white. Fill a shuttle with white thread, then knot the end of the white thread together with the ball of red thread.

Pinch the knot between the thumb and forefinger of the left hand. Take the red thread up and over the back of the fingers of the left hand, spreading the fingers a little, then secure the thread by wrapping it several times around the left baby finger. All of the action happens on the stretch of thread between the forefinger and middle finger of the left hand. So make sure there is enough room for the shuttle to pass between those 2 fingers. Let's call this part ofthe red thread the "action" thread.

Now take the shuttle in the right hand and with the hook, point or pick pointing forward, place the thumb on the bottom and the forefinger or first 2 fingers of the right hand on the top. Use the last 3 fingers of the right hand to hold the shuttle thread up and out of the way when forming the first half of the doublestitch.

The shuttle is used to manoeuvre the shuttle thread around the "action" thread that is over the left hand. For the first half of the doublestitch, lift the shuttle thread up and out of the way. Spread the fingers of the left hand to keep the red thread tight. Slide the shuttle under the "action" thread.Don't let go of the shuttle, just let the red thread slip between the shuttle and the fingers, off the back of the shuttle and then pull the shuttle back out, letting the thread slip between the shuttle and the thumb.

Note that the shuttle is below both the shuttle thread and the "action" thread when you slide it under, but between the threads when you slide the shuttle out. That forms the first half of the stitch using the white shuttle thread.

Now to flip the stitch over to the red thread relax the left hand and pull the shuttle straight out to the right keeping the white thread tight. Alternating which thread is being held tight is what flips the stitch. Then extend the fingers of the left hand again to tighten the red thread and use the middle finger of the left hand to slide the first half of the stitch over until it's right against the knot that you are pinching. That's the first half done.

For the second half of the stitch again keep the red thread tight. Let the shuttle thread hang down in front of the "action" thread. Take the shuttle OVER the "action" thread and slide it butt end first underthe "action" thread and let the red thread slip between the shuttle and the forefinger.

Note that the shuttle is above both the shuttle thread and the "action" thread as you go over it, but between the threads as you pull the shuttle out. Again relax the fingers of the left hand and pull the shuttle straight out to the right. Keep the white shuttle thread tight, then extend the fingers of the left hand again using the middle finger to slide the second half of the stitch against the first half.That's the doublestitch completed.

Repeat until you have the specified number of stitches completed. You will see that all of the stitches are red - the colour of the thread over the back of the left hand. You can tell immediately that any stitches which are not red are not flipped.

Picots are created simply by leaving a little extra thread between stitches. When the stitches are slid together the extra thread makes a loop that is a picot. The more thread between the stitches, the bigger and lacier the picot will be.

Chains are created using both a shuttle thread and a chain or ball thread. Rings are created using only the shuttle thread. To tat a ring pinch the end of the shuttle thread. Wrap the thread up over the back of the fingers of the left hand as you did for the chain, but instead of winding it around the baby finger, bring the thread across the palm and pinch it again. You will have a complete circle around the fingers when tatting a ring. The formation of the stitches is identical to the chain. When you have completed the ring pull on the shuttle thread and the ring should slide closed. If the ring doesn't close then one or more stitches aren't flipped.

Usually you reverse work - turn the work upside down - when you switch from rings to chains and from chains to ring.

Rings and chains are joined to one another through the picots. Shuttles that have a hook on the front are more efficient for joins. Insert the hook into the picot and pull up a loop of "working" thread, then slide the shuttle through the loop. Use the fingers of the left hand to pull the loop back down trapping the shuttle thread underneath. Make sure that the shuttle thread still slides after the join. It is easier to check as you are working than to have to un-tat.

Older patterns are written in long form but newer patterns use visual diagrams where the circles or ovals represent rings, the arced lines represent chains and the short little lines or sometimes tiny loops represent picots. A join is indicated by a short line touching any two parts like two rings or two chains. The numbers shown around the outside of a ring represent the number of doublestitches to be tatted for each section of the ring.

For example a visual diagram of a ring might show an oval with a short line on each side and one on the top. If there was a number 7 above and another 7 below the short line on the left and two more 7's on the left. You would tat 7 doublestitches, leave a picot space, doing that 3 times then tat 7 more doublestitches before pulling on the shuttle thread to close the ring. The number of doublestitches required for each segment of a chain is usually shown alongside the chain.

Sometimes three rings are joined together forming a cloverleaf or trefoil. To form a cloverleaf, tat the first ring, do not reverse work. Tat the second ring, starting it as close to the first ring as possible leaving no gaps. Join it to the side of the first ring. Do not reverse work and tat the third ring close to the previous ring again joining the rings at the side. After all three rings are completed, reverse work to tat the chain.

A good diagram should let you visualize the finished lace even if you don't have a picture, but a picture always helps.

Monday, January 01, 2007

Floral Tatting

Several years ago I self published a book called Transitions in Tatting from Flat to Floral which is no longer in print. I'm thinking about re-printing just the floral part of the book as people keep asking me for flower patterns. The front cover shows you the flowers.
My criteria for these flowers was that they had to be life size, and they had to be constructed in such a way that wire wasn't needed for the flower to hold it's shape. The purple orchid on the upper right was tatted by Sue Hanson and was returned to her after the photo was taken. All of the other flowers have been sitting in the vase exactly like the picture since 2000 when the book was published. None of them have wilted yet!
The little white flower in the middle is a
Daisy
Then counter clockwise from the bottom left
Stargazer Lily
Daffodil
Red Carnation
Purple Tulip
White Carnation
Purple Cattleya Orchid
Daffodil
Delphinium
Orchid done in Purple Mauve and White
Red Tulip
Also included were Leaves for the Tulip and Daffodil and an English Ivy.
The designs were made especially for use in bridal bouquets and wedding veils.
I have the hard copy that I could have photocopied, but I'm not sure about the original drawings. In the course of going through several computer upgrades and changing hard drives 4 times I'm not sure if the old files are still intact. Having the hard copy to work from I could probably re-draw the flowers so that I could make them available again. Anyone interested in a book of flowers?