Thursday, May 26, 2011

Blue this time

When my sister and brother in law were visiting on the weekend they thought I ought to make lots of bracelets like the one shown in the previous post. Sounds like a good idea in theory. Then I pointed out that it takes a lot of time to make and it wouldn't fetch the necessary price. When pressed to say how long it took I figured 4 or 5 hours. That particular bracelet had been done with beads from a tube of mixed beads that I had separated out to get the shades I wanted.

Just out of curiosity to see how long it would take, I thought I'd do another one although I wasn't about to spend another evening separating beads. So I went through my meager stash of beads and matched up 2 colours of beads with a solid and variegated thread, and set out to remake the bracelet.  Right after I tatted the first ring I twisted my hand in an awkward position that made the muscles in my thumb and wrist cramp up.  I thought about tatting left handed, but even holding the thread caused my thumb to hurt.

Between the pain in my hand and the excitement of the hockey game, I only got about half of one side done before I put it aside and went to bed. I picked it up the next evening and finished it. So I guess the real answer to how long it took is probably a leisurely 8 hours.

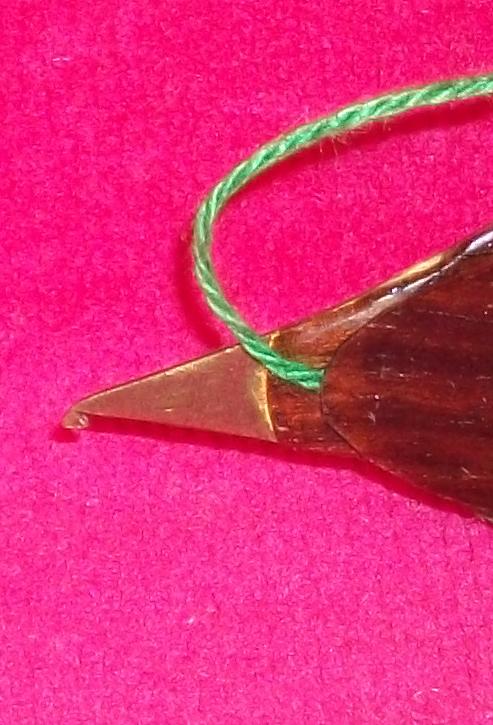
Of course there were some little interruptions along the way like having to ice my hand, pulling the hook out of my shuttle while doing a bead join and nearly shredding the thread a couple of times doing a really tight join. When there aren't a lot of bead joins to do, I position the bead and hold it in place with a safety pin until I need to make the join. When there are a lot of bead joins like in this pattern I just guess at the needed picot size and sometimes it's really tight. Then, when I use a very fine hook, it's easy to split the thread and only grab half of it. At that point it's as likely as not that the hook will tear the thread. I didn't want to deal with broken thread, so I just worked very carefully when that happened. Then there was the search for the second half of the barrel clasp that somehow became detached and got lodged down the side of the couch.

Now that it's done, I don't think I like this one as well as the purple bracelet, although it's the same pattern and I'm not sure why.

Saturday, May 21, 2011

A bracelet finds a new home, and the world goes on

The purple bracelet I did in April has found a new home with my sister.

She came for a visit today and admired it enough to want to wear it when we went out for dinner. I didn't think they were colours she would like or I would have mailed it out in her birthday card instead of the bookmark I sent. Her birthday's not until next week and she hasn't received it yet so I couldn't really say anything except take the bracelet with my blessings, I can always do another one. She and my BIL thought that bracelets like that would sell really well. Maybe so, but not likely for how much time they take to make. I ought to sit down and time the next one to see how long it does take.

On another note, was anyone surprised that the world didn't end? Anyone who knows their Bible could have told you that foretelling the exact time of the end is an exercise in futility. When Jesus was on earth his disciples asked
"what shall be the sign of thy coming, and of the end of the world?" Jesus gave them a lot of information, pointers to when that day would come most of which were, - things will be bad, they will get worse both in natural disasters like floods, earthquakes and famines and in increased wars and conflicts and all of these things will increase in frequency and magnitude like birth pains before the end comes. You can read it all in Matthew chapter 24. BUT, one of the things he also said in the same chapter in verse 36 "But of that day and hour knoweth no man, no, not the angels of heaven, but my Father only."

Because of that, I always think that when someone makes a exact prediction of the time of Jesus' return and the end of the world, I can count on it that they are wrong. Of course that same chapter of the Bible says that an increase in false prophets is another forerunner of His return. The Biblical standard for a false prophet is anyone who predicts an event that doesn't happen. Camping has already blown it by his 1994 prediction which didn't come to pass and of course having it happen twice just tells you he has really missed the mark. I feel sorry for the people who follow his teachings, but God doesn't ask you to park your brains at the door when you believe in Him. He does ask you to look into things for yourself. You are supposed to use that organ between your ears, not just blindly follow any and every teaching that is out there.

I get really annoyed, when people who have rarely, if ever, cracked open the Bible, talk about what they think the Bible says. What some people know about Christian beliefs they have learned from Hollywood movies. Guess what? Movies lie. You want to know the truth? Read the Book for yourself.

Wednesday, May 18, 2011

The attention span of a flea

I think that must be the problem. Waaaayyyy back here I was working on a bunch of 3D flowers for a new book. It got stalled when this mess here just wouldn't co-operate. I can make it work, but one of the things I was aiming for was something realistic, life size, hold it's own shape without a lot of tatting. It's that making it fit into the predetermined mold that has me momentarily stumped.

So I wandered off into making a tatted cross, and meandered through a beaded bracelet. Then I got waylaid by sequins. I drew a design that I haven't tatted yet but I did want to see what the flower would look like as a pendant. So here it is.

But before I could get to the one I drew, I got sidetracked again......
Like I said, the attention span of a flea.

Wednesday, May 11, 2011

Still playing with sequins

I just had to try it again, this time without having the sequins lining up in a row. I'm not sure if I like using sequins or not. I might be falling out of love with the idea.

The hole in the sequin offered enough resistance that it pulled the hook right out of one of my shuttle. It was an older shuttle that has been broken and repaired several times, but it's an English Aero, so I just keep using it. I love my Aeros.

Here's what's happened so far. I might have one more idea to try.....

Friday, May 06, 2011

More Sequins

After I did the sequin bookmark, Fox and I had a couple of emails about using sequins in tatting and I thought one possibility might be a an amulet bag. Fox dared me. So I did.

The start of it was the sequined flower, which I suppose might just be used as a simple pendant, but I was aiming for a bag, so I wanted rectangular. I started with the flower shown in the previous post.

I drew the pattern SmartDraw. I use Serif's program because it's free for the design class, but I've been using SmartDraw for years and I just stick with my old version 4 program. I prefer it's preformatted curved line that I can drop and drag, to the straight line you have to add nodes to, in a lot of other programs like Serif. Once I had the basic shape I tried several methods of adding chains in order to give me the rectangular shape I needed. Then before going to sleep I printed it off and tatted the first row.

As I was nodding off to sleep I started thinking about tatting a back for the bag and how I might attach it to the front. I thought that the back could be quite plain and rows of ring and chain would do the job. Then I thought a row of split rings in the shape of a rectangle around the flower, would frame the flower and give me a base for attaching the back to it.

So when I woke up, I cut off the chains I had added around the front and just tatted a long string of split rings. I laid them around the flower, tying them where the frame and flower touched and when I knew what I needed, I cut off my trial bit of ring and chain and did it again, joining in the appropriate places.

When it came to doing the back I thought about adding more sequins and what I was hoping for was loose floppy sequins that shimmered together in rows. I went looking for sequins with a single hole along the edge, instead of the ones I have with a hole in the middle, but I couldn't find any. So I had to use what I have. Pinned in the middle, these sequins don't shimmer and shake. Since my foundation frame row was in split rings, it just seemed practical to continue that way and I very carefully tatted my first row, starting at the top.

About 2 rings in it occurred to me that if the sequins needed to be hung from the top, then I'd be doing joins and adding sequins at the same point which might be awkward and difficult. So I retro tatted everything and started again at the bottom. Of course the bottom of the bag has to be attached as well, so that just made the first row that much harder to do. I was being very careful not to repeat the same mistake I made on the bookmark so I was quite particular as to which side I was spearing the sequin on so that they all laid in the same direction.

When I hit the end of the row, I needed to join to the bottom, join to the flower frame on the side, add a sequin and, of course. climb out right where the sequin was, to the next row. I was adding the sequins in the same way you'd do a bead join and it needed a stitch after it to hold everything in place. There ISN'T a stitch after when you are climbing out. So I removed a stitch before the sequin join, made the join and added the last stitch. Which means that the sequins where I climbed out aren't exactly in the middle of the side of the ring.

As I was doing the next row, I realized that I could either do a lock join on the split side of the split ring, or I could do it the normal way. The lock join on top of the sequin looked ugly, so I went for my normal join. Several times the split rings snagged and didn't want to close. It might have been the sequins or it might have been the thread. The Mocha Brown Lizbeth is the first Lizbeth thread that I have had that has slubs. Most of them have been tiny loose excess bits of fluff along the thread, but a couple of them were bigger and made for less than smooth ring closing.

After I'd done a few rows, I noticed something. Not all of my sequins were facing the same way. I think it was when I had to climb out through a split ring while adding a sequin that threw me off, or maybe it was tatting in the dark while watching TV, or the fact that my little container of sequins got spilled all over the couch. After the first backward sequin, 2 rows back, I stopped caring. I just wanted this thing finished. When I got to the end I decided I wanted a little something along the top of the bag to cover over the picots that were folded down to make the sequins lay over the rings. So I added a row of chains along the top and a long row of split rings for a hanging chain.

I could have re-worked the front so that there were brown rings connecting the flower to the frame, but I'm done with this so I cut a length of ribbon and tucked it in the bag. If I were going to use it to hold something I'd sew the sides of the ribbon closed, but as it is, I'm done. Nothing left but to sew in ends and scan it.
Here it is, front and back.

That's when I noticed THIS.

Give me a break. What is a pink sequin doing in a container of yellow ones? And why didn't I notice it until I was scanning it?

Monday, May 02, 2011

Credentials? 210 plus

In the last couple of weeks I've had emails from people that seem to suggest that they are trying to find out what kind of tatting credentials I have. The simple answer of course is NONE. I don't pretend to have any kind of qualifications except that I like tatting and I tat a whole bunch, all the time. At the table, watching TV, walking down the street, in line at the bank and the grocery store, in waiting rooms, in the bathroom, in the kitchen, lying down, standing up, sitting still, in my sleep. A lot of tatting.

Have I taught tatting? Yep. One on one, in groups, on line, on the phone, over the internet. If someone will sit still long enough I'll try to teach them to tat.

What makes me qualified to teach people to design tatting? Nothing much. Just over 210 published patterns  in 4 books and 24 newsletters and a whole bunch more like this one that may or may or become what it's intended to be.


This is just for Fox, a beginning possibility for that sequin project we were talking about. It might work. I'll just have to tweak it a bit to see.

Thursday, April 28, 2011

Sequined Bling

I was thinking about turning the very beady bracelet I did the other day into a bookmark, but I have too much respect for books to subject them to the spine killing treatment of beads. So the problem is how to get the bling without the hard fat lumps that beads present. Then I had an idea. How about using sequins? All of the shine with none of the fat.

Here it is, in all it's unblocked glory. The threads are size 20 Lizbeth Turquoise Lt #662 and Summer Fun #104 with pink sequins. The reflection from the sequins really inhibits acquiring a good scan and although I tried numerous background colours nothing really worked well. Can you spot the one upside down sequin?
Here's the little miscreant. I was trying so hard not to do that, and only noticed it as I was about to finish the bookmark.
I misjudged thread length - twice. I reloaded the shuttle the first time and measured out what I thought I'd need to finish and ran out again 2 measly rings from the end. Two. rings. However, as a designer these things happen frequently, so adding in more thread is no big deal. See the instructions on the sidebar for how I do it. The ends are hidden while I add the thread. So it's just a matter of cutting off the ends when I'm done and you can't even see where I added the thread.

I don't usually use something as thick as size 20 for bookmarks, but as this one is probably going to be used in paperback novels it's all right. Not only that, the thickness of the thread will help to cushion the pages from the edges of the sequins better than size 80 would. Over time the sequins may cut through the threads, but it's a bookmark, not an heirloom.

Most of the time I block my work, even though I tat tightly enough, and pull it into shape enough as I work that it doesn't really need it. I don't go the -pin every picot in place- route, but I do generally pin out the major points before I hit it with a shot of super heated water from the steam iron. I wouldn't want to put the iron on this one, though. I expect that the sequins are made out of plastic and would, A- melt and lose their shine and shape, and B- stick to my iron and make one horrible mess.

Wednesday, April 27, 2011

Tatting 101 - Filling a shuttle

I get asked so many beginners questions so often, that in defense of my time, I've decided to do a Tatting 101 with the basics and I thought I'd start with the one that is the simplest, but the one that I still get asked: How do I get the thread on the shuttle?

First, there are different types of shuttles. The most basic shuttle is a flat shuttle. Here is a template for one that you can cut out of an old business card.
The shuttles pictured here are the 3 basic shuttle types. The little one on the left is one my hubby made for me out of walnut wood. Some flat shuttles can unwind if you drop them. This one doesn't. The middle shuttle is a post style shuttle, this one is a David Reed Smith shuttle. The one on the right is an Aero bobbin style shuttle.
No matter what kind of shuttle I use, the method of putting the thread on is the same. I use a simple, practical slip knot. Start by wrapping the thread around your hand like this. Then poke a loop of the thread coming from the ball through the wrap like this.
Then hold the thread end in one hand and the loop in the other hand and pull apart.
You end up with a loop and the knot can slide up and down. Which is where it gets it's name slip knot from.
With practice you can arrange the knot close to the thread end, but for now you can just cut off the end leaving just enough to hold onto.

On a flat shuttle, take the loop and position it around the shuttle going into the hole on one side, around the back and out through the hole on the other side. Then holding the thread end in one hand and the ball end in the other hand pull and the knot will slip making the loop smaller and smaller until it's snug against the shuttle.
Then wrap the ball end of the thread around the shuttle in the hole on one side and out the hole on the other until you have the shuttle as full as you want. Some flat shuttles have fanciful shapes and only one hole at one end. These shuttles are often just curved at the other end so the the thread is wound through the hole and around the flat end.
On a post style shuttle the top and bottom sections are called blades that are joined with a post in the middle. They clamshell together at the tips which often look like the pieces are attached, but they aren't. This closeup shows you that the thread actually slides through between the blades.
For this type of shuttle take the loop and slide one end through the blades at the front. Then take the loop around and slide it through the blades at the back so that the loop is around the post as shown here. Pull on the short and and ball end of the thread until the loop is pulled tight against the post.
Then wrap the thread between the blades at the front and the back around the post until you have as much thread on as you want. If the loop isn't quite tight enough you can hold onto the short end until you get it started. You will hear a soft click as the thread passes between the blades. Repeatedly using thick thread can cause the tips of the blades to open up a little as the thick thread is continually passed through them. That will make the shuttle useless for finer threads. Don't overfill (filling it top to bottom of the post and outside the edges of the blades) a post shuttle, especially the more expensive ones. Overfilling the shuttle can cause the blades to separate too much and become "sprung". A sprung shuttle is useless.
Bobbin shuttles have a removable bobbin. Except shuttles like the antique detach a spool shuttles which twist apart to expose the bobbin. All of the modern shuttles have bobbins which come right out.
Take the loop and position it around the bobbin. Pull on both ends of the thread to tighten the loop.
If you have an Aero shuttle, the bobbin will fit on the end of the shuttle making a handle for easy winding. Cheap Aero look alike shuttles that have a similar shape have an end that is too fat to sit inside the bobbin.

Wind the thread around the bobbin and insert the bobbin back into the shuttle.
If you use a shuttle with a hook, pay attention to the direction the hook is facing. I like to wind my shuttle so that the thread comes out at the back on the same side as the hook. I found when I first began to tat that sometimes the hook got caught in my work and sometimes it didn't. Then I discovered that if the hook was turned away from the work it didn't catch but if it was turned the opposite direction it did. Something as simple as which direction you load the shuttle can effect the way you tat. Different people tat different ways so watch how you are holding your shuttle and you will find which direction works best for you.

Monday, April 25, 2011

Nothing much going on

There's not much going on here, mostly because we've been up to our arm pits in doing the taxes. What has been done is a bracelet, with lots and lots of beads. I used Lizbeth size 20 Purple DK and Purple Splendor with mauve beads on the rings and lilac beads on the chains. The beads on the joins are gold beads. I'm please with the way it turned out and I thought that the same design would work as a bookmark without the beads until I realized that without the bling it was just facing rows of plain ol' ring and chain. Unimaginative and boring.

I must think of something else. I want to be tatting and the usual well of inspiration is decidedly dry at the moment. I know what will happen though, the second I launch into the next design class I'll have ideas come thick and fast, just when I have no time to tat.

Tuesday, April 19, 2011

Comments please

I frequently get asked things that initially make me want to jump up and scream NO WAY! Frankly my first reaction to some things is tell people to go - - - - - -. Well, you can insert your own favourite expletive. But I have this other inner voice that always makes me step back and try to see things from the other person's point of view. Sometimes when I've seen both sides as well as anyone can, I don't always see a clear road to follow.

I spend a lot of time thinking things through. I'm never happy just doing, I want to know why. Over the years I have read people's comments about not being able to design and I started thinking about the first efforts I made in designing. I thought about what I did, why I did it, what problems I had, what was helpful, and what was not. Lots of thinking. As time went on I ruminated over this information and began to direct the thought process into how to impart my learning experience to other people. I considered how to break it down into something that could be worked at by someone with only basic tatting skills.

Then I took all of what I had been thinking and wrote it down creating diagram and pictures to go along with it. Then I though of using software for the purpose and did the same thing taking step by step screen shots and added this information to it. Then I took it a step farther to show how the drawing software could be used to create.

It took weeks of planning, writing, creating images and editing to create a course that I only charge a modest $20 for.

Now that I've shown how it can be done, what do you think my reaction would be when someone asks if they could take my lessons and translate them so that they could teach them?

Comments? I'd like to know what you think.

Wednesday, April 13, 2011

Rant about tatting....

...for no particular reason. Fox mentioned the other day that she wasn't doing the Catherine Wheel join correctly and it got me to thinking. I am mostly self taught and until I went to a tatting workshop, I had never seen another tatter, or another tatter's work. I learned tatting, like I learned to knit crochet and embroider. I was shown the first steps and then just ran with it. If a pattern said to do something I didn't know, I did whatever worked for me. So I don't get bent out of shape by people talking about doing what is "right" or "proper". In short, I don't worry about tatting police. I see so few tatters, it isn't likely to matter and when I do they mostly are impressed by what I have done.

I am personally not impressed by bazaar junk done by a half blind granny using rope like thread and beads designed for use by a 5 year old. My apologies to elderly, visually challenged femmes assisting in raising funds for worthy causes, it's just a personal preference. I like to think that when something leaves my hands it can stand up to the close scrutiny of the average person. Good enough, is not good enough for me, I expect excellence from myself.

That said, over the years I have heard numerous things about the "right" way to tat and I have to admit that I mostly ignore it. Things like front side back side tatting. I personally don't think that it looks better, it just looks a little different. I don't do it and I make no apology. I do a lot of 3D tatting. When you look at a tulip, which is the front? The inside, or the outside? I like knowing that when I pull a doily out of the wash and slap it down on the table, which ever way it lands is right side up. In designing this necklace I wanted a sort of netting effect where the motifs join the necklace band so I used just chains over that section. Which meant when I got to the end of the row I just finished it with a split chain and turned around to do the next row. The recipient will never know or care that I didn't do front/back tatting.

I like balance. When I do a join, a join is a join, not a stitch. It seems to me, that in a design where a ring has a lot of joins, that counting the join as the first half of the stitch means that I'm losing a half stitch for every join which will make the ring smaller than a ring of the same stitch count that doesn't have joins. I don't count the join as a stitch, I've been doing it that way for over 30 years and so far it's worked.

Tiny invisible joining picots. Baloney! Imagine a mat full of lacy motifs all connected together. Envision delicate picots evenly spaced around the edges of each motif so that the lace is suspended in a diaphanous spiderweb of picots. Now picture the same thing where each motif is jammed up against the next one because of tiny joining picots. In my opinion it's UGLY. I don't do it.

Years ago when I was tatting the flowers for my wedding I needed to tat a lot of carnations in a short amount of time. I was literally -tatting in my sleep. The pattern had a very short split chain at the end of each row. Due to tatting late at night I often skipped the split chain, just finishing the row and then doing a slip stitch back to the last picot. In the ruffles of the carnations it wasn't visible and I was waaay too tired to be picky. I wouldn't have done it in a place where it would show and I wouldn't have done it if I'd had more time and hadn't been tired. Can you see them?

There are a lot of little things the tatting police probably wouldn't like about my tatting. That's OK. I don't tat for them, I tat for me. I tat because I enjoy tatting and I enjoy the fruits of my labour.

Just because the general consensus is that you ought to do things a certain way, doesn't mean that there might not be another equally effective way to do things. You can't always assume that because you do things differently, that you are doing it incorrectly. Who says you have to do things one way and one way only? You might be the person who finds a whole new BETTER way of doing things.

In case anyone is interested, here's a closeup of the assembled motifs and the little inset that I used to finish it off. I would have taken better pictures but it was late and it's already been packaged up and mailed off.

Sunday, April 10, 2011

Fringe Element Tatters Tat and Chat - are you coming?

One of the Fringe Element Tatters has arranged a Tat and Chat at the Eatonville Library in Etobicoke on April 17th. That's Toronto for anyone not in the GTA. I'm just north of Toronto, in Brampton and I don't usally travel too far from home. Firstly because I don't drive, and secondly because our car is 23 years old and I'm reluctant to be further than towing distance from home and thirdly, because hubby, who is my chauffeur, isn't always well enough to drive, or well enough to leave on his own. Meniere's can make him suddenly and without warning, too dizzy to stand, can make him see double, go deaf, and lots of other not nice things. But, if he's well enough, Etobicoke is close enough to make the attempt and it's only for a few hours, not a whole day or a whole weekend. So I think this is something we can attempt.

It's nice to meet local tatters, but it's even nicer to finally meet tatters that I "know" from the internet. Anyone else in the Toronto area planning on going? I've already called Fox and we've agreed to tentatively give it a try but it would be nice to see some other folks too. If we have a bunch there are lots of things we could try.

Friday, April 08, 2011

The picture in my head is nothing like the tatting in my hand.

I had this idea to take a 3D flower, just use part of it and add a bead in the centre. The purpose of this exercise is to create a necklace instead of a bookmark or hanky for my sister whose birthday is coming up. I have FIVE sisters, but this one shares my birthday and while none of the family bothers much with sending birthday cards and the like, this one sister does. And we share the same birthday so it's really hard for me to forget hers.  No, we aren't twins. Mom just happened to hit the same day 15 years apart. If you think that is novel, one brother was born on New Year's day and one brother was born on Christmas day. I think Mom was trying for Easter with Sis and I. For anyone who's keeping count, we used to have 11of us around the table. Mom, Dad, 3 boys, 6 girls.

Anyway I had this idea, but when I use just part of the design, I lose the central part that used to hold it all together. I started off with the large bead in the centre of a ring, which was wonderful, except that I needed to throw rings off the ring which was more problematic. So I switched to a SCMR with a large half inch bead in the centre, which worked but was very awkward to add the bead and close the ring. Once that part was done the big bead got in the way while tatting and to further complicate matters I did the rings including the SCMR in a solid colour with a variegated thread around the outside.

I have maintained some of the 3D effect even though changing the stitch count on the centre section flattened it out some. I opted for a larger flower shape in the middle and was going to end up with an upward facing point along the top edge or  with the side flowers pulled in toward the middle, which is what I finally decided on. I was envisioning a narrow tatted band with the flowers hanging off the middle of it with something nice and decorative bringing it all together.

What I have is 3 flower shapes that sit on top of one another if I stretch it out straight, or the side rings on the ends of a U shaped curve. I was thinking of hanging the flowers from a row of split rings, but I didn't like how chunky that looked. I switched to a plain chain, but that didn't look like anything. So I've decided I need to tat across the top of the U shape, add a bit that hangs down in the U and maybe a short chain into some graduated split rings. Or something. I need to get this done and mailed in the next day or so. It might be faster to tat a hanky edging. Or not.

This is SO NOT what I was picturing.

Pardon the crappy picture, may camera battery is dying.

Thursday, March 31, 2011

Easter Cross

I'm in  designing limbo. I have lots of thing that need doing that I'm just not taking the time to do right now. Plus I have lots of things I want to design that aren't working the way I want them to. One of the designs that I am determined to get done is a 3D pattern that just isn't working out to my satisfaction. My criteria is that it has to be readily recognizable. It has to hold it's shape without support. It needs to have the minimum amount of tatting to acheive all of these things. What is irritating me about it, is that each permutation of the design takes about 10 hours of tatting, just to get to the point where I know that the design isn't going to work. That means that it isn't a quick tat and after 5 tries, I'm no further ahead, and it's getting frustrating.

On the other hand, I needed a new cross pattern and this one whipped out as fast as I could tat it. This one is done in size 50 or 60 thread, but this one didn't get labelled so I don't know which it is. I did 4 pattern repeats on the short arms and 6 on the long one. I ended up with an empty space in the middle and added a 4 ring motif, but if I was doing it again I'd just throw them off the chains in the middle.

Since it will soon be Easter and time for tatted crosses, I thought you might like the pattern so here it is. I'm running out of hours so I haven't even proofread it yet so there might be something wonky, just so you know.


Wednesday, March 23, 2011

Nothing to see

I went to the doctor's with my sweetie this morning. That was after I ran out and shovelled the drive so that he wouldn't try it. We had already stored the shovels and were talking about seeding the lawn yesterday, where did this stuff come from?

Anyway, the reason for both the doctor visit and my concern about him shovelling are some torn bicep tendons with a 4 cm separation. Last summer he swung his arms to catch his balance and felt something pop. His arm was bruised and felt tender for a few days but it seemed to heal up and he didn't think much more about it. Then some time later he noticed a soft lump below where his muscle should be and after a while we thought he ought to get it checked out. The doctor thought it might just be some fatty tissue, but sent him for some tests. We got the results yesterday letting us know it was a torn tendon and we were in this morning to see about a referral to an orthopaedic surgeon.

I forgot to bring my tatting. I tried pulling a hair to tat with, but as my hair was braided it wouldn't pull without breaking. Fortunately before I went bald we were in to see the doctor. Now it's just a matter of wait and see. Apparently the specialists are getting so specialized they only deal with certain types of surgeries.

Sunday, March 20, 2011

Tatting, sort of

I haven't dropped off the face of the earth and I have been tatting, just not tatting things I can show. I've been test tatting the motifs from the Design-Tat class.


I've also been doing a lot of creative work for a new book. Sadly, most of it is a jumble of cut off thread and hours upon hours of tatting just to find out what doesn't work. As soon as I have them done right I'll do them again in the right colours.

Of course hours spent in the garage waiting while they work on the car makes for lots of tatting time.For the first time ever, the car didn't pass the e-test. It's a 23 year old car that hubby has kept in immaculate condition. I kid you not, he shampoos the engine. The top of the engine block is the same shiny aluminum it was when it rolled off the assembly line, so we were really surprised when it didn't pass the test. So it went into the shop for a diagnostic. We knew when one of the fuel injectors failed in the fall that another one of them was not at full capacity, so we assumed that was the problem, but the test suggested a vacuum leak. Hubby asked the mechanic if it might be the catalytic converter but he said no, definitely not. So we (we, meaning hubby, I just stand around and act as a third hand) changed the faulty fuel injector, tightened all the hoses and clamps and tested for leaks before taking it back for another e-test. It failed again, although just barely. It went back for another diagnostic. No vacuum leaks and no indication why it shouldn't pass, but there was a smell of gas. On further discussion with the mechanic it was suggested it might be the catalytic converter. It was, but it took trying several shops to get one for a 1988 Z24, and several other shops to get one that could put it on right away. Once that was done it passed the test with 0 emissions. Good old car. 300,000 km and it has more get up and go than most new vehicles. We're going to hate to part with it, but they don't make parts for it any more and you can't even get parts from the junk yard for it, so it's days are numbered. 

Friday, February 04, 2011

I haven't been tatting

I've been doing this instead

The ruler is in there for perspective. I should probably add a couple of small flowers around the outside. I've got 3 squares done, another butterfly and a bird. I was thinking of doing a quilt. The embroidery is the easy part. Having to stitch it all together doesn't sound like fun. So I may have to think of something else to do with a handful of embroidered squares. It always amazes me how heavy a little square feels when it's been embroidered.

Wednesday, February 02, 2011

Stunning Silver

Busy, busy, but I just have to show you what was sent to me recently.
Aren't they gorgeous? So delicate that they look like a puff of wind would blow them away, but so sturdy they could stand up. These, of course, are silver tatted earrings made by Alan aka Joyful the clown. They are simply elegant and something I shall certainly treasure. Now, what can I wear to go with something this beautiful? They are definitely not blue jeans and sweatshirt attire. Although, come to think of it, if you wore these with blues jeans and sweat shirt, you'd definitely be dressed up.

Friday, January 14, 2011

We have internet! O drat, we don't have water!!

Wednesday our brand spanking new modem arrived. It didn't work, but it arrived. Just in case (not likely, but you never know) hubby installed it on his computer using the also new Cat 5 line we just strung through the walls. To be doubly sure that there is nothing wrong with the Cat 5 two strands were used instead of one to make the connection to the, also new, jack. After which hubby couldn't even log into the modem program to set it up. So he called the IP yet again. After some lengthy attempts the IP advised us they were going to check things out and call us back, which they did. After several tries it was determined that some settings in our internet browser were interfering with the operation of the modem and that the initial address we had been advised to use wasn't working. An alternate was suggested and after the preliminary handshaking the internet roared back to life.

I am so deliriously happy to be able to connect to the internet again and not lose the connection 2 minutes later. I can send and receive email, I can upload pictures to Blogger, I can even send files through the internet! Hooray!!!!!

Of course, this morning, I have a new problem. Remember this in 2008?

In October we had this.

Christmas morning as I got up to put the turkey in the oven for our afternoon feast, this was trundling past the bedroom window headed for yet another  little spot.


This morning we have this.
That makes 3 water main breaks in 4 months, none of which are covered by the city because a condominium townhouse is private property and we, it's illustrious owners, will have to cover it ourselves. Mommy! I want to move.

Wednesday, January 12, 2011

Not right, Not wrong, Not working

Lest you think I haven't been tatting at all, this started out to be a necklace that came to a point in the middle, but obviously I wasn't thinking clearly because what I have at this point resembles a collar rather than a necklace. I planned for the first row and the last row to have beads, and if I'd had beads on the last row I would just call it quits, but I didn't and now I have something that I have to add a row to to add the beads, except that it's already too wide and adding more will make it wider. ARGGHH!


Next question, what do you do with a project that isn't what you want it to be but isn't garbage either?

On the internet front, a second modem was sent to us express. This one was new in box and should just plug in and run, but it didn't. We have been told that the phone line into the house is fine and that although our purchased modem is functioning, it isn't an "approved" modem meaning that it will probably work with the system, but it might at times have issues. The new modem just received is approved and should resolve all of our problems. If it doesn't then the problem might be with our server's network. Hubby is currently wiring in the new Cat 5 cable to the demarcation point. With the new cable in and all of the phone lines disconnected at the demarcation we should have new line, new modem and the internet should sing.

If it doesn't the issue isn't with us, our equipment or our phone line and heads will roll. Hubby has more tenacity than a pit bull. He's brilliant about a lot of things and he knows when he is right. Don't argue with him, you'll lose.

Tuesday, January 11, 2011

2011?

2011 is set up to be a good year. At least considering how bad it's been so far, it can only improve. Our internet connection died on January 1st. We have spent 6 to 8 hours on the phone trying to sort it out. There seems to be a combined issue of a dead modem and something problematic on the line. January 1 we told the IP that the modem was bad and to ship a new one. January 5th they advised us that they hadn't shipped it yet because they were waiting for a report back from Bell. So finally they got the report from Bell and sent the unit which was supposed to arrive yesterday. It finally came today, in a box, without packaging just rattling around loose. We plugged it in, reconfigured it (we're getting good at this, we've done it about 50 times since the beginning of the year) and nothing. Just to verify that it's the modem and not a problem with the internal phone lines, we plugged it in at the demarcation point where the phone line enters the house and disconnected all of the phones. Sure enough, it's dead as a door nail.

We've had issues before, so we actually bought a backup modem for times like this, but even with our fully functional modem we've had issues We have download access, so I can view web pages and receive email, but I can't send files or email and periodically my connection fails altogether. Doing things like the 25 Motif Challenge has been a "challenging" experience. Between loosing connectivity and getting kicked off my computer while the modem gets reconfigured again and again it has been difficult to view the blogs. Of course once I view them, I have to upload the pictures to the challenge blog which is an interesting experience when your upload speed is slower than dial up. Last Saturday I spent 12 hours trying to do the blog post.

Don't even get me started on the nightmare of trying to upload files for the Design-Tat course. It took 2 days just to get 1 file uploaded. It would look like the file went through and then it would suddenly disconnect. Over and over again. The file was so large I couldn't even use dial up to send it, but finally after repeated attempts it went through.

Unlike most homes we have a single dedicated line for the DSL service. When we went with DSL a few years ago it just made sense to run a separate line for the modem so there is one phone line from the demarcation point, which in our home is the basement, straight to the modem on the second floor. So a lot of the typical comments that "it's your phone line" are highly unlikely. However after the 3rd Bell phone technician was here insisting that it's the new (it's only been in 5 years) heavy gauge wire that is responsible, we went out and bought a reel of Cat 5 wire and we are now in the process of re-wiring the line to the modem. Anyone who has fished lines through a house can appreciate what this is like. Last night we brought it from the basement through the wall up to the second floor. Now all we have to do is run it under the floor to the wall and we can create a new junction up here and split off all the computers.

On top of all of this, since my computer is the one closest to the modem, it means that all of the configuration of the modem and the router have to be done on my computer. While my computer is being used I switch to working on the laptop. Except that when we need to connect to the demarcation point, it is necessary yo use the laptop. So since the beginning of the year I have begun and trashed endless emails and tutorials as I'm kicked back and forth from desktop to laptop computer. At one point the tech support person insisted that it was necessary to reset the computer's internet browser back to factory setting to fix the problem. Of course, the tech was an idiot and it did nothing to repair the issue, but all of my customization is completely gone and I'm left looking for things that no longer exist.

As frustrating as I find it, it's nothing to what my dear sweet honey is going through. He's the one who's having to deal with idiots on the phone, writing copious emails and repeating endlessly the explanation of what has gone on before while trying to get people half a world away to respond in an efficient and timely manner.

11 days and counting and we still don't have internet.