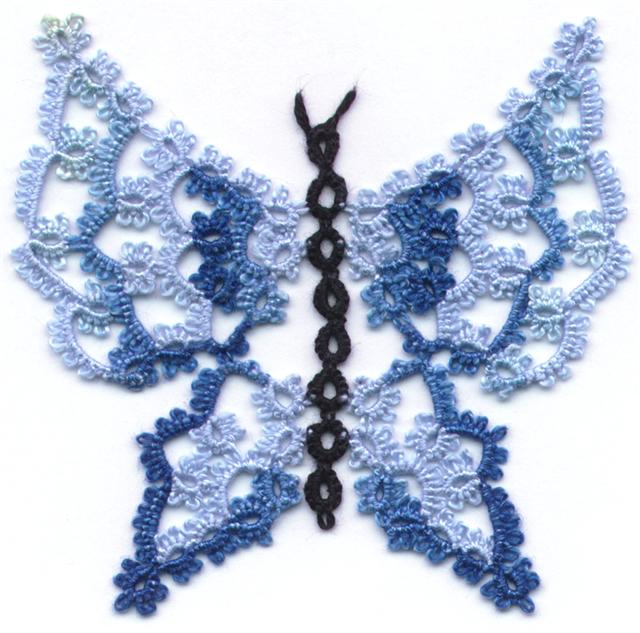
Here are some of my thoughts on Blocking, Stiffening, Framing and Storing your tatting. Some years ago I had several lengthy conversations with the textile conservator at the Royal Ontario Museum. She dealt with ancient and fragile textiles and I spoke to her about the proper way to treat those textiles and newer laces. So while I'm not an expert, I did get my information from one. I know what ought to be done to preserve our laces, but my feeling on the subject is that unless the lace is a special occasion piece such as wedding laces or christening outfits, it ought to be treated like any other fabric. So while I don't pamper my tatting, I don''t abuse it either.
This is going to be a long, wordy, picture free post which I may add pictures to later, but for now I'll just stick it here as a reference tool. So if you're looking for pictures, move along there aren't any here. If you're looking for information, grab a cup of tea, coffee or whatever and sit down and read to your heart's content.
There's whole bunch of things that are helpful to know. So here it is divided into 2 categories. Tatting with modern threads will stand up to washing as well as any fabric. I regularly throw my tatting in the wash with the rest of the laundry. So there goes the theory that you have to treat it with special care. LOL
Colours can bleed. I did a bunch of the
Grace snowflake on my web site and the red did bleed into the white, but when I kept rinsing it, the red bleeding disappeared. Modern cottons (at least in North America) use processes that resist the bled out dyes. That particular thread bled every time I used it, but with additional washings the dye disappeared so it wasn't permanent. The best solution of course is to use colourfast threads, but when you don't know how the thread will react to water it's always best to test a bit of thread before investing a lot of time into tatting with it.
What I do with small projects is wash my hands, pick up the motif and rub it in the suds, then rinse it out. Orvus is the recommended soap for fragile laces, but ordinary Ivory soap is a good choice and available in most grocery and department stores. According to the conservator who did the research Ivory laundry flakes compared favorably with Orvus. Any face and hand soap can be used (preferably not detergent) the major difference between the soaps is the dyes and the perfume additives. Newly made projects usually only have the soil from your hands on them so they aren't really dirty unless the dog/cat got to play with it. So gentle washing is usually sufficient.
Most of the threads that we tat with are cotton and cotton wants to curl when it gets wet. Blocking uncurls the fibres. If the project is small I block it on the ironing board and if it needs symmetrical blocking I throw a checked tea towel on the ironing board first. It gives a nice grid to pin things out on.
I am not as precise as some people who do tatting for exhibition and judging so I'm a little haphazard about my blocking, but I am also very good at eye balling it and don't use a grid most of the time. You know your own ability so work accordingly.
Lay the damp tatted piece on the board and spread it out. Pin the centre down. When I use the ironing board some pins will go through the holes in the board and others will hit the metal, so I turn them sideways so that they go through the padding and turn to lay between the padding and the metal of the board. Use stainless steel or brass pins for pinning to avoid rust.
Then pin out the outside edge at the compass points North, South, East, and West stretching the tatting as you go. It will stretch out. Then pin out in between NE, SW, NW, SE. Once you have the outer edges pinned out, start pinning out the shape of the piece. I don't like the look of pointed picots so sometimes I pin the ring or inside a chain, but pinning the picots does do a better job of crisping up the work because it pulls on the stitches. If you are doing an exhibition piece, pin every picot. Yes that's a lot of pins, do it anyway!
Next I push the pins flat, (sideways between the padding and the metal frame of the ironing board) and lay a pressing cloth or paper towel over the work. Press the lace with a hot iron. (What, your rayon thread melted? I told you this was for cotton. If you're working with something else use common sense.) Be careful of doing this if you use plastic beads. I use glass beads almost exclusively and had a horrid mess the one time I pressed a piece with large plastic beads on it. When the piece is almost dry pull the pins out. Lay the pressing cloth over it again and press flat.
Why use a pressing cloth? Because if you don't you'll flatten out the lace so that it doesn't look as pretty. The raised portions will be shiny where they were in contact with the iron.
For fragile, antique pieces and inherited heirloom pieces where you want to take more care use a large mason jar or any (glass) container with a secure lid. Add Orvus or Ivory laundry flakes or shavings of a pure soap and distilled water (or tap water depending on how careful you want to be about it). Add the lace and shake gently to agitate it. Rinse the piece thoroughly until the (distilled) water coming off of it is clean enough that you would drink it. Pin it out gently. New threads are tough and will take a lot of pulling, but ancient threads aren't, be careful.
If the piece is too big for the ironing board purchase a block of construction foam (styrofoam). It comes in big 8 foot pieces about 2 inches thick, so you can cut it into smaller chunks for blocking. I use a couple of small chunks for edgings and a big 2 foot square piece for things like doilies and collars. With these pieces I pin them out wet the same as on the ironing board and just leave them pinned to dry. Often I'll pin them first and then wash them already pinned, as it saves time. I just hold the whole thing under the shower, soap up my hands and lather the lace, then rinse again under the shower. I sometimes have one project pinned on one side and a second or third on the other side depending on their size/shape. If you need a grid to work from, you can attach a square of gingham cloth to the board and use it for your grid.
For exceptionally large pieces, tablecloth size big, you need to pin it out on the mattress. A job which is best done early in the morning unless you have a spare bed you can use. If it's too wet you can dry it with the hair dryer. Make sure you get all the pins out when you're done. You don't want anyone rolling over and getting stuck with a straight pin.
Pieces of white lace may be periodically laid out on the grass or over bushes so that they can be bleached by the sunlight as it does brighten them up. Hurray for ultra violet light!
------------------------------------------------------------------------Stiffening can be done with sugar, starch, glue or commercial treatments. They all have their pluses and minuses. Note: If the piece has beads on it, the stiffener may make the beads look dull and ugly. Rather than dipping the piece in the stiffener you may want to apply it with a brush.
Sugar - heat sugar water until all of the sugar has been absorbed. Dip the piece in the solution and pin it out. If your solution is too thick it will clog the picots and look ugly, water it down and try again. The good thing about sugar starch is that it washes out and doesn't harm the fabric. The bad thing is that critters will eat the lace to get to the sugar. If you have a problem with pests in the house don't use sugar.
Starch - wheat, rice, or corn starch can be used and the purer the better. For the kitchen challenged, things like corn starch go in first then add
cold water. Heat the mixture until it's clear. Immerse the lace and pin out to dry (see the note on beads). This is the
ONLY archival quality stiffening that can be used as it does stiffen, it can be washed out and it isn't attractive to most critters.
Starch, Commercial - can be used but generally doesn't give results as stiff as the first 2 choices and there's no guarantee that it won't harm the fibres. Different products give different results and have different drawbacks. Experiment with little pieces first before you throw a large piece of lace it these.
Glue - White glue of the kind that children use also known as PVA glue can be diluted with water and applied to a blocked piece of lace. Most of these glues either don't wash out at all or don't wash out completely. The long term results (long term as in 50 or more years) is that the pieces will yellow to varying degrees. That may be OK on some things but not so nice on snowflakes.
Clear Nail Polish - I have heard of people using this for small projects like earrings both to seal the finishing knot and to stiffen the tatting but I have no personal experience with using it so I can't comment on it.
Commercial stiffening products - things like Stiffy and a bunch of other brands of fabric stiffeners will stiffen the lace. Many of them are permanent. Some of them yellow with age. Some of them are made with polymers which do break down with age. Plastics off gas when they break down and cause damage to textiles. So use these with discretion unless you don't care about the lace.
-------------------------------------------------------------A lot of people like to frame their lace for display. If you are permanently mounting the lace make sure you use acid free archival quality materials. Use a pure cotton fabric backing and sew down every picot using cotton thread (or match the fibre, eg silk on silk). You can mount it under glass but the glass must not touch the lace so there has to be spacers between the glass and the lace. The framing must allow for air circulation. Sealing the lace behind glass results in condensation from temperature changes which will damage the lace.
If the lace is just being stored make sure to use acid free paper, or 100%cotton sheets, between the laces and store them flat. Larger laces which must be folded should be stored either with sheets of acid free paper between them or with sheets of cotton fabric between them. All laces should be taken out and aired at least once a year and re-folded in different places to avoid permanent creases which result in permanent damage to the fibres.
Laces should never be stored for a long term in plastic boxes or bags as this will result in yellowed fibres. Likewise they shouldn't be stored in shoe boxes or other similar boxes as they often have a higher acid content which will harm the fibres.


.jpg)


 Wait a minute, that's 25 motives. No hearts, no butterflies, just the same motives done a bunch of times and all of the lace for 3 newsletters.... and a whole bunch of hours spent blogging the fun everyone else was having with the challenge.


 That's just a smattering of the fragments, snippets and incomplete pieces from the bottom of my workbasket. What about yours? What do you think people will make of your leftover bits? Do you think some distant relative will scour the internet looking for thread to match an incomplete piece that you put aside in disgust because you hated working on it? Will all of your treasured pieces from round robins and exchanges show up in a bulk lot of "vintage tatting" on ebay?
 How about a useful way to keep and use all of your little bits? How about using your cast off bits and incomplete pieces, your mistakes and your ugly trials and turning them into something useful, durable and educational? How about dressing up an old pair of jeans and recycling them into a craft bag? How about (drum roll please!) another challenge!
 This one is a simple 4 ring base with a ring and chain border and with a little playing with the photo it could be assembled to look like this.
 Or this.
 Either way it's going to leave some big gaps between motives.
 I've been playing with another square I designed and I want to turn this one into something more than just a square motif, but I don't have a lot of time to play around with it. The design is fairly solid, at least solid for tatting. I used very tiny rings so that I didn't have really wide open spaces, but at the same time the long chains in the corners allow for some negative space to attract the eye.
  Sort of like this..... See the problem? To get outward facing curves I need to tat it from above, which I could do, if I worked it first and attached it using a separate row, repeating the corner sections as shown here. But you can see the problem, I'd have to work 3 rows before the joining row and I'd end up with points at the intersection of each pair of motives rather than a straight edge.

 The layout shows how to position the squares so it would be easy enough to convert this to tatting.
 It's nothing more than a short scarf laced up with ribbon to form arms. I could do that in tatting. without much trouble, although I think I'd like a little more back to it for warmth. If it's done in little squares it's easy to add a short row or two along the back.
  Very open, and very easy to reproduce in tatting.
  This one reminds me of the rose motif in my last post.

 That lovely little border edging around the rose becomes this gorgeous dainty lattice work.


 The border of the skirt front had 3 separate bouquets of flowers, but to give it a bit of continuity I cut pieces of the flower transfers and placed bits of them in each bouquet so while there were 3 areas of flowers they sort of bled into one another.
 I sort of like this section but the pink flowers detract from it as do the wine red flowers in the corner of the picture. Unfortunately, these were some of the flowers that I chose to intersperse. The Queen Anne's lace and leaves were nice and while you can't see it in the scan. the buttercups had nice textured stitching.
 The centre border had this section which I mostly like, the pink flowers were done in blue and gold here which went better with the purple. The butterfly is just plain ugly. In trying to keep the green leaf shades all different I made the mistake of pairing this continuity flower in a blue-y green that was just too jarring matched up with the vibrant pink. The pink was pretty when I used it in the butterfly elsewhere on the skirt.....
 This is the last section of the skirt. The red and brown butterfly on the left is hideous. It was ugly before I stitched it and my colour selection of red and brown didn't improve it. the colours blended well with the flowers but they didn't liven up the butterfly itself. The other sort of morning glory shape flower was also incorporated into each section. The colours didn't work so well in some of the bouquets.