Friday, February 28, 2014

Pink hanky, or the trials of tatting with colour

I started the edging for this hanky and was coming up on the 3rd corner when the thread broke. I did a whole hanky with dimpled rings and the thread didn't break even once. With this simple edging that I think of as a vine edging, where the rings are small 8-8, and the thread seems strong so it shouldn't break. But it did. I'm a big girl and I know how to open closed rings, back up, bring the thread back in and carry on, so I don't usually mind. See, it's all fixed.

This however is variegated thread. It has a long stretch of pink followed by a short intense stretch of green. The pattern is worked with 2 shuttles in a ring of 8-8 followed by a chain of 8-8 and a ring of 8-8 joined to the first ring. Since I'm using a variegated thread wound CTM on both shuttles there is a section of pink lace followed by a short section of green on one side of the lace, then repeated and the green is on the opposite side of the lace. like this. See?

I was beginning to wonder if the travelling patch of green on the top was going to match up with the green on the bottom, which I don't want it to. Then the thread broke right in the green. I thought about cutting out a repeat of colour and moving over to the next section of green, but it seemed like such a waste of thread, so I just joined the thread where it broke and kept tatting.

Then the thread on the other shuttle broke. I'm a big girl and I know how to open closed rings, back up, bring the thread back in and carry on...wait, I've been here before. At this point, I have not 1 but 2 shuttles with variegated thread that have broken about half way around on the edging.

One of the nice things about variegated thread, at least in my opinion, is that you get a recurring sequence of colour just like the lace has a recurring sequence of pattern. In order to continue that regular sequence, you have to have the same pattern used in the same section of colour. Breaking the thread means breaking the sequence. So to try and bring the colours into sync again, I undid everything back to the first break. Pulled the thread off the first shuttle until I was at the beginning of the green section and added the thread in. Then I brought in the pink colour on the second shuttle.

Of course at this point I had to go around the corner which used a bit more thread on the first shuttle. You can see what happened. The green sections caught up with one another and I now have an edging with half of it pink with little bits of green and half of it with solid blocks of green. I don't like it.

When I started this project I grabbed what looked like a full ball of thread and loaded the first shuttle, only to find out that the thread had been cut and wound back on the ball. That's OK there was plenty of thread left on the ball, so I unwound it and started again. The design is simple and it makes a fairly narrow band of lace, but it's easy to do a second row to mirror the first row, which I was prepared to do from the outset. If you read this blog, you'll know I abhor skinny lace. Nor am I crazy about doing multiple rows of lace to make it wider. However, this one is repetitive, quick and easy, so it'll do.

Except. There's always an exception. I like how I've done the corners on the first row. I'm not sure I'm going to like it when I add the second row. So I could just do the sides and join the row to the existing corner which will mean a lot of ends to sew in on teeny tiny thread. Or I could just do a chain over the corner, not really doing much of a corner treatment at all.

There there's that other exception. What do I do about the pooling of that block of colour on the second half of the hanky? If I just do the sides, I can start the variegation at any point and separate the green more for the second row, on the side where it's pooling, or deliberately match up the greens on the section where it's not. Of course that means all those ends to hide.

I was leaning toward spreading the colour out on the side that's pooling and doing a new corner. I've come to the end of the last side and realized that I either have to undo a section to join the lace to the beginning or crown in another pattern repeat. I'm thinking undoing will be a better fit and the last ring is being stubborn about re-opening and the thread is starting to look frayed.....

Wednesday, February 12, 2014

Another hanky in the works

When I went through my stash of hankies I realized that I'm out blue flowers, so I got to thinking that I ought to do matching edgings for the hankies I have and finish them off, so I can buy more with blue flowers. Here's the current assortment.

I'm thinking that I'll use a double bobbin shuttle for the pink and blue flowers so that I can repeat the colour on the edging. I haven't come up with a design that I like that I can do that with so I selected a hanky with a single flower to work with.

I chose this pink flower and then went looking for threads to match. Out of the threads I have none of them are quite right. There isn't much of the deep pink and the pale pink thread is a little off. The pink flower has a bit too much yellow in it.

The variegated pink might work, but then I'd have to pair it up with a green to match. The green leaves are a yellow/green and not a blue/green like the thread. The best match in the greens is a yellow/green variegate. I don't like mixing 2 variegates together. Too often they don't quite work and I don't want to tat 44 inches of lace that doesn't look quite right.

You'd think that with nearly a 100 partial balls of thread, finding a match would be easier. Nearly running out of thread on the last hanky has me wary of starting another one without being sure of enough to complete the job. One of the other options I have is a pink green variegate that on the ball looks like a perfect match.

Once I had the thread chosen, I opted for using a traditional design, just to get things going. Designing edgings isn't my strong point. When I do an edging I want it to be fairly wide. I don't like skimpy edgings. Of course wider edgings take longer to complete and use more thread so it's a bit of a balancing act.

I've started, using what I think of as a vine edging, which is just a variation of a ring and chain edging, but it's skimpy. The edging makes a wider design if it's mirrored back to back, but that will mean playing around with the corner treatment which I have already done for the first side. I like the corner the way it is.

My options are to put the mirror image on the inside, and play round with how it connect to the first corner, or mirror it on the outside and just follow around the outline of the existing corner. Of course I could always just repeat the edging part and just join it to the existing corner.

Decisions, decisions, what shall I do? I don't know, I guess I'll have to wait and see how I feel when the first row is done. Yet another reason why I don't like multi row edgings.

Of course it's February and I really out to design another heart.

Have I mentioned before I have the attention span of a flea?

Wednesday, February 05, 2014

Lesson learned: Make sure there's enough

You may remember that I won some thread on ebay. It was a lot of size 80 thread which I use mostly for bookmarks, like the one in my last post, and edgings. Winning a batch of partial balls lets me have a wide variety of colours, although not necessarily a lot of thread. Bookmarks don't take a lot of thread so having only partial balls is OK.

I decided since I have a nice palette to work with that I'd add an edging to a hanky. I happened to find a lot of cotton hankies with machine embroidery in the corner and I bought a bunch on them in different colours and designs. It seems that most often I want to make these as bridal gifts so I generally use the hankies with the blue embroidery like the one shown here.

If I can't have plain white on white, blue at least goes along with the "Something old, something new, something borrowed, something blue" tradition. Of course, unless you know ahead of time what the wedding colours are going to be, the lace is best left white.

Consequently, the white drawn thread hankies and the ones with blue embroidery are gone and I still have those in pink, purple and mauve. So I decided that I should just tat matching edgings to some of the others and keep them on hand for quick gifts. (I don't know how it happens, but things just barely get off my shuttles and they're walking out the door, sometimes before I even take a picture.) Anyway, since I had lots of lovely colours to play with I thought I'd just choose a hanky and give it an edging.

This one has a mauve flower with a darker mauve ribbon and mint green leaves. One of the variegated balls of mauve thread was a perfect match, as was the solid green. I filled my shuttle and merrily tatted away. Guess what? You don't have to guess do you? You know when I started out talking about partial balls of thread, what was inevitably coming.

I ran out of the variegated thread half way down the last side. (Why is it always the last side? Couldn't it happen half way through?) Fortunately in the other batch of partial threads there was another ball of the same dye lot that I won. Good thing too, because the thread was vintage Lily brand which isn't being made any more and the balls of DMC and Coats aren't really a match for it.

At any rate, here is the finished hanky using my Hearts and Flower edging and I have a wee giftie  ready if I need it.

NOTE TO SELF: Next time you make a hanky edging make sure you have enough thread before you start!

Tuesday, February 04, 2014

A bookmark pattern for you

Besides the usual snowflakes that I tatted over Christmas, I also did a bookmark for my SIL. Her birthday comes just before Christmas and consequently her birthday can get overlooked in the seasonal events. Since it was near Christmas though I thought of doing something with a poinsettia like a small pin, but didn't have the time to fuss with designing something with the points of a poinsettia. Getting the loopy round natural shape of tatting to conform to angular shapes can be aggravating.

I settled on a bookmark, and thinking of a poinsettia, I worked in red and started with a basic daisy shape. The daisy seemed sort of ordinary so I added another round to the petals to give it a little more oomph. It was finished off with a row of chains and some single rings like leaves between the flowers.

I was planning on sharing this with you earlier, but better late than never. Here's a pattern for you to enjoy.
UPDATE: I knew I had forgotten something. Maureen kindly pointed out that I hadn't specified where to start and the new drawing has that added in. The shaded rings are done with the second shuttle, so the first daisy ends with a split ring and the next begins and ends with a split ring. The top rings are tatted with shuttle 1 and the bottom ones with shuttle 2. This lets you tat a row of daisies instead of tatting individual daisies that you have to join together and hide all those ends. I don't normally show the stitch count inside the rings, but on the little "leaf" rings it was less crowded to put them inside.

Monday, January 27, 2014

Done and dusted

I agonized forever over what to make for my nephew's upcoming wedding. I decided that since people are going more for digital pictures rather than print photos that a picture album was redundant. I finally settled on doing edgings for some placemats.

The Mikasa china pattern they have selected is Love Story which is very romantic and has a stylized heart.

I chose to use a simple dimpled ring edging. See all this?

No, I didn't have trouble with the thread. I didn't have difficulty closing the dimpled rings. I didn't make a miscount and have to cut it off. What I did have, was difficulty finding some plain but elegant placemats. Knowing that I had a lot of tatting to do, I just started tatting and when it looked like it was long enough, I just left ends long enough to make a few more repeats and started again.

None of the stores I tried had placemats. They had plastic crap. They had wooden junk. They had printed ones and patterned ones. They had ones in really hideous colours. I was looking for something neutral like a plain cream or ecru and I couldn't find them anywhere. Just when I was about to give up I found them. I wanted a nice formal, linen look fabric, double sided so that I could blind stitch along the edges to attach the lace.

The little pieces? that's where I overestimated the length and had to cut it shorter. Cut shorter, undo the last 2 dimpled rings to get rid of the joining picot, tat the last ring without the joining picot, finish it off and sew in the ends. If I had had the mats to measure it would have been easier because it turned out that on a couple of them, where I had to undo ended up right where I had added in more thread so I had to back up even further, add more thread and re-tat to the end, just to get rid of the bump from the joining picot that wasn't needed.

Dimpled rings while cute and matching their china pattern are kind of plain by themselves.

I don't like giving people high upkeep tatting. I know that they'll use it a few times and then just give up on it because it's just too much work to keep it nice. The picots on this edging are all on the chains where they can't be seen. There are 3 picots on each chain and they're all sewn into the seam along the edge. Machine wash the placemats and just pull the edging out for minimal fuss.

Still, it looks kind of plain. So I thought a tatted heart in the corner might be a good choice. In going through my designs, there were some that worked out too large and some were too small, while others left open areas that I thought might be problematic. I could envision a knife or fork sliding under the lace and tearing so I wanted to make sure I didn't use too open a pattern.

I didn't want them all to be the same, so I chose different hearts all about the same size. I chose to put them in the upper left corner, because I thought that would be safest. In tatting them, I eliminated a lot ot the picots because I didn't want to have a lot of picots to sew down and I didn't want loose picots that could curl and need blocking every time the placemats were washed. I've blind stitched the hearts onto the top layer of the mat and hopefully I've tacked down all of the bits that might cause problems. I even tacked down each row of the rose so that the silverware can't get caught in it.

At any rate whatever problem it might be, is not longer mine. The recipients can deal with it. Or not. At this point, I'm done. May hands are hurting from tatting and from struggling with a curved needle trying to stitch down all of the picots of the edgings through the thick fabric. My thumbs are aching and now I get to go shovel more snow. O Joy!

It's hard to get a good picture when it's white on off white, but you get the general idea. Hopefully they will appreciate them and not use them under the dog's dishes.

Monday, December 09, 2013

Another Snowflake pattern for you

I did this necklace with sequins ages ago and having no purpose for it, it's been hanging off my mirror ever since. I like the look of it and wondered about turning it into a snowflake. The first issue is that the medallion has a 4 sided base and a snowflake has 6 points. Somehow you need to go from tatting multiples of 4 to something divisible by 6. The quick way of doing this is simple multiplication 4x6 gives 24, but who wants to do 24 repeats for a simple little snowflake? Certainly not me. Of course half of that is 12 which just happens to be nicely divisible by both 4 and 6.

The second row of the medallion has 3 sequins on each of 4 sides along with a ring joined to the base of the ring on the first row. I figured it would be simple to just replace the sequins with rings, but keeping to the same design would have resulted in 4 rings and 4 chains on each side or a total of 16 and not the 12 I wanted. So, instead, I went with 3 rings on a side which doesn't frame the centre in the same way, but it works.

Since I was trying to replace the sequins with rings, I used rings of 5-5-5-5 which are kind of large, but the size and numbers worked.

Once I had my 12 outward facing rings, I needed to pare them down to six and create a point for each arm of the snowflake. To keep it simple I just went with larger 6-6-6-6 rings in a 4 ring grouping and an outward facing ring for the point.

The finished snowflake is 4.5 inches point to point done in size 20 thread. It's large open and not very frilly, but I think I like it anyway. Going with smaller rings would make it more petite and delicate looking and of course adding a lot more picots would make it more frilly. Anyway, here is the pattern for you to enjoy.

Thursday, November 28, 2013

Snowflakes for Christmas

At this time of year we start to see all of the tatted lovelies that people use to adorn their trees. We oooh and ahhh over all of the amazing trees decked in lace. Some of them are pristine white lace on dark evergreen for a dramatic tree. Some of them are a fun collection of snowflakes, candy canes, and wreaths. Some of them are white trees festooned with a kaleidoscope of vibrate colours. Whatever they are, we all come away from viewing them wishing that our own trees were as covered in lace and that can be discouraging.

If you have just learned to tat, or you don't have a lot of time to devote to your tatting, it can be daunting to make dozens of tatted gems for your tree. Rather than get overwhelmed, why not just relax and determine to tat one snowflake or other project per month. You can fit in one small design a month, even if you're busy.

Here's a simple design with 360 stitches. Over a month, that's about 12 stitches a day. You can manage 12 stitches in a day. Really. You can. It may not be a spectacular design, but it's easy and it will get you started on your own tree full of lace. One a month and by next year at this time, you'll have a dozen for your tree. A dozen is a respectable start to a tree full of lace.
Just so that you can make your own snowflake, here is the pattern.

Of course, this is a simple design and maybe you'd like something a little more challenging, like this:

This is a little more complex, but neither of these designs are particularly difficult and both of them will give you a start on your own tree full of lace.

As I get time and inclination, I'll upload some more snowflakes for you to try. Who knows, maybe you can fill your tree with snowflakes for this Christmas.

Wednesday, October 02, 2013

Living in an imperfect world

I showed the lace edging I'm working on. This is my "go to" edging pattern for several reasons. It makes a nice wide edging all in one pass. You can make edgings wider by adding more rows, but I like to start, work on, and finish. If I have to add more rows to get the depth that of edging I want, I get bored and just quit. I don't mind working on a large project, as long as when it's done, it's DONE. It's like doing earrings, baby booties or mittens. One is OK, but having to start all over again to make the second one just irks me.

The other thing I really like about this edging is that it's easy to adjust it to go around corners. The flower shapes make an instant corner treatment, without any extra work. As long as you position one of the flower shapes straddling the corner you can stretch or shrink the edging to fit just about any length. Most of the hankies you buy are approximately 11 inches along the side. Very approximate. The one I'm currently working on is 11 inches wide and 11 3/4 long, more or less. It may not be perfectly rectangular. Hankies often aren't perfectly square or rectangular. So we have to be creative about how we attach ore perfect laces to imperfect edges.

This edging allows for connecting 2 picots on each chain which gives a secure attachment to the fabric, but the flower shape allows for a lot of flexibility in between. So I end up with 12 flower shapes from corner to corner on one side and 11 on the other side but my corners are always flowers and unless someone stops to count pattern repeats, you'd never know.

There are 3 different ways of attaching edgings to fabric. You can tat directly onto the fabric and this works, but I'm not crazy about how it looks. I've only ever done a few times. The first time I was working in white thread on a white hanky with prepunched holes along the edge and I tatted directly into the holes along the hanky edge, using the holes instead of a picot for joining into. The next time I tatted directly onto the fabric, the hanky didn't have prepunched holes. I used the tip of the attached hook on my shuttle to wiggle aside the weave of the threads in the fabric to make my joins.

In a pattern like this one you have to make sure that you line up the pattern so that you have the right number of holes to match joining points as you come to the corner. Depending on the corner treatment you use you may need a fixed number of spaces around the corner for it to even if you have preset holes, you might need to create some extras to make things fit.

The last time I did a direct join attachment, it was a hanky with a pink floral print in the centre, surrounded by a white border and a scalloped edge. I used pink thread to match the predominant colour in the design and joined directly to the fabric. I was happy with the results until I saw it on display along the edge of the shelf in my sister's hutch. She had taken several hankies and displayed them under various pieces of china so that the lace edges showed. It looked awful. It probably looked OK to everyone else, but all I could see was the twists and turns of the pink thread joins over the white fabric as they followed the scalloped edge. YUCK!

The second method for attaching lace to fabric, is to create a foundation row that you can either tat the lace onto or sew it onto. You can do a row of single crochet along the edge of the fabric like this one pictured. Or you can do a row of blanket stitch, either by hand or by machine. Whether you use a blanket stitch or a crocheted row, all you are doing is making something that you can use to attach the lace. Again, you can either join directly onto the foundation row or you can sew the lace on to it. This prepared hanky is one I received with some thread I bid on.

My preferred method is to sew the finished lace onto the fabric using a blind stitch. Select a thread colour that matches your lace and a fine needle. The needle needle to be slim enough to fit inside the hem of the fabric. I start by carefully sliding the needle between stitches under the hem and out through the edge of the fabric. Then I tie a knot in the doubled thread and cut close to the knot. When I pull the thread tight, the knot slips under the hem and holds secure. Then I run the needle through the picot and back down right next to where I came up. Like this:


Then I run the needle along under the edge of the hem and come back up where the next picot is to be attached. This is called blind stitching because you don't ever see the thread that's holding the lace on to the fabric. You see fabric, then you see lace, looking like it's floating along the edge.

When I'm attaching lace to a hanky, I figure out what's happening at the corner first. Typically pattern repeats fit in an orderly number of spaces, but if a corner needs a fixed number of joins before and after, the lace on either side of the corner may need to be adjusted. Once I've figured that out, I begin joining the lace BEFORE the corner. It may only be half a pattern repeat, but it's before the corner. You can see in the upper left corner  of the hanky in progress, that there's a short piece of unattached lace. That's the bit that the final section of lace has to join into. All of my adjusting position will happen along the edge, not right at the corner. It just gives me a lot more wiggle room if I have to nudge things and I don't end up with the corner looking buckled or the lace looking stretched.

We go to a lot of effort to make beautiful lace and it can be spoiled when our perfect lace is attached to less than perfect fabric edges. So it's nice to have a pattern that goes with the flow allowing me to enjoy the process instead of getting stressed out by it.

Tuesday, October 01, 2013

Cleaning, tatting and playing with thread

I've been tatting. Sort of. Mostly I've been hauling junk. Some years ago we started cleaning up the basement with a view to finishing it and possible moving all the computer equipment downstairs where it's cool in the summer. Then we got notice that the condominium corporation was going to re-insulate the attic of our townhouse, which was where we had stored a lot of unused stuff like camping gear and Christmas decorations. Of course hubby is a packrat and there was a lot of other stuff up there that had to come down, like a big chest full of motors that ran the various parts of hubby's robots. He built his first robot in 1962 when he was 14. The robot, and it's successors, have been dismantled, but the parts were in the attic.

Lots of things were finally thrown out, but much of it just moved from attic to basement. A full size steel shed, a box full of Avon containers which my SIL insists are worth money. Well they are, full and new in box, but empty, they're just junk. A full set of old dishes that we don't use because they have gold rims that spark in the microwave. Boxes full of encyclopedias, lots of computer programming books, and a race set with real little motors that run on a track

After the first pile of stuff got moved to the basement, other things followed. A big steel table that he though would fit in his room so that he could work on repairing computers. It didn't fit, so it got moved to the basement. Monochrome monitors to go with the Commodore computers, got replaced by the colour monitors to go with the Intel computers. The small monitors got replaced by bigger ones that were easier to see, which, in turn got replaced by flat screen monitors that use less hydro and give off less heat. The old ones still worked so they were kept, just in case,  because you never know when the new one might break and you need the old one for a while, or you need the parts, or something. I told you he was a packrat. I am too, just not as bad.

When we finally cleaned up, we got rid of an extra washer and dryer, 5 working monitors, 2 computers, 2 old TV's, 2 desks, a rocking chair, a large chunk of carpeting, 6 old metal bookshelves, the waterbed frame and other miscellaneous pieces of MDF, a Hibachi, a box full of assorted coffee mugs, 2 sets of TV trays, boxes full of books and old papers, lots of broken things had been kept because Mr Fixit here might need the parts and lots and lots of empty boxes because you know you have to have the packaging if need to return it.  We still had the boxes for things that had long since bit the dust.

The last straw came when my sweetie started to smell something funky from down in the basement whose corners we couldn't even see, let alone clean. The metal scrap collector was by our house 3 times to pick up stuff and we fortunately had 2 weekends of unlimited garbage collection that let us get rid of most of it. A stop by the Salvation Army emptied out the more usable stuff. My darling sweetheart built shelves along the wall to get everything up off the floor and then we washed down walls and concrete floor with bleach.

Once that was all cleaned up he decided that he should sand down the stairs and re-paint them. Using the sanding disks to strip off the old oil paint kicked up a lot of dust which meant that everything we'd piled onto the shelves had to be vacuumed off again, but finally, finally the basement is clean.

The downside of all this cleaning activity is that for over a month now, I have been too tired, too achy, hands too swollen to tat. I have enough energy to vegetate and that's about it. I am working on a hanky edging that would normally take me about a week to do. It's been languishing on the couch for over a month, half done, half attached. The thread I won on eBay has come and been admired, but not touched other than to sort it by colour. Here's the hanky, just as proof I haven't forgotten how to tat.

I like to use the finer threads mostly for hanky edgings and bookmarks. A nice wide edging will take the greater part of a ball of size 80 thread, but a bookmark done in multiple colours will use less than a shuttle full. A couple of years ago I realized that I wanted a lot of colours of size 80 thread. Here is my original palette, red, white, blue, red/purple, yellow/mauve variegate and a variegated blue that was given to me.

The only local source was Michaels who carried white and during the Christmas season, red and green, with each tiny ball priced at about $3. On the other hand Ebay had small batches of it for $7- $10 and with $4 or $5 shipping it worked out to roughly $1 a ball. Granted it was "used" thread with a lot of partial balls, but it also meant that for the price I got a variety of colours.  So for me it was a great deal and I ended up with lots of colours to play with.

Using someone else's colour choice helped to get me out of my comfort zone. Then, after using some of the colours in little projects, I discovered that I didn't have a lot that mixed and matched in the ways I wanted for the projects I had in mind. So I started haunting Ebay again, which is where this newest batch comes from.

The first bunch had lots and lots of greens and pinks. Pink rings for flowers and green chains for stems makes for lots of nice edgings. The latest lot has a whole bunch of white and variegated threads in every colour of the rainbow. In looking at both batches in detail I can see that they are mostly pastel colours, which I like, but I can see I need a few deeper shades for contrast. Maybe I need to surf Ebay again. Or maybe I should just get cracking and use up some of the 110 balls of thread that I have, and not be so greedy.

Thursday, September 26, 2013

Ever had one of those days?

Ever had one of those days? You know the kind. A day where you wake up in a relatively good mood, the kind where you whistle while you work, the sun is shining, the birds are singing.....and then everything goes sideways.

It started with printing a single sheet of paper. The printout from one of the printers was faded so the same sheet was printed from an alternate printer, which decided not to co-operate with the router. So the print was switched to the large colour printer. Of course that printer decided to act up pulling in too many pages at a time and printing half on one sheet and half on the second sheet.

That's when things really got interesting. Pulling the cartridge out of the front of the printer cascaded a flood of toner all across the carpet. The vacuum was pulled out to clean up the mess.

Then as the toner cartridge was re-inserted, an even greater flood of toner spilled out over the desk and all across the floor. Again the vacuum was hauled out and the desk, drawers and floors were vacuumed. It was at this point that the bag inside broke sending clouds of toner into the air.

Now there was toner all over the floor and inside the vacuum which necessitated using the little sweeper vac to clean up the mess. The broken bag was carefully sealed inside a garbage bag and the inside of the vacuum cleaned out. All of the filters had to be removed washed and replaced.

Then of course the sweeper vac which has a much smaller receptacle had to be taken out to the garage to use the big shop vac to suck out the toner dust. Except... the last time the shop vac was used it was put away full so it had to be cleaned out to have enough suction to do the job.

Finally, 3 hours and a shower later, the page was printed. It almost makes you want to just pull the covers over you head and forget about getting up in the morning.

Wednesday, September 11, 2013

I won

I was surfing through Ebay today and saw a bunch of thread. A lot of times the thread is big ball stuff that I'm not interested in. Other times folks south of the border don't want to ship up here to Canada. Sometimes they are willing, just not sure what it's going to cost, so it means an extra step to email and ask. So When I see things I might be interested in, I still may not bother to bid. I prefer the "Buy it now" stuff so I know what it's going to cost. The other thing that puts me off is that I bid and then get out bid. So this time I waited and watched.

I was doing an update on the 25 Motif Challenge and while waiting for pages to load (waiting for pages to load is the most time consuming part of doing the update, so I've learned to do other stuff while waiting) I took a peek. The thread was still available at a modest price. The shipping was going to double the cost, but it still looked worthwhile. Just before I went out for the 3rd appointment of the day I tossed in a bid. I came home to find out that I had won. Yay me!

One of the things I like about batches of thread from Ebay, is that I get lots of variety for less than it would cost me to buy an equivalent number of balls of thread from the store (if the stores around here had them, which they don't). The other thing I like is that the batches of thread invariably contain colours that I would buy myself. I like pinks and blues and reds and purples which is what I normally end up ordering. Then I go to tat a pumpkin and have no orange. I try for a daffodil and have no yellow. Likewise there is no brown for an owl or green for a frog. Actually, I have remembered to buy greens because they are needed for leaves to go with the pink and purple flowers. Still, I have to deliberately choose colours outside my preferred pallette and I still come away with lots of raspberry and grape, but not much in the way of lemon, orange and lime or variegates thereof.

Ebay threads contain lots of colours that I like to tat with, I just don't recognize them when I'm actually buying. So this batch I won gives me lots of new colours while catering to my preferred tones. It's nice, now and then, to work with someone else's pallette.

How about you? Do you need a challenge now and then to get out of your comfort zone?

Tuesday, September 10, 2013

What if?

One of the things that I have learned from teaching a design course, is that what holds many people back is inspiration. Inspiration doesn't come and hit you over the head like a brick from out of the blue. It's often just a quiet, "what if?". What if I take this design and change this little bit? What is I take this shape that sort of reminds me of a dragonfly and tweak it to make a dragonfly? What if I take that jewelry design and try to recreate it in lace? What if I just try to make a string of lace that works as an edging? What if?

Sometimes people have the desire to design, but they just don't know where to start. If you said "Design something." their minds would just go blank. The wouldn't know where to start. In coaching people to create their own laces, I have found that it helps to give them a starting point. That start can be a picture or a simple daisy motif or any other little bit that opens the door to possibilities. The first step to designing is just making something, anything, even if it's ugly. Making is the first step. Pretty can come later.

This is a picture of the first thing I designed. I wanted a collar edging for this dress, but I didn't want just a skimpy edging. At the time the only books I had were some Dover publications and I selected the widest edging I could find that would lend itself to curving around a collar.

When it was done I had an edging that was a series of cloverleaf points at the bottom without a stable enough section across the top to let me sew it onto the dress. I added a row of ring and chain across the top to fix that problem, but I still had what looked like a jagged row of teeth along the bottom. Rather than give up on it, I added a row of ring and chain around the cloverleaves and an inverted cloverleaf in  the gap between pattern repeats.

It wasn't wonderful, but it worked. It also gave me the courage to try other things. That's the other part of designing. You have to be willing to spend hours
working on something that doesn't turn out the way you want. You can look at all the mistakes you make as wasted time, but I prefer to look at those failed pieces as just sample pieces with potential for something new.

What if you take a failed piece and change one little part? What if the failure is just the start of a new beginning?

Tuesday, July 23, 2013

Facebook irritates me

I have no interest at all in "social media" I socialize with real people, not electrons on a machine. I joined Facebook after I received a barrage of "Friend" requests thinking it might be a good way to connect with people. Sadly, it connected me with hundreds of people I don't really know. Friends of friends of tatters whose names I don't even recognize. Initially, I accepted the friend requests of people I recognized or people used tatting as their profile pictures, so I had a vague idea who they were. Many of whom like playing various games on Facebook collecting peas or butterflies or whatever, and consistently send me requests to accept, or send some little bit of something. Signing up for a Facebook account required providing information that I didn't think Facebook or anyone else needed to know so I left those fields blank.

No one on the internet needs to know my personal information. They don't need to know my phone number, address, sex, age, school, occupation or any other of a myriad details that so many people seem cheerful to divulge. Now I know that a lot of these details are on the internet anyway, but why would any sane person want to make it easier for nefarious individuals to collect personal data?

I go on Facebook once in a very long while, but recently I have been receiving emails from Facebook telling me that I have notifications pending and after I ignore several messages, I log into Facebook, delete the messages, many of them from a niece who thinks everyone in the world wants to see the forwarded pictures of whatever animal she thinks is cute, or endless requests for butterflies or peas or whatever other stupid game is being played.

The last time I got another one of these stupid emails I tried to log into my Facebook account and was asked to verify who I am. After typing in the CAPTCHA I was asked to verify who the people were in a series of pictures.

Wait a minute. Who is Facebook to insist that I verify my familiarity with other people? That isn't something Facebook needs to know. As it happens, many of the pictures that they asked me to identify were pictures from other tatters. Like many of us, I only know these people online, not in person. A lot of us use avatars that are somewhat anonymous and if/when we post pictures of people, they aren't people that other tatters could identify.

The whole exercise just makes me fuming mad. Facebook could drop off the face of the earth and I wouldn't lose a second of sleep over it. So I've decided to consign all of their notifications to file 13. I would remove myself from the service entirely, except that I've heard that you can't really, once they have your info, it's there forever. Of course, to remove myself, I'd have to be able to sign in, which I can't.

I don't want help with it. What I'd really like to do is blow it up. NO, NOT REALLY! SHEESH! You can't even express your frustration with things these days without having to pick your words carefully to be politically correct.

mutter, mutter, sputter as she  shuffles off back to her cave.

Thursday, July 11, 2013

Ideas

Ideas. I have lots of them. Some of them wander around in my brain looking for a way out and others get trapped in the corners.

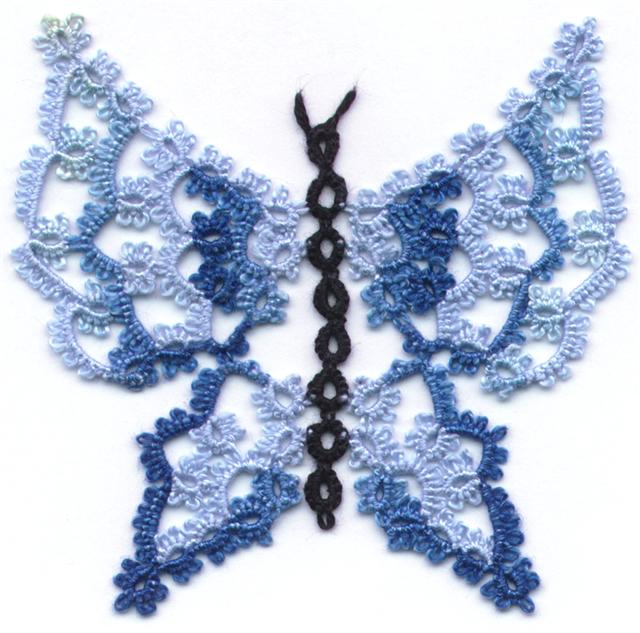
I saw an amazing piece of mixed media art and thought. I could do something like that with an embroidered butterfly and an edging. The butterfly was done some time ago and I was quite industrious creating and tatting the frame for it. The idea was to make a tatted butterfly corner to carry the butterfly theme into the frame and then possibly to do a butterfly scrollsaw frame in wood to mount it. The butterfly corner wouldn't co-operate so that idea is stalled. The butterfly and the frame edges are mounted on my blocking board and I had to move them over the other day to make room for blocking the doily that I finished last week,

I have a book half completed, because the enthusiasm dropped off when one of the patterns for it stalled. I have or maybe it's had, another idea for a book, but after the first couple of designs I kind of forgot which direction I was going in.

I got out a hanky to put and edging on, but after fussing with the quilting thread that I was using because it perfectly matched the flower on the hanky, when it broke repeatedly, I folded the whole thing up and put it away.

I was looking at some edgings thinking that I should just sit down and tat to get myself back in the groove so I was looking online at edging patterns and saw some motifs in the middle of the images of edgings which reminded me that I was thinking of designing a motif that could be tatted continuously like and edging. Sort of tat half the motif down one side and then come back along the second side doing the other half of the motif.

Like I said, lots of ideas, just not a lot of will power to execute them. Maybe getting a Kobo for my birthday wasn't such a good thing. I've read about a dozen books ever since I got it in April, but not much else is happening.

Saturday, July 06, 2013

Colour makes me happy

I have an enormous delphinium in my garden that stands over 6 feet tall. During the growing season my sweetie has often said 'can we pull that weed out?' referring to the delphinium. It isn't much to look at most of the year. Then it blooms. Two foot long flower spikes covered with purple/blue flowers that just shout with rich vibrant colour.

My mother had a light blue delphinium in her garden and when I bought one for my garden I expected the same light blue flower on a plant 3-4 feet in height. Surprise! This one towers over my husband who is 6 foot 3 inches tall. The flower spike at the base is over 6 inches across, with the individual flowers over 2 inches across tapering at the top of the spike to over 1 inch across. In other words it's one huge mass of flower. You can see that the flower spikes are way over the top of the fence.

Every year I put it inside a tomato cage hoping that it will give the flowers the support they need. Every year it stands straight and tall, looking glorious. Until the first heavy rainfall. Then I wake up to purple branches laid across the lawn as the weight of the water and the wind topple the giants over. What's still out in the garden looks like a lot of flower. But the largest spike just broke off from the weight of them and I brought it inside. See. Huge. Colourful. Mass. Next year I'm putting in a 6 foot pole to hold them up.

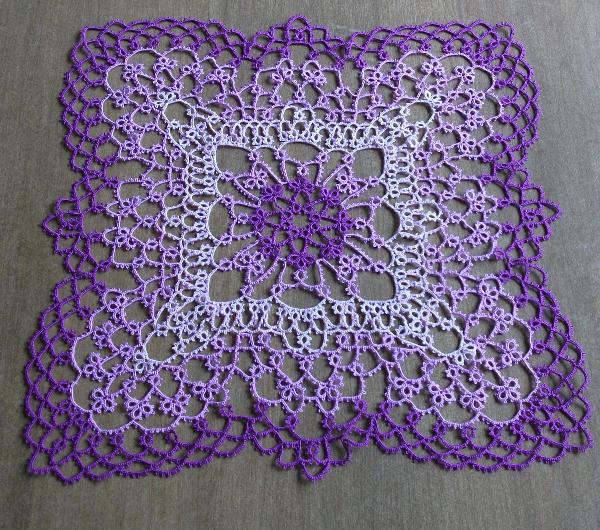
Something else with colour is this. You saw it as it was being worked. It had skinny little spaghetti chains. Then it had ruffles. As it was worked it looked like a ruffled mess. Now it just looks like glorious wonderful colour. I love it. I also don't have a table to put it on and show it off. The dining table is used all the time so it isn't a good option. The speakers which I thought would hold it nicely are too narrow. It does fit on the end table, but the only table currently without a doily on it is kind of hidden in the corner where I can't see all the lovely colour. I think it's time to persuade my sweetie to make me a table.


The finished doily is about 12 inches across and I like the colour, the shape and everything about it. If I were doing it again, (not going to happen) I'd change row 4 so that the side by side rings are joined to each other and I'd use a single ring instead of a cloverleaf in the corner of the row. It's the really dense row of ring and chain that outlines those spaghetti chains and makes that lovely negative space stand out. I've designed about a dozen doilies and this is one of my favourites, but it still needs tweaking, which it isn't going to get. However, working on it has me thinking that I should go on a tatting binge and create enough new designs for a book. I have a couple that haven't been documented yet and this one has me thinking I should just go for it. Making doilies could go through thread stash in double quick time.

Monday, April 22, 2013

Designing on a whim


My 4 version parallel Bible is a B-I-G book. I like having more than one translation side by side because it gives a better indication of what the original text meant. The Old Testament was originally written in mostly Hebrew and Aramaic and the New Testament was written mostly in Greek. I don't speak any of those languages and have no plans on learning them, so reading in multiple translations often helps clarify things. Of course such a large tome means that the average bookmark just gets lost in it.

I finally gave up on hunting for my bookmark inside the pages of my Bible and set about making one long enough not to disappear. I wanted something simple, pretty and really long. I was working on a design for another project that made a fairly broad band of lace and I thought it would make a good choice because I wouldn't have to modify it much.

I selected 2 solids and a variegate from my stash of size 80 threads and went to work. I used the variegate red/pink/green for the large rings with the solid pink along the outside. Then I used the solid green in the split rings down the middle. The threads were mixed brands of vintage Coats and Clark and Star which might explain why the split rings down the middle are smaller than they ought to be.

If I were doing it again I would make the split rings larger. As it is, when I noticed that the green was tatting up smaller, I left larger spaces between rings. At the ends I tatted large inward rings with the variegated thread and large outer rings with the pink and then just repeated down the second side.

Since the bookmark is really long, the wide band looks proportionate, rather than long and skinny. I didn't want a skimpy tail on it, so I just continued the split rings ending in larger rings to make a cross at the end which saved having to make a tassel. I like the look of tassels, but they're time consuming to make and I wanted something quick. Now I have a bookmark that's so long, at least one end will stick out where I can see it.

It's nice to be able to make whatever I need without having to search through dozens of books or wait for an online shipment to come. One of the reasons I stared designing lace was that even when I looked through books I didn't always find what I wanted.

I dabbled in designing, right up until I made the lace for my wedding. At that point I got over being timid about doing my own designs and jumped in with both feet. One of the things that I do with the Design-Tat course is give people the building blocks necessary to jump in the deep end and design their own patterns. It's a very liberating feeling, being able to make what you want without a pattern.

If your interested in trying your hand at designing, there's a new Design-Tat course starting. You can sign up for it here. The cost is $15 Canadian payable through PayPal. A lot of people wanted the drawing tutorial, but didn't need the designing class, so it's available separately, and you can find it at the same link.

Monday, April 08, 2013

Drawing Tutorial

I've been at it again. For the last few years I have been doing an online tatting design course, giving people a background in how to create their own designs. A natural extension of that was helping people to take their new creations and turn them into visual patterns by using drawing software.

The first time you try to make a tatting pattern using software, the results can be hilarious. Or tragic. Depending on your temperament. How do you get these shapes on screen? How do you get them where you want? Is there some way to have control over how things look? Is there a right way and a wrong way to do it? What about using colour? Should you make your rings teardrop shape or oval? There are lots of questions and of course, the drawing software help files aren't really geared toward tatters.

I initially created a basic tutorial to help budding designers get their patterns into drawing format. As the classes progressed I added more and more information complete with screen shots of what the software looked like and where to find pertinent features. Of course things were complicated by the fact that the software I used for class, which was free, had significant changes every time I did another design class.

After re-writing the whole thing for the fourth time. I decided to change to do a more generic format. The tutorial still has screen shots showing you what you need to do and where to find things, but it's been done so that if the software that you use, isn't the free one, or if you're on Mac or Unix instead of PC, you can still find what you need and know where to look for it.

Since the information is now more detailed and more comprehensive it's been put into a single large PDF file. You no longer have to wait for the course and get the information piece meal, you can just download the whole tutorial and get to work.

There's everything in it, from how to draw your first ring, to creating designs with the software.

If you're interested, the PDF is available from my store for $15.00 Canadian payable through PayPal. The link is here, under Drawing Tutorial, the first item on screen.

Sunday, March 17, 2013

He cares


Everything in the Christian life is about faith. There is an element of service to it, but mostly it's just about faith. To begin with, you need to believe that God IS. You have to believe that He exists. Now you might believe that somewhere, "out there" that there is a Supreme Being who exists, but it doesn't do you much good if God exists and He doesn't care any more about you than you care about an ant under your foot. So you need to believe that He not only exists, but that He cares about you.

There are many places in the Bible that tell us that He does care, like:  John 3:16 For God so loved the world that He gave His only begotten Son, that whoever believes in Him should not perish but have everlasting life.  1 Peter 5: 7 Casting all your care upon him; for he cares for you. Psalm 55:22 Cast thy burden upon the Lord, and he shall sustain thee: he shall never suffer the righteous to be moved.

God cares, and as we approach Easter we are reminded of just how much God does care. You see the penalty for sin is death. You don't agree? That's OK. The penalty is still death. God IS and one of the things that He IS, is the Creator of all things. It's His universe, He gets to make the rules. You don't like it? Tough. God is still God and He calls the shots.

He's not only God the Loving and God the Creator, He's also, God the Righteous. and God the Holy. Sin can't track alongside a Holy and Righteous God. Sin is an old fashioned word. We don't think of it, or understand it much these days, but it really just means, that you missed the mark. You tried for the bulls eye, but you missed it. This Holy and Righteous God, set down some rules to live by, things like; don't murder, don't steal, don't covet and some other rules like don't worship anyone except God, don't take His name in vain and other rules. You probably know what they are, or if you don't, you can Google them.

These rules are called the 10 commandments, but when Jesus was talking about them in Luke 10:27, He said they really boil down to just 2. Thou shalt love the Lord thy God with all thy heart, and with all thy soul, and with all thy strength, and with all thy mind; and thy neighbour as thyself. Ever get really annoyed with someone? Was that loving? No? Then you missed the mark. You don't have to break any of what we might think of as the biggies, like murdering someone, just treat another person in an unloving way, and you missed the mark. What happens when you miss the mark? There's a penalty for it. Do you think you could go through life and never blow it? No? Me either.

See, God recognized that we don't have the capacity to always, with everyone, do the right thing. So He came up with this really bizarre plan to fix the situation. Sin has this huge penalty. It's death. Death is permanent. There's no do-over. Finito. Done.

So how does a Holy and Righteous God, who knows that the penalty for sin is going to condemn us to death keep us from killing ourselves, by default? He gets someone else to take the fall for us. Well that might work, but who is going to be crazy enough to apply for THAT job. No one, that's who. So God did it Himself. They are His rules. Break them and some one has to pay the price. No one else could, so God put His own head on the chopping block and died, so that we didn't have to.

God took all of the sin, all of the crap and corruption that WE did, onto Himself. He took the death penalty, so that we don't have to die. Now here's the thing. This substitution that He did, only works, if we want it to, it isn't automatic. It's like a Monopoly, "get out of jail free card" that's available to anyone, but you have to play the card. You have to believe that God really does love YOU so much, that he was willing to take the death you deserved and give you life instead.

That's where faith comes in. 1 John 1:9 says If we confess our sins, he is faithful and just to forgive us our sins, and to cleanse us from all unrighteousness. You missed the mark. So don't be an idiot, admit it. He has already promised to forgive it. He'll wash away all the garbage, and let you start over with a clean slate. You have nothing to lose and everything to gain. Just admit that you blew it, and ask Him to forgive you and make everything on the inside new again.

Not only does He wipe out the old, bad stuff, He, Himself will take up residence inside you. Can you imagine how easy it can be to live a perfect life if God is on the inside helping you? The amazing thing, is that you will know, that He is there, and He is real. Don't waste another day in the same old rut. It's time for a new beginning. You won't regret it.

Have questions? Want more information? Email me or leave a comment.

Wednesday, March 13, 2013

Tatting in my pocket, and a Bible on my desk


Just like there's always tatting in my pocket, there's always a Bible near by. They're all different versions and bookmarked in different places. Wherever we happen to be we pick up the nearest one and carry on reading. The other day I picked an NIV that was marked in Philippians 4:6 "Do not be anxious about anything, but in everything, by prayer and petition, with thanksgiving, present your requests to God." A little bit later, I read, this time in a KJV Matthew 21:22  "And all things, whatsoever ye shall ask in prayer, believing, ye shall receive." Then I picked up an ASV and read in 1 Thessalonians 5:16-18 "Rejoice always; pray without ceasing; in everything give thanks: for this is the will of God in Christ Jesus to you-ward."

During a time when things were being hectic and stressful, I had randomly hit these verses. Be anxious for nothing. Boy, did I need that reminder. Don't sweat it, just tell God the problem, being thankful that He's in control and will sort it all out. Really, when God's in control, you don't need to be anxious and you can be thankful because, He's always got your back.

Everything you ask for, you receive, when you believe that you will. Believing in the impossible is difficult, until you remind yourself Who it is, you're talking to. God, who created all things CAN do ANYTHING. And He loves me, I'm His kid. I have the right to ask Daddy for anything. And I have the right to expect to receive what I ask for.

Some time ago we had a bill coming due for over $1000.00 more than what we had in the bank. I had no idea where to get the money from. I talked to Daddy about it. I told him I didn't have the money and I didn't know where it was going to come from, but I was trusting Him to see that I got it. A client had asked about fixing a little problem, which we did, and told them we'd charge a couple of hundred for it. The client showed up a few days later to drop off an envelope containing payment, only instead of the $200 requested, they paid us $1500. The little job we did had saved them a lot of time, effort and money, and they were just passing along the benefit. I don't need to know how God is going to do it, I just need to believe that He will.

Being in the middle of a difficult situation can make you miserable if you let it. The admonition is; to rejoice always, pray always and give thanks always. If you know that God is always on your side always doing for you, what you can't do for yourself, you can always thank Him before it happens, because you know the outcome will always be in your favour and that's enough to make you laugh-out-loud-happy.

In Genesis 45:5  "Now therefore be not grieved, nor angry with yourselves, that ye sold me hither: for God did send me before you to preserve life." (KJV) Joseph was sold as a slave by his own brothers and he went through unpleasant experiences. Yet, in the end, he was no longer a slave, taken out of prison and raised up to a position just under the king. He endured really bad stuff, but in the end not only did he get promoted to an exalted position, he was placed so that he could save himself, his family and his nation. In selling him as a slave, his brothers had intended evil, but God intended good.

God's intentions are always good. He doesn't destroy, tear down, or rip apart. God creates, builds up, heals and restores. He may not do it in our timing, but He will always bring about good in the end. It's worth while rejoicing about.

Saturday, March 09, 2013

Tatting, designing and rambling

I am slowly working my way through the yellow doily again, the one with the spaghetti chains. Calling it the yellow doily is a misnomer because this one is obviously pink and purple.


Then I have been re-writing class lessons for the design class, in between which there have been issues. Like hubby's computer got hit with a virus, TWICE. Each time he has insisted on full scanning of every computer in the office, just in case. No sooner had that issue been handled and we found out our domain had been hacked. Honestly, I don't check my domain all that often. I know what's on there and I only have to look at it when something changes. Having a blog, means that most of the changing stuff happens here where I don't have to nag him about uploading it. It also means that if I think of something to say, I just blurt it out and you get to suffer through it.

We discovered the domain hacking by accident and realized that the search engine had posted a warning that visiting our site might expose user to malware. Apparently every folder on our domain had a file uploaded that redirected people to a porn site. Embarrassing and frustrating. Supposedly our IP provided continual hacking and virus protection. Obviously, it didn't work very well! Needless to say we had virtually no sales coming through our website from the time of the hack until we noticed it and contacted the IP. Supposedly they fixed the problem.

Immediately after that fiasco, my laptop started acting up and had to have a recovery disk run on it. I only use the laptop intermittently, often just for reading, but still, it was an aggravation.

Then hubby got a phishing email. He has set the spam filter on our domain about as high as it can go, so it ought to have been stopped, but it wasn't. That isn't what irritated him, what really upset him is that he has an email address that he ONLY uses with the IP. which means that no one else has it. So the phishing email was just a lucky (or unlucky, depending on your perspective) hit. That's the last straw. We're changing web hosts.

Having our own domain means that nothing should change on the website except for a momentary blip as it re-routes. We might be without email for a couple of days as the international systems get re-routed since the email is part of our domain.The nitty gritty has already been done with the new web host, it just needs the DNS switched over, but hubby has decided to let that go till next week.


I have another book in process. This one will be mostly quasi 3D  things.
Sneak peek:
One of the things I'd like to try designing is a motorcycle. So I've been looking at lots of pictures thinking about how I might accomplish this. I have no doubt that I COULD design one, but I want to make a design that other people could do too.