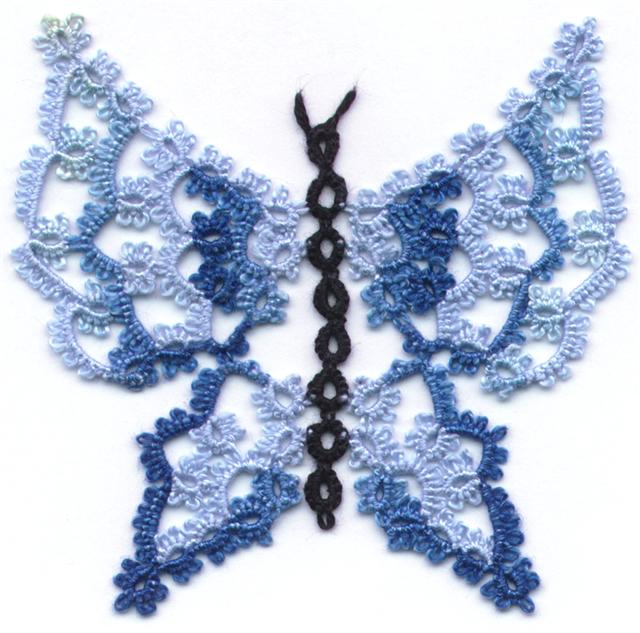
Friday, December 19, 2008

Wow Tatting

Have you ever seen a piece of tatting that's just breathtaking? NO? Then take a look at the wonderful pictures sent to me this morning. Patricia Estrugo sent me these photos of a wedding veil she tatted, that was so glamorous it took part in a fashion show.That picture is a tease, because as we all know, tatters want to see the lace not the model.

Better? No, I didn't think you'd like this view either.

How about this one? Isn't it Gorgeous!?


Here's the view with the front of the dress. Spectacular aren't they? Finally a picture of Patricia taken at the show with the designer of the piece.

Patricia speaks Spanish and her note to me in Spanish doesn't include much more information than that the pictures were taken at the fashion show and that she had tatted the veil. For those of you who do speak Spanish, this is the entire email.

VELO DE NOVIA TEJIDO POR MI

LES MANDO UNA FITIS DEL DESFILE DE VERONICA ZAPATA PARA QUIEN TEJI EN FRIVOLITE EL VELO DE NOVIA QUE LES PARECA, AL FINAL ESTOY YO CON LA DISEÑADORANO SABEN LA EMOCION QUE SENTI AL VER ALGO HECHO POR MI DESFILAR DELANTE DE LA GENTE Y LAS CAMARAS DE LA PRENSA ESPERO LES GUSTE

I have written to her asking for more information, but with the language barrier I'm not sure how much more information I'll get.

Edited to add:

I got the bsic information on what Patricia was saying by using the internet translator. HJ added the full translation in the comments.

Wednesday, December 17, 2008

First Trial

I decided that I want to work on a project that uses a square motif so I sat down tonight and did this one. I want something that is sort of uniformly dense with even amounts of semi solid tatting. I want the focal point to be both the centre of the motif and the corners where 4 motifs meet.

This one has some semi dense bits in the centre and at the corners, but 4 together doesn't make for an interesting join. I'll have to scrap this one and try another design. By the time I find a design that I like, I should have enough pretty designs that don't quite fit my plans, to fill a book. This one is done in size 10 thread and I think it's about 3 inches across. I should re-do it in 80 to see what it would look like as a bookmark especially if I do the rings in a solid colour and the chains in a variegated colour.

I mentioned some ideas for tatting books on one of the tatting lists and one of the members wrote to me off list and remarked that I shouldn't share my thoughts because someone else would take the ideas and use them to create their own book. The thought that someone else would take my idea and run with it doesn't really bother me, although I do think about it from time to time when I mention an plan for a book. I suppose anyone could take the idea, but they aren't me, and they won't come up with my designs. Does that sound conceited? I don't mean to be. If I do provide an idea that someone can springboard off of, then the tatting world is all the richer for it.

There are several books of snowflake patterns available. Does that mean that the possibilities for snowflake patterns have been exhausted? Seems to me that I read somewhere that the could be millions of real snowflakes and no 2 would be alike. So it seems like there could also be lots of different snowflake patterns.

What about hearts, or butterflies or bookmarks, do we have enough of those? And doilies, there are lots of patterns for those too. Does that mean that we shouldn't expect any more patterns for those either?

There are lots of designs for dresses and shirts and pants, but we keep seeing new variations of those things. They change around the designs for those things 4 times a year and there is always something new, so why shouldn't it be the same for tatting patterns.

Some people buy tatting patterns because they are collectors. Some people buy them because they want to make that one special item. Some people buy them because they find that a particular designer sets out patterns in a way that is easy for them to follow. Some people don't buy many books, choosing rather to make the things they like over and over again. Should a designer stop producing books because there already are some publications on the market with those things in it? I don't think so. I think there is room for old and new books, old techniques and new techniques. It's all good and it all has it's place.

Me? I'm going to whip up a bookmark, then I'll try another idea for a square motif. Happy tatting all.

Monday, December 15, 2008

It just kept growing

Want to see what's been taking up all my tatting time recently? This started as a simple square motif that I thought I might use to embellish a denim jacket. It kind of grew out of control and has been taking all of my tatting time recently.

When I got the first square bit done, the bits between the points looked kind of empty. When I fixed that problem, I created another. To fix the second problem I ended up with a chopped off point. By the time I had fixed the point I had created yet another problem. For a while there I thought I was going to end up with a tablecloth before I got the various problems fixed. 14 inches side to side and nearly 15 inches point to point. Done with Coats Royale size 20.

I may leave it white or give it a dye bath. I haven't decided yet. It doesn't really fit any of the spaces I have, being too wide for my end tables and too small for my dining table. Maybe I should have kept going....Nah, I'm tired of this one.

Now my problem is what do I tat next?

Friday, December 12, 2008

Why?

Many people, when you talk to them about tatting, see it as a frivolous activity. Hand knitting, while time consuming, does produce useful articles such as sweaters, socks and mittens. Quilting can make beautiful and practical bed covers, pillows and bags. Embroidery, including cross stitch can make beautiful wall hangings and embellishments to almost anything. Tatting on the other hand is woefully misunderstood. Mention tatting and the uninitiated will think only of doilies. Talk to tatters and you get a whole different perspective.

There are a lot of things that tatters make that aren't doilies. At this time of year there are a lot of snowflakes. Granted a snowflake could be considered a small doily, but as no two snowflakes are alike, neither are any 2 tatted snowflakes so there's a lot of room for variety. Then there are the things that make nice little gifts like bookmarks, hearts and butterflies. A whole lot of newer designs have shown up in the past few years for critters, "lions tigers and bears, oh my" to quote Dorothy from the Wizard of Oz. Just this past year we have seen a lot of Jane's hippos
and Anne's dragons (pdf). Then there's the jewelery, from quick little earrings to the spectacular pieces created by Marilee aka Yarnplayer.
Beyond all of that, which the uninitiated might consider typical for tatting there is a whole range of three dimensional tatting like the flowers done by Linda
or the gingerbread house and pirate done by Carol which tatters and non tatters alike find utterly awesome.

Isn't it interesting that if someone takes up painting, no one questions the validity of it, even if they consider the product 'bad' painting. No one asks, why do you bother doing it when you could buy a print of the same thing to hang on your wall. No one thinks that the time spent painting is a waste of time. No one would call a painting, even an inferior one, worthless. What is it about textiles that seems to give people the right to judge it as worth less value and less appreciation.

Is it because it involves thread or yarn? Is it possibly because it is seen as "women's work" and therefore people feel free to be critical of it? Is it because of familiarity since it is something that was done by almost everyone's ancestors so that there is no feeling of "uniqueness" to it? Is it because it is seen as something "easy" to do? Is it because of a lack of understanding in the skill required?

I could slap paint on a canvas and call it art. (I'm not saying that it would be ART, just that I could do it.) So if, without training or skill of any kind I could throw paint at a canvas and not be criticized for calling it art, why is it that people can freely criticize fibreart as if it is some lesser form of art. Fibre is a more difficult medium than paint. Colour, shape and texture and more challenging to produce in fibre than with a paintbrush. So why is it that fibreart doesn't get the recognition it deserves?

Thursday, December 11, 2008

What's your worst insult?

Time was, when every stitch of clothing was carefully, painstakingly, made by hand. The fibers were grown and harvested. Then they were carefully separated from debris, carefully treated and spun. The resultant strands were plied and skillfully, woven and knit into fabrics that could be shaped into clothing. Making a piece of cloth was a time and labour intensive process. Fabric itself had such worth that we have historic references of clothing being highly valued. Think of the soldiers sharing out the garments belonging to Jesus and gambling for the tunic that was woven in one piece. Or what about the reference in Dickens "A Christmas Carol" where the ghost of Christmas Future shows Scrooge a vision of the charwoman and the laundress selling his clothes and bed linen.

In these days where fibers are spun by the thousands and fabric manufactured by the bolt, we can go from raw materials to finished garments in a single day. There are machines that can weave or knit, machines that can cut stacks of pattern pieces in one go and machines that can be used to assemble the pieces. What used to be a labour of months is now done in minutes, making the average person depreciate the value of things done the slow laborious way. Does that mean that the things which are done carefully and methodically by hand has no value, because that which is done by machine is faster?

We've all had it happen. We're merrily working away at our chosen craft whether it's tatting, knitting, crochet, cross stitch or quilting and someone utters a comment that just sucks all the joy out of it. Comments like, "No one has time for THAT." or "Only people that can't afford to BUY gifts, make them." or "It's not worth making it, I can buy the same thing at WalMart for a couple of dollars."

Years ago I was showing some tatting that I had done, when a lady came up to me and said, "People don't have time to bother with that any more." It made me feel about 2 inches tall. All I could think of saying in reply was, "What am I, chopped liver? I'm a people, and I bother with it." Afterward, I didn't know whether I should be embarrassed because I was wasting my time with something real people wouldn't bother with, or angry, that someone would thoughtlessly and ignorantly, denigrate a pastime that I enjoy, and use to create all manner of delightful articles for my own amusement, and for the pleasure of the people I gift it to.

What's the all time most insulting thing that anyone ever said to you in regard to your chosen craft whether it's tatting, knitting, quilting or some other endeavour? Come on, share the insults.

Sunday, December 07, 2008

Doilies: Love 'em or Hate 'em

I'm not really a "frilly" sort of person, so I suppose that it's silly that I spend every free moment making lots and lots of lovely laces that I rarely use. I have made a lot of tatted doilies, but most of them I have given away to various deserving people. I am fortunate to come from a very loving family who appreciate all of the hand made articles I have given them. I DO make extra effort to create things worthy of appreciation and I believe that most of what I make fits into the art rather than craft category. Although I know that in the hands of a skilled person pasta stuck on a styrofoam base and spray painted in gold, could be very artistic, my hands are not that skilled. So I stay with the fibre arts where I know what I bring to the table is a modicum of skill and a large dose of patience which usually produces artful results.

I have seen recently an abundance of comments about doilies being old fashioned and out of keeping with today's modern decorating trends, which may very well be true. When you consider the Victorian era where decorative flair enjoyed it's heyday, you also had an assortment of beautiful and irreplaceable wooden tables, desks, sideboards and hutches which were easily marked with water or the placement of heavy, rough objects on their shiny surfaces. It was much better to protect these delicate surfaces with ornate laces that to suffer scratches on a tabletop or water stains on a piano.

The men of that day liberally applied Macassar oil to their hair in the same way that people today would use mousse and hair gel. The oil often left stains on the woven fabric of upholstered chairs and sofas which, unlike our present furniture, was not easily cleaned. To avoid permanently stained fabric, lace pieces were created to fit over the back of the furniture. Additional lace pieces were created to protect upholstered arms from wear, so that you often see patterns for sets of anti-macassars. These lace pieces, although beautiful in their own right, were essentially rags (pretty "rags", but rags none the less) used to protect valuable pieces of delicate furniture.
Fast forward to today and take a look around your own living space. Most dinnerware is stored in a kitchen cupboard, not in a mahogany china cabinet, The tables are often covered by sheets of shatter proof glass negating the need for any other protection. The piano has been replaced by an entertainment centre made out of plastic which requires no protection from watermarks and scratches. Modern hair care products don't leave greasy splotches on upholstery and even the furniture itself is said to have a "life span"

So do doilies and the like serve a purpose in our modern environment? Most emphatically YES! Doilies give a splash of colour, an element of interest, and a feeling of hom-i-ness to a sterile environment. We don't use them with the same abandon of the Victorian era, but doilies still have a roll to play in decorating our homes. Since they are no longer just rags used to protect more valuable pieces, it is all the more important that the doilies we use be especially beautiful, and particularly well executed. An assortment of doilies lets you give a quick lift to the room just by changing the lace on display. You could hide them behind glass like the art they are, but how much better to lay them out on a table and change them with the seasons.

So which are you? Doily lover, or doily hater?

Friday, November 28, 2008

Loose Ends

I used to think that people who designed patterns whether they were tatting, knitting, crocheting or sewing, had some mystical ability whereby they just sat down and made things that were right the first time. When I started designing tatting, it came out of necessity. I needed flowers for my head piece and only had one pattern. One pattern, no decent book, craft, or yarn store in the neighborhood, and no time to order online and wait for delivery of books that may or may not have had suitable flower patterns in them. On a one month deadline I tatted furiously doing an assortment of variations of the one pattern I did have, and several little fill in bits to make up the rest of it. You can see the results here.

One year when we were out of town visiting family for Christmas I had my shuttles with some beads but no patterns. I had been making a lot of simple ring and chain motifs for a vest so I had that pattern memorized. It wasn't quite the right stitch count or the right shape, but it was good enough for me to make a small beaded snowflake for my mother in law. Since we were snowed in I had lots of time on my hands so I kept making snowflakes changing the stitch count and bead arrangement slightly on each one. As different family members showed up they went away with beaded snowflakes, all of them similar to this one.

Then Georgia needed a beading patterns for the online class and I used a similar pattern minus the outward rings and added lots of different coloured beads to make the rainbow earrings. A bag of assorted coloured beads had been sitting on my desk for a while tempting me to use them in something and all that came to mind was a rainbow. The need to use lots of different coloured beads and the need for a beaded pattern just fit together well.

The patterns for both of these and several other designs are on my web site here.

However, these designs are small. If you make a mistake with a snowflake, it's no big deal because you really haven't invested much time in it. If you make an earring pattern and it doesn't work, you can just scrap it and start again. Now, I know if you are a beginner, every ring you complete is a hard won battle, and just the idea of throwing away all that work is just incomprehensible, but trust me, tatting gets easier as you do it more and a single ring that takes you 20 minutes to make today will take you only 2 minutes a year from now.

When you get bored with snowflakes and want to move on to something a little larger, making a doily is just adding a row of edging to a snowflake. If you want a larger doily, you add another row. At this point, it starts to become more challenging for two very different reasons. First of all, each new row that you add becomes larger and you can just add edging after edging, but as you do minute adjustments to the stitch count have to be made because edgings are straight and doilies are round so the inner edge has to be smaller than the outer edge. If the outer edge isn't wide enough it will cup, but if it's too wide it will ruffle.

The second reason it becomes more difficult is that if you want the finished piece to look like a whole design instead of a bunch of rows slapped together, you have to do some planning and thinking ahead. If you have a pattern segment, an area where 2 rows together look really good, or an emerging shape that you want to see continued, you have to plan on how to create the shape or repeat the motif.

Very often doing this is a matter of trial and error. You make the best guess at how things ought to proceed and you try it. Sometimes you get it right the first try. Of course some times the first try looks awful. What is even worse, is when you are working on a motif that has several rows to it. That may mean that you won't know if your idea will work until after you have completed all of the rows. And what do you do if your idea doesn't work? You cut if off and start again.

Want to know how I developed my method of adding in new thread shown in the tutorial? Lots and lots of cut off mistakes. As a designer, I don't worry about carefully starting with pre-wound CTM shuttles. I begin with whatever half wound shuttle is handy. I pull out enough thread to get started and I add in a second half wound shuttle and keep going. Adding in new thread and hiding ends doesn't have to be something you avoid. When I add in new thread I leave the loose ends hanging until I have finished the piece. That way, if my pulling and tugging on it pulls the thread ends I'm not going to have anything pull out and if I've had to add the thread in at an awkward place and I'm concerned that the thread end will be too short and might pull out, I just sew it in and out between a few more stitches of the finished piece before cutting the ends off close to the work.

Sometimes when you like how a design is shaping up, but you're not sure if it's going to lay flat or if you're not sure what direction to take the design or where your next section needs to connect into it, blocking helps. I'm now on row 13 of this one and I'm still not sure about it other than I know it will take at least 2 more rows. It's about 7 inches across shown here, and I'm now at 10 inches across. The design will require 2 more rows which should add 1.5 inches but I was looking for a finished size of about 12 inches. If it works out it will be a happy accident since it seems to be one of those designed to fall off the shuttles without much forethought. If it doesn't, it will be about a week's worth of tatting down the drain.

Tuesday, November 18, 2008

Adding in New Thread

One of the problems that every tatter must face is the inevitability of running out of thread on the shuttle and having to add new thread. As a beginner this may seem to be a daunting task, but it really isn't that hard. Here are some pictures showing how I do it. For the purposes of this tutorial I began with size 10 thread in green and at the point where I add in the new thread I switched to white so that you can clearly see the old and new threads.


Wherever possible I add in the new thread at a ring where I can easily hide one end in the ring and the other end in the following chain. That may mean that my old thread is quite long and hard to deal with so I cut it to about three inches.


Fill your shuttle and begin making a ring with the new thread.

Insert the old end under the first half stitch alongside the core thread like this.
Tighten up the stitch and snug the old tatting up to the ring just started.
Take the old end of the thread across the core thread away from you.
Tat the second half of the stitch and bring the old end across the core thread toward you.
Tat the first half of the next stitch.
Bring the old thread across the core thread away from you.
Tat the second half of the stitch.
Bring the old end across the core thread toward you.
After you have done this with 3 or 4 doublestitches, give the old thread end a hard pull to make sure that there is no slack in the old thread. Finish tatting the ring and close it.
You can see where the old end comes out between the stitches and you can see the spot of green where the join is, but you don't see any of the green in between where it is zigzagged through the half stitches.
Now reverse work and begin the chain in the same manner, bringing the white end of the new thread under the first half stitch.
Tighten up the first half stitch.
Take the end of the new thread across the core thread away from you.
Make the second half of the stitch.
Bring the new end across the core thread toward you and tat the first half of the next stitch.

Bring the end across the core thread away from you and tat the second half of the stitch.
Bring the thread across the core thread toward you and tat the next half stitch.
When you have zigzagged the thread end between 3 or 4 stitches, pull on the end to make sure there's no slack in it and finish tatting the chain. See how you can see the thread between the stitches when they are spread out?


Once the stitches are snugged up together you can't even see the thread ends even when you work with 2 different colours. I usually just leave the ends hanging until I have finished tatting the piece, then I pull the ends tight and cut them close to the lace being careful not to cut the stitches. Then wiggle the stitches a bit and the last shred of the end pulls in between, held firmly in place and virtually invisible. The thread end is shown here coming out between the stitches so that you can see for yourself how hard it is to see any tell tale sign of the hidden ends. This is size 10 thread and if you can't see it here you certainly won't in anything finer.

Sometimes, when both shuttles (or shuttle and ball thread) are about to run out at the same place, I cut both ends. Then I wind my shuttles again CTM. I hide the old core "ring" thread in the ring and the old "chain" thread in the chain. Since the thread is wound CTM I'm starting in the middle of the CTM and I only have the 2 old threads to hide rather than 1 old thread and 1 new thread. This is easier than adding in new ring thread and dealing with 2 ends, then a little while later adding in new chain thread and dealing with 2 more ends.
As a designer I often work with whatever thread is on my shuttle at the time. Sometimes my shuttle is full when I start and sometimes I've had 2 or 3 tries at something and there isn't a lot on the shuttle to work with. If I stopped to rewind the shuttles every time a project didn't work as planned, I'd end up wasting a lot of thread. Using this method for adding in new thread, it doesn't take very long to secure the thread ends and get on with my tatting. As you can see, adding in new thread isn't something to be afraid of. You can do it quickly and easily with relatively little difficulty.

Just so that you can see the end results, here is the finished piece.

Sunday, October 26, 2008

Snowflake Suncatcher Pattern


This is a modification of a pattern that I designed as a thank you for Nell Corns. It starts with a central ring and a split ring to climb out into the first round of single shuttle rings and uses 3 seed beads as spacers on the bare thread. The whole design takes 204 beads so I found it easier to put the beads for the first round plus the 12 used in between the large and small rings of round 2 on one shuttle and the remainder on the second shuttle, that works out to 81 beads on shuttle 1 and 123 on shuttle 2. You can work with all but 15 beads on one shuttle, but then it becomes hard to manage. When I'm working with one colour or type of bead I always load a few extra on each shuttle. That way, if I miscount or find a misshapen bead I can break it off and not worry that I won't have enough to finish.


Complete round one with 3 beads from the second shuttle and end off with a split ring. Then begin the next round with a large split ring loaded with 5 beads. The picot on the split side of the ring will be used to hold the 2 sides of the points together.


There are 2 beads between the large and small split rings, one from each shuttle and 2 beads on the outer side of the small ring. After the first small ring, there are 3 beads that make the outer point of the motif. The second side of the point is a mirror image of the first side. The large rings are joined to one another on
the split side of the rings.


The join to the outward facing ring of the first round is not a shuttle join. Switch shuttles to make the join. Leave 3 beads in the middle of the chain and finish by joining to the next outward facing ring. Repeat until all of the points are completed.


This is a simple pattern and worked in size 20 thread is about 3 inches across from point to point. Made with silver lined beads, it's very sparkly and eye catching. Here is the pattern.

Friday, October 24, 2008

A little of this, and a little of that

You may have noticed that I haven't been posting much lately and for the one or two who wondered, here's what's been going on. During most of August our front yard was dug up due to the burst water mains. Twice during that period the driveway was unusable and I had to use a bicycle to get around which meant that just doing things took much longer leaving me less time for other, more interesting things.


Then a number of local folks decided to get a craft group going for socializing and for teaching, so I have been showing some people how to tat. The ladies in this group are keen on finding ways to sell their finished goods and I have been coaching them on how to use the internet as a selling tool. This has resulted in some one on one hours spent showing them how to set up PayPal accounts, showing them how to use things like Ebay and Etsy, helping them to take pictures of their goods, explaining why it's important to crop out blank spaces and re size their images and showing them how to use software to accomplish this.


I mentioned that I was discontinuing the Tatted Lace Pattern Collection newsletter and a number of people have taken that to mean that I wasn't going to be designing any more. That is far from true. I have a small doily completed, in addition to the elephant flake seen in the disaster photo, 5 more motifs and part of a bookmark designed and recently I have been stuck in a rut doing these beaded snowflakes. For some reason, this design just makes me happy and I want to tat them in a whole rainbow of colours. The pink one is half done and the beads are already loaded for the yellow version and I have an idea for a necklace that I may or may not do.


Some of my time has been spent just being there. Hubby, who has been diagnosed with Meniere's was relatively okay during the summer but as soon as the colder weather hit, he started having drop attacks again. Let's just say life's not fun.


On another note, I sent out notice that another set of round robins would be starting and I've been trying to match people up and get mailing addresses to get them started. In the middle of this I was reminded that some of the tatting from the earlier round robins hadn't made it home yet, so I started chasing them down.


In the mean time the awesome volunteers on the 25 Motif Challenge blog have been keeping everyone up to date. It's a good thing too, because I certainly haven't had any time for it.

Wednesday, September 17, 2008

The End of an Era

I made a decision this spring as I went through yet another panic. When you're not the one doing it, it probably doesn't seem all that hard to come up with a new design, or two, or ten. When I look back over the hundred plus designs I have come up with for the newsletters, nothing seems especially wonderful, or particularly innovative. There isn't anything that a dozen other people couldn't have done, many of them probably better than I. Still, when the publishing date looms on the horizon and I don't have a fistful of new tatting to show for it, there's always a mad scramble to "invent" something on the spur of the moment.
In the beginning I wavered between creating a book and going through the difficulties of publishing it, and working on a deadline where there were fewer printing hurdles, but more pressure. I opted for the deadline and began producing the newsletter "Tatted Lace Pattern Collection". I wonder if other people realize how hard it is to create something new, fresh and wonderful, on demand.
I have to admit that I am my own worst enemy at times because of the self imposed guidelines I use. There has to be 4 or 5 patterns, one of them has to have the tatting content equivalent of a 12 inch doily, there has to be a variety of difficulty in the pieces, there has to be a lot of out of the ordinary kind of projects, some 3D tatting and some of them have to be simple enough for beginners to work on.

Do you know how restrictions and deadlines seriously impede creative ability? I do. There are times when I just get one newsletter sent out and I start wondering what on earth I'm going to add to the next one. How do you invent "new" or "interesting" or "different"?

Some added pressures of my personal life made this year especially trying and I decided that in the interest of my own sanity, I ought to terminate the newsletter after the last issue this year.
I've learned a lot along the way, but now it's time for something new, so this was the final issue. I'm not giving up on designing, I'm just going to design things as I would normally, and when they're ready, I'll publish a book. I've been asked about putting all of the doily designs from the newsletters into a book and I might do that, along with some new designs I'm working on. I have a number of things in mind including doing a dual issue of books in hard copy and electronic format so that people can buy in the format they want.

Tuesday, August 26, 2008

Challenging!

I have added another image to the Design Challenge page. This one has some more definite lines which may make it easier for a new designer to work with. Work with the black or the peach and see what you can come up with.

My personal challenge these days is getting out of the house (video), going anywhere without a car, keeping up with the 25 Motif Challenge, still tracking down the last few packages on the Round Robins and getting the Tatted Lace Pattern Collection done. Thanks to the wonderful folks who have volunteered to help with the 25 Motif Challenge I think I can keep my head above water.

One ray of sunshine is the I love your Blog award given by Artistgirl's Muse The concept behind this award is to link to the person who gave you the award and to link to seven blogs you love. I thought that this time I would link to some of the non tatting blogs I like to visit. In a Minute Ago, Lost Arts Studio, Teeny Tiny Cabin, 4:53 AM, Patra's Place, Annie's Crazy World, Hello my name is Heather,

Saturday, August 23, 2008

The View From Here


This is the view from my front door. 2 weeks ago on the 9th, we were awoken to the news that the water main had burst 2 doors down. After they dug down 10 feet through the road they discovered that the mains were buried under the lawns and driveways of our townhouse complex. So they moved over and dug up the neighbours driveway, which incidentally was where the water was coming from in the first place. Then the rain started. Ever tried finding a water leak in the pouring rain? 10 hours later there was a bandaid on the water pipe and the emergency crew left for the weekend. Monday they were back to fill in the hole and replace the gravel for the driveway base.

We were waiting for them to come back with the asphalt to finish things off, but on the 19th water started pouring out from under the gravel. This time the crew came back and dug up the lawn and a 30 year old tree. That was sad, but the tree was in bad shape and had to come down soon anyway. The mains looked questionable, so they decided to see if the dug a little further if the pipes would get better or worse. After pulling up our driveway the found another trickle of water, not under our driveway, but coming from further up the street. (Thanks guys for the unnecessary driveway replacement!)


So this is my current view and it's likely to stay that way until the decide if they want to dig up more pipe, which I would really prefer, or fill in the hole and hope for the best. I'd rather have it all done and finished, than have half of it done and have to wait for the other shoe to drop.


By the way, a closer inspection of the picture will show my latest piece. It was supposed to be a snowflake, but it grew to doily proportions. Rob has named it Elephant Flake.

Wednesday, July 23, 2008

Design Challenge 1B

I did another variation of from the design challenge and when it was done I wondered how it would look as a doily.

It has possibilities, but I'm not sure if I like it well enough to design an outer border that would bring it all together. Before you go shooting yourself for being slow, this doily is just a photo image copied and pasted. I wanted to see what the negative space would look like where they join. I like the join, but I'm not crazy about the outer edge. I think maybe it would need something to bring it all together and connect the outer points. I had no idea that the points were going to look so square, but it does make for an interesting design element.

Now there's an idea for an eight person round robin. The first person does a snowflake, the next 6 just make and attach a repeat of the first snowflake, and the last person has to do an outer round to finish it off before sending it home. So everyone would make 7 snowflakes, all different, and one round to finish off a doily, and everyone ends up with a doily which is mostly their own design.

Monday, July 21, 2008

Cross linking

I just thought that I'd post some technical information while I'm thinking about it. A few weeks ago the tatting community banded together to help get some purloined pictures removed from a web site. The web site owner had copied pictures from other people's blogs to promote the sales of their merchandise.

I copy pictures from other people's blogs to post in my own blogs all the time. So what's the difference? Doesn't that mean that I am infringing on copyright too?

NO. For 2 reasons. First of all, when I began copying pictures from people's blogs for the 25 Motif Challenge blog, it was because people offered me the pictures. Later on I asked new participants for their permission. When it became too cumbersome to contact each person individually, I wrote an explanation on the blog advising people that when they joined the challenge it was with the understanding that their pictures WOULD be copied.

Each picture that is copied is identified as to where it came from and each entry includes a link back to the blog where it originated.

Secondly, posting the pictures of your tatting on the challenge blog is not promoting any merchandise I have for sale. Those 2 things make a huge difference.

Something that you may not realize, is that by participating in the 25 Motif Challenge, or in the latest Design Challenge, your blog is becoming more visible and more popular. One of the things that causes a web site to appear close to the top of the list in a search engine is the number of hits the web site receives. When another blog or web site links to your blog or website, you become more visible. More people find your blog, more people visit your blog, and you move up in the ratings.

As the search engine robots work through the internet following all of the links to their final destination, your page comes up more often, with each new link there is another robot finding you and adding you to their list of places to visit.

The cross linking of people to one another and to the 25 Motif Challenge page is making you and tatting more visible on the internet. We are becoming easier and easier to find. Tatting really is alive and well on the internet and these challenges are not only helping us to improve our tatting skills, they are also making us more noticeable.

Taking my own challenge

Since I started this challenge it's only fair that I give my rendition of the challenge image. I started with a couple of ideas and began tatting. This was my first drawing. The drawing only mildly resembles the initial image,


but that didn't matter because no matter how much I tried to make a hexagon with it, it just wanted to be an edging, so I cut it off and started again...with the same results.

That wasn't working so I sat back and looked at the image that Bev called a Rorschach blot. At first all I could see was the letter 'W' but when I looked at it again I saw butterflies. So I played around and came up with another drawing. This one looks a little more like the original image.

So I started tatting. I wasn't sure of the spacing between the butterflies and the chains at the bottom looked weird and disconnected, so as I did more repeats I changed it, adding a short chain between the large rings and adding a join on the tiny split ring at the bottom. It got closer to what I wanted. So I cut the thread and started over again.

See all the ends hanging? When a design gets tweaked over and over again, I just work with whatever thread is still on the shuttles and add more thread in as I need it. There's no point in starting out fresh with fully loaded shuttles because chances are that I'm going to have several tries at it. I weave the threads in as I go if I can, but if I can't, I just let them hang and then sew them in when everything is done. I don't attempt designing with specialty threads as it's most likely just going to be a waste of thread. Sometimes I load the shuttles and tat the design that's in my head start to finish and it comes out perfect the first time. Other times it doesn't.

Here is the latest result. I think I should re-do it adding a longer chain between the large rings at the top because it wants to cup a little. One extra stitch between the butterflies would probably work out better. It's heard to tell since this piece hasn't been blocked yet.

This was one variation of the image. I have another one I'm still working on. After 3 false starts, I'm about half way through it.

Wednesday, July 09, 2008

I've been tagged


I have been tagged by several people in the last few weeks, or maybe it's months? First it was the Arte Y Pico Awardand more recently it's the Brilliante Weblog award

and while I appreciate the vote of confidence, as you can tell from how long, it's taken me to acknowledge these awards, doing so is way, way down on my priority list. Actually, I don't even get much time to blog here on my personal blog because I spend so much of my computer time updating the 25 Motif Challenge blog. Right now instead of blogging about being tagged, I really ought to be emailing everyone in the round robins to get the pictures of all their pieces so that I can update the Round Robin blog. After which I should send around a notice about a new series of round robins. Then it should be time to update the challenge page again...

Where is that bag of TIME. I'm sure it's around her somewhere.........

Thursday, July 03, 2008

I challenge you!

Here's a challenge for you. See this image? Use it as a base to design a snowflake. Use either the blue or the white for your outline and see what you can come up with.

Anne took the challenge and designed a beautiful piece based on this image, but she thinks hers looks more like a flower.
Marty has her interpretation done. Her first attempt had many points of different shapes, then she ran out of thread. After reloading her shuttles shae came up with a successful snowflake.