I've been feeling for a long time now like I was missing part of my e-mail "conversations". It's kind of been like missing a sentence here and there in a dialogue. Very disconcerting.
Yesterday hubby was using the DVD burner on my PC to convert some home movies to DVD so I used his computer to check mail. Imagine my surprise to find that several of the messages from my e-mail lists identified as SPAM! Since our IP introduced spam filtering my husband and I have had far fewer ads for Viagra, mortgages and the rest. What a relief to be rid of all that garbage mail.
Some time ago hubby went in and changed our spam filtering from normal to aggressive. It was about that time that I started to feel left out of the conversation. My e-mail is set to delete spam off the server. I never see it. Yesterday I changed my e-mail settings so I could see what was happening. Yep. The system has been deleting my tatting e-mail.
The good news is, I'm not losing my marbles, people aren't talking behind my back, it's just a good old computer glitch.
Saturday, July 29, 2006

Tuesday, July 25, 2006
Another simple book mark


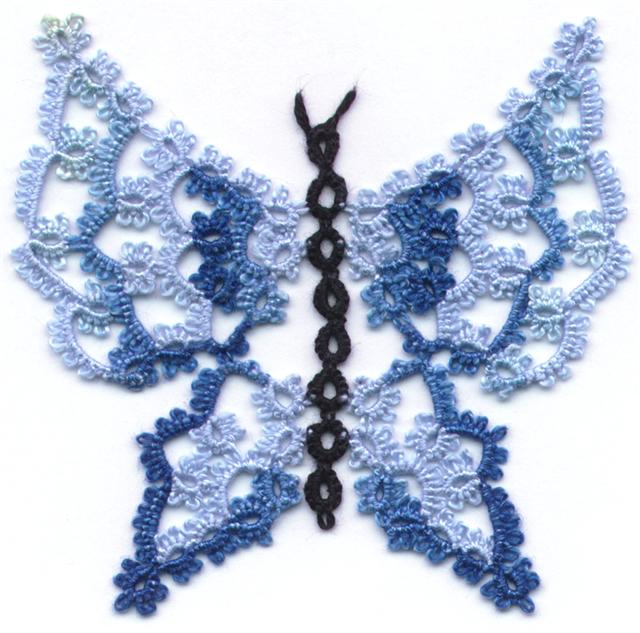
Each of these little bookmarks allows beginners to learn new little techniques. This is another of the bookmarks that can be done using chains only, but it requires the use of a paperclip to make mock rings (MR). Begin at the base of the butterfly and when completed the end is used to make the optional long zigzag chain.
Slip the paperclip over the shuttle thread before you begin. A large paperclip gives you something that is easy to hold onto and it will hold open the beginning space so that you can close the mock ring. Start where marked, tat the required number of stitches and then pull on the paperclip. This pulls the core thread back through the stitches to open up a loop. Slide the shuttle through the loop and pull the MR closed. First mock ring completed.
Again slide the paperclip over the shuttle thread and tat the next MR joining it to the first. The tiny ring at the top has 2 picots for the butterflies feelers.
Repeat for the second side of the butterfly. Join to the base of the first mock ring and add a zigzag chain to complete.
A zigzag chain, is also known by the names ricrac and sometimes rickrack, sets or Victorian sets. A regular chain wil curve because the top of the stitches is slightly wider than the bottom. If you want a straight chain you do a zigzag chain. This is produced by tatting the first half of the doublestitch for 4 or 5 stitches and then doing the second half for 4 or 5 stitches. Each time you switch from first or second halves the direction of the top part of the stitch changes giving the chain a zigzag top.
Friday, July 21, 2006
A Change of Style
It was pointed out, that if I'm going to post patterns for people to try, I ought to change the background so that they can print it. Duh. I must have been having a blond moment not to have realized that myself. I knew the patterns could be printed just by doing copy and paste since they are visual, but any textual information on a pink background wasn't going to be readable.
So, we're now plain boring practical white.
One of the reasons I like white for tatting. It goes with everything. It doesn't detract from anything you put it with or on. It just always adds to the mix.
White is nice.
So, we're now plain boring practical white.
One of the reasons I like white for tatting. It goes with everything. It doesn't detract from anything you put it with or on. It just always adds to the mix.
White is nice.
Wednesday, July 19, 2006
Small Bookmarks
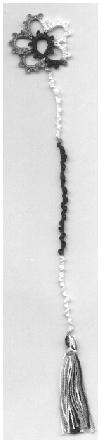
There are lots of sites on the internet where you can learn how to tat including mine at www.tattedlace.com so I don't want to duplicate that information here. What I do want to cover in the next few posts are some simple beginner patterns both for those who want to learn how to tat, and for those who want to teach others.
One of the easiest ways to learn how to tat is to begin with chains using 2 contrasting colours of thick thread. Thick thread like size 10 or bedspread cotton means that you can actually see the stitches as they are being formed. Using 2 colours lets you differentiate between the shuttle thread and the ball thread.
The problem with tatting chains is that you can't really make much with them. Can you imagine going in to your first tatting class and having the instructor say "Today we are going to make a long string of knots ." Not a very interesting project to generate enthusiasm for tatting.
I developed several small designs that could be done in size 10 thread to make little bookmarks, a couple of which use only chains. The flower bookmark shown is one of them. When worked in variegated thread you can still see which is the ball thread and which is the shuttle thread. Each of these designs was created so that it is finished off with a long zigzag or rickrack chain and a tassel. If you know how to crochet you could do a crochet chain instead of a tatted one. Or you could just tie on a fine ribbon.
The Flower bookmark begins with a ring shape. So you could tat a ring. Sometimes if I am teaching a small class and I have the time I wind the thread onto throwaway shuttles that I cut out of plastic lids, like the kind you get on margarine or coffee. (I'll do a template for the throwaway shuttles in another post.) I wind the ball end of the thread onto my business card, and I tat the central ring. That way we begin class with shuttles already wound and the students only have to learn how to tat chains.
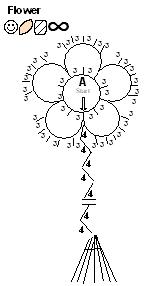
If I have a large class or I don't have the time, I wind the thread and attach a paperclip between the shuttle and the business card. Instead of beginning the bookmark with a true ring, we do a mock ring, or a Self Closing Mock Ring (SCMR). A mock ring is just a chain curled around and joined back to itself. So, hold onto the paperclip and begin tatting where marked in the diagram. Tat 3 doublestitches, then a picot, 9 times. Tat 3 more doublestitches. This will bring you back to the beginning where the paperclip is holding your place open. Pull on the paperclip to pull the core thread out enough to push the shuttle through the loop. Then pull on the shuttle to close the loop back up again and the central ring is formed.
The next row is a chain joined to alternate picots of the base ring. The point where you start has to look like it's a picot. It isn't a picot, it just looks like one and it's called a mock picot. Any time you have the shuttle thread and the ball thread forming what looks like a picot in the finished piece, it's a mock picot. Similarly, when you tat a row of split rings you have the 2 threads, one from shuttle 1 and one from shuttle 2 forming what looks like a picot between the rings. That is also a mock picot
If you just start the chain, as soon as you tighten the chain up, the gap that looks like a picot will disappear. To prevent the mock picot from disappearing you do a lock join. A lock join is created by an unflipped half stitch. Do the first half of a doublestitch, but don't flip it, then do the second half. Since the thread in a lock join isn't flipped, it won't slide. That's what makes it a lock join.

Tat a chain around the ring. Skip the first picot and shuttle join into the next picot. Usually you insert the hook into a picot, pull up a loop of the thread wrapped over your hand and then slide the shuttle through, as shown in the picture to the left. For the flower bookmark insert the hook into the picot and pull up a loop of the shuttle thread. Slide the shuttle through the loop and pull the thread tight. Shuttle joins don't move so make sure that you have pulled out all of the slack and that everything is in position before you tighten the join.
Continue the chain around the mock ring skipping one picot and doing a shuttle join into the next picot until you come back to the beginning. Join into the mock picot at the beginning of the row, pull one of the threads, either the ball thread or the shuttle thread through the mock picot and tie the ends in a square knot.
A square knot is formed when you tie the thread left over right, right over left. Or, right over left, left over right. A granny knot won't hold and you don't want it to come undone.
To complete the bookmark add a fine ribbon or crochet a chain and add a tassel or tat a chain using a Zigzag stitch. You will have noticed when tatting the flower that chains tend to curve. If you want a straight line instead of curves you need to switch back and forth between tatting the first half and tatting the second half of the doublestitch. Tat 4 or 5 first halves then 4 or 5 second halves. Repeat for the desired length. Zigzag stitches are also known as Sets or Victorian sets. Once the straight chain is completed, a tassle can be added to finish off the bookmark.
In this one small bookmark, the tatter will have learned 5 additional techniques. Mock ring, SCMR, mock picot, lockjoin, and shuttle join.
Beginners

I've been thinking about doing a series of posts including things for beginners. I really want to put the stuff on my web site but that requires intensive input from Rob. If it isn't perfect he won't put it up. Useful takes a while, perfection takes longer and I'm impatient. I really want to do this. Do I have time for it? Probably not, but if it's in a blog I can do it in little pieces and then when/if it gets moved to my web site everything will be complete. Sort of. Well my part will be complete, perfection will come by and by.
On several of the e-mail lists we've had discussions about what makes a pattern difficult and I have always maintained that a technique such as split rings ought not to be part of the equation. If a pattern calls for split rings and you can't do them the pattern isn't difficult, it's impossible. If you can do split rings the pattern may actually be very easy. So when I started doing patterns for publication I devised a legend so you can see at a glance what the pattern needs.
The picture at the top are the symbols I selected. A happy face means it should be easy for anyone to tat. The not so happy face means it will take concentration. Doesn't the little guy look like he's concentrating? The symbols that look like a pair of canoes are shuttles. There's only one when a pattern calls for one or more when more are needed. The next symbol is a ball of thread. doesn't it resemble threads going around a ball? The circle split in the middle is used for split rings. The pair of vertical lines are used for mock picots, I don't usually mark them in the pattern. I think it's overkill for something that just happens as you work. The eternity symbol is what is use for continuous thread (CTM) , no beginning no end just lots of thread. (Don't we just wish that our shuttle threads were endless!). The last symbol of linked paperclips also looks like chain links, so I use it to show split chains.
There are some other symbols I use from time to time, but so rarely that I describe them when I do. Like the symbol for a really hard pattern. I've only ever used it once or twice. The first time I used it on the Orchid pattern in the Transitions book. That pattern was such a stinker to do that I only tatted it twice. It's also the only pattern I really had to have proof tatted. The end results are pretty, but Oyyyy what a pain to work on.
I think I'm going to begin this beginners series with some of the patterns I use to teach with. I'll need to tat up some samples first and right now I really ought to be doing other stuff... If I have time after Bible Study tonight I might get to it. Bible Study has really been great, we've been going through the book of Mark looking at how Jesus operated and seeing what He did to get the results He had. It's been very thought provoking and challenging.
Tuesday, July 18, 2006
The Wedding
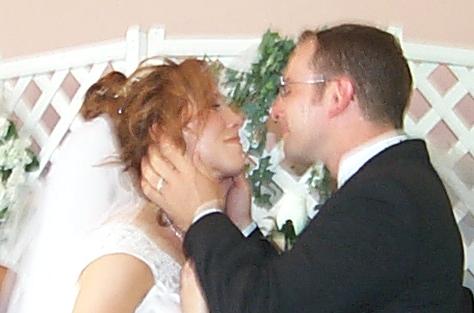
Aren't they a cute couple? Rick and Lora's wedding was on Sunday at Westfield Heritage Village, a very quaint locale with historical buildings and people wandering around in period costumes. We had been concerned about being rained out, but the day was bright and sunny with the temperature soaring to a skin crisping 97 degrees F. The ceremony was held in the Mountsberg Church and of course the buildings were not air conditioned.
The bride, not being satisfied with the job the hairdresser did, took the time to re-do her hair making her about one hour late for the wedding. Picture a quaint frame building packed with men in suit coats and ties, ladies in elegant finery and add 100 degree temperature and an hour wait for the bride to show up.
Fortunately, one of the wedding party had been thinking ahead, so the program was printed using stiff card stock in dark red, (to match the dresses) for the outer blades of a paper fan. They used a teardrop shape with a rivet at the base so you could spread out the pages to read the program or fan yourself. Never mind reading, we were too busy fanning! The music was provided by a very talented choral group, friends of the bride and groom. Since candles were not permitted in the village they used a sand ceremony where the mothers of the couple poured red and white sand into a large glass bowl. It was very pretty, and a nice touch to the ceremony.
The photographer, anxious to get just the right picture, took an abundance of shots at numerous locations on the grounds and the wedding party was quite wilted when he was finally done. The Inn, where the reception was held was air conditioned, but crowded with hot bodies it didn't stay cool for long. Due to the lateness of the wedding and the excesses of the photographer the reception started an hour and a half late. We were entertained with delightful live classical guitar music so the wait was enjoyable except for the grumbling tummies. The food was yummy, a buffet with lots of choice and nothing seemed to suffer for having been delayed. I think the staff knew that the wedding was late and had delayed the food preparation. All in all it was a delightful day.
The Album
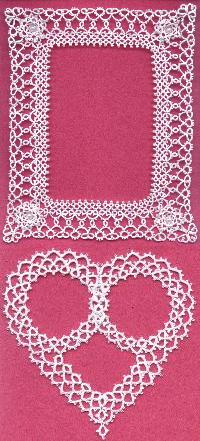 I haven't posted much lately as I was working on the album cover for my niece's wedding. I was still working on it the morning of the wedding! It seems to me that the tatting is the easy part. I constructed the album covers so that they were simple sleeves that could be removed for laundering. Although I tried to buy albums that were white to start with, the best I could do was a white album with a small circular picture on the front and back.
I used white satin fabric for the cover but the picture showed through so I lined the cover to make it thicker. I didn't want any raw edges showing so I just sewed the satin and lining together like a long tube, turned it inside out and then folded the long ends in and blind stitched them together fitting it to the album as I went.
I had the choice of attaching the lace to the fabric and hoping that I got it positioned correctly or making the cover and then attaching the lace. Not wanting to spend hours sewing down picots in the wrong position, I opted for making the cover first. The difficulty of course is that I had to work from the outside of the cover sewing the lace down to the satin, but not through the lining. I used a small plastic cutting board in between the layers which worked really well. It took a little longer but I was assured of having the frame in the right position on the front of the album. It was a little off, I think because the satin was so slippery and it was hard to pin the tatting in place and then remove the cover from the album to stitch without the pins sliding out.
In the mad rush of getting dressed for the wedding I didn't have time to take a picture of the finished album but here are some scans I took earlier. The frame uses an edgings and flowers that were in earlier editions of the Tattedlace Pattern Collection newsletters. I wove a gold ribbon around the row of open rings and tacked them down under the flowers in the corners.
I was going to use a musical theme for the interior, but since I hadn't met Rick I didn't know whether he was as musically inclined as Lora was so I decided against it and went for a heart shape. I needed an open area for names and the date and began with the idea of 2 intertwining hearts that would let me embroider a name inside each one. I doodled in the drawing program with a round motif adding points at the bottom and played around with different ways of linking them together, none of which I liked the look of.
Time was running short so I tatted up my 2 round ring and chain motives as I considered how best to proceed. Once I had them done I laid them side by side I realized that the two round shapes made the 2 top curves of a heart. Adding an open point on the bottom gave me the space to embroider the date. I un-tatted the last motif until I could open it up again, linked the two motives together and joined it back together. After I added a ring and chain point to the bottom of the linked round motives, all I had to do was add another row of chains to join everything together and my heart was done.
Tuesday, July 11, 2006
It's a mystery. This afternoon I was intrigued by several shiny discs glinting on the back patio stones. They appeared to be about the same size as the plugs we removed from the junction box when we wired in the downstairs lights. There was no way the plugs could have gone from the garbage pail in the garage to the backyard, so I sent Rob out to investigate. He came back in with 3 shiny quarters. How do quarters get dropped onto the fenced in patio when no one has been in the backyard?
Three was an odd number so I sent him out to look again for the fourth quarter. He came back with 2 dimes and a nickel. Curiosity fully aroused, I went out to see this phenomenon myself. Scattered over our yard, on the lawn,in the flowerbeds and around the outside of the fence $3.70 in nickels, dimes and quarters but no pennies.
Our first thought was that the grass cutter had lost it out of his pocket, but why no pennies and why were they in the flowerbed. Even if you back up to get the lawnmower into position you don't stand in the flowerbed to do it. That explains why there would be coins on the patio, but not the flowerbeds.
Did the tooth fairy lose the coins during the night. Did someone in a fit of exuberance throw a handful of coins in the air to land where they may and if so, why only in and around our yard not in the back greensward or the neighbouring yards?
I expect we'll never know, but it would make an interesting plot for a story.
Three was an odd number so I sent him out to look again for the fourth quarter. He came back with 2 dimes and a nickel. Curiosity fully aroused, I went out to see this phenomenon myself. Scattered over our yard, on the lawn,in the flowerbeds and around the outside of the fence $3.70 in nickels, dimes and quarters but no pennies.
Our first thought was that the grass cutter had lost it out of his pocket, but why no pennies and why were they in the flowerbed. Even if you back up to get the lawnmower into position you don't stand in the flowerbed to do it. That explains why there would be coins on the patio, but not the flowerbeds.
Did the tooth fairy lose the coins during the night. Did someone in a fit of exuberance throw a handful of coins in the air to land where they may and if so, why only in and around our yard not in the back greensward or the neighbouring yards?
I expect we'll never know, but it would make an interesting plot for a story.
Wednesday, June 28, 2006
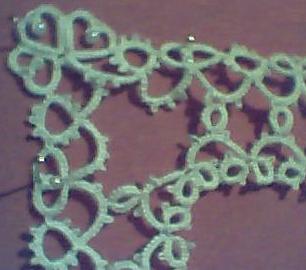
Row 2 - A working corner
Well, I finished row 2 and pinned out the frame, but as often happens when you work from the outside in, my internal dimensions aren't what I hoped they'd be. I want a regular 5 x 7 picture to be able to nicely sit inside the frame. My dimensions are 5 x 7.5 which means that the picture will fit, but the white border will be visible. I'm going to need another row and that's both good and bad.
Good, because I did want to have pearls outlining the picture which I couldn't comfortably do with the design I was using and now I can. Bad, because it means I need to do another row and I don't really have time to do it. Looks like the holiday weekend will be spent furiously tatting.
Before I go on to do another inside row I want to take a stab at doing the musical notes just to see how they go. If it works as expected each medallion for the note should take about 2 hours to complete. I want to see what the finished size looks like before I decide about the frame.
Monday, June 26, 2006

The corner isn't working.
The corner of the picture frame was going well until I hit the inside corner and ended up with too much tatting for the space it had to fit in. I like the way the side is shaping up, but the bit shown here is the third attempt at going around the corner. The thread ends are from cutting and starting again. I'm afraid that I may have to cut the thread and do something creative with the inside corner. I don't have time for this!
We had an interesting weekend. Our 18 year old car needed some cosmetic work done on it. The interior roof started sagging down and my ever resourceful hubby decided to fix it. The fabric cover was removed excess debris vacuumed up and then we proceeded to brush on the fabric glue. What a disaster. The brush on adhesive which was supposed to dry clear, dried white on the navy blue fabric. The fabric shrunk.
Rob decided that since that job wasn't going well he'd start on another project. He wanted to hang his compressor in the garage where it's easy to use it for filling car tires and blowing wood and grinding dust off projects. He built a solid frame out of angle iron and mounted the compressor with rubber spacers to reduce the noise. Then he decided that he wanted it wired into a switch that was more easily accessible so that he could put a timer on it and keep the compressor full at all times.
Just as he was tightening the last screw on this project the screwdriver hit the edge of a metal button inside the control panel in the garage and everything went black. None of the fuses looked as if they had blown and everything in the house was still working so he checked the main fuse panel in the basement. The garage fuse tested fine, but just in case was replaced with a spare. Still no power in the garage. Each line coming into the garage fuse panel was tested. One set of lights in the garage was working, but all of the other lights and outlets were dead. An hour later we're back to the main fuse panel. According to the label there is only one fuse for the garage Then I notice that some items are showing 2 fuses. After a closer check we discover that one of the fuses on the main line coming into the house has blown. Luckily we had a replacement and in minutes everything is back up and running, including the newly installed compressor.
After a quick trip to the fabric shop we started over again on the roof, this time using a spray adhesive. Much better, except for the stuck together fingertips where we had to hold the fabric in place while applying the adhesive. The car is all back together again and looking spiffy, the compressor is hung and has been used to fill all the tires and Rob is aching from hacksawing angle iron, drilling holes, and hanging upside down, inside the car trying to get the roof lining in and out. He forgets that he isn't as young, agile, and flexible as he used to be. So he spent the rest of the weekend taking it easy.
I spent the rest of the weekend working this corner again and again.
Friday, June 23, 2006
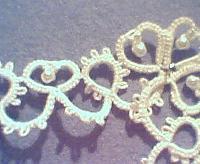
Wedding Album
Well, I'm half way around the first round of the rectangular frame for the front of the album. It's a pattern from my Tatted Lace Pattern Collection that I now have on CD, called Hearts and Flowers. I'll add another row of ring and chain to the inside to make a wider edging. I'm doing it in size 20 thread with 3mm seed beads on the dip of each dimpled ring. I think I'll do the ring and chain edging with a small ring thrown off the top of the chain and join that ring to the middle picot of the chain on the first row.
I'm not going to do the big heart shaped frame that I did for the first album. You can see thumbnail pictures of the first album on my website. http://www.gagechek.com/slb/cd/ The rectangular picture frame is near the mi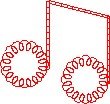 ddle of the page and the heart frame is below it. For this album I want to do something musical so I'm thinking of tatting some musical notes and embroidering their names inside the notes I may do some crocheted chain for the straight lines although I'd really like to do it all tatted. Time is against me on this one. I went into the fabric store and they are renovating and out of dress fabrics right now. I have a choice of plain white cotton or traipsing out to another store. If I'm going to embroider the names I might do the straight lines as well. Or maybe not. Like a lot of things I'll just wing it.
I'm not sure where to put the wedding date. I may add a small tatted heart with an open centre, or I could do tied eighth notes and embroider the date in the space between the bars at the top. Whatever I do it leaves me with one month to come up with the 5 new designs for the August newsletter. I love pressure-NOT.
Wednesday, June 21, 2006

I've just heard from my sister and my niece's wedding invitation which was sent out 3 weeks ago, didn't arrive. I was wondering what had happened. I was told about the wedding some time ago and have been waiting for the invitation to see what it looks like. I was hoping it would give me some ideas.
I did a wedding album cover for the last 2 weddings. It was more work than I want to ever have to do again. Two tatted frames; a rectangular one for their picture on the front, and a heart shaped one with their names and the date of the wedding on the interior, plus a whole lot of chained edging for the rim of the album. I have been looking at other options that won't kill my hands to complete before the wedding.
My niece is a pianist, vocalist and artist so I'm wondering if I can make a musical symbol into a picture frame for the front. It would be different, but the wedding is July 16th, 2006. I don't think there are enough hours in the day. I wish I could draw creatively, then all I would have to do is fill in the drawing with lace.

Baby Birds
This year, like every year, the sparrows have taken over the bird house in my yard. The bird house sits on the top of the bird feeder pole, which is high enough to keep the squirrels off. It sits right outside the second storey window where my computer room is, so I can work all day and watch their antics. I put it up to house the little red house finches that sit and sing so prettily. The tiny hole was made just big enough for a finch. Perfect.
Someone forgot to tell the squirrel that a bird house is for birds. I woke up one morning to the sound of something industriously chipping away at the wood. By the time I had chased the squirrel away from the birdhouse, the tiny finch size hole had been enlarged. Rob took a sheet of aluminum and wrapped the front of the house in it. Try and chew THAT! The birdhouse had been saved, but with a bigger hole. Just big enough for sparrows. So now every year I have a new batch of sparrow babies to watch grow up.
They start out making tiny little peeping noises you can barely hear, but as they grow the chirping gets louder until they get to the stage Rob calls Darth Vader birds. They're at that stage now. Soon they'll all fly away.
I keep hoping that one year I'll actually see one leave the nest. They get bigger and bolder every day. At first I can just see the tip of a beak and sometimes make out the top of a tiny head, deep within the dark recesses of the bird house. It doesn't take long before I can see the whole head with the beaks that seem to take over their whole faces. Baby beaks are a different shape than those of the parents. It's like they are hinged so that the whole top of the head lifts out of the way for the parents to feed them.
It's interesting all of the little things you learn when you get to watch them year after year. Things like, both birds build the nest. Papa bird crams the nest with all kinds of building stuff that Mama bird re-arranges and sometimes discards. Both birds feed the babies. Papa feeds whoever has his head out the hole at the time. Mama bird goes right into the nest to feed the littlest ones as well. All of the babies leave the nest on the same day. If one, the eldest jumps out a day or two too early, it will stay near the nest and the parents will feed it on the ground.
It's amazing to see the grown babies sitting in the middle of a pile of seed and still go running to the parents chirping incessantly, wings at the side flapping so wildly they're just a blur, mouths gaping open. They'll pick at the seed if the parents aren't around but they'd rather the parent pick it up off the ground and stick it in their beak than try and pick it up themselves. I wonder if their wide shaped baby beaks don't work as well for picking up seed.
One of these days I'm determined to see them "fly the coop", if not this batch, then the next. They always have at lease 2 clutches of eggs before the heat of summer sets in so I know I'll have several opportunities before the summer is over.
Saturday, June 17, 2006
You'd think the little challenges with creating a newsletter would end once the publication was done. Think again. After sending out all of the newsletter e-mails I had a couple of people tell me they didn't get it. That happens occasionally when either their IP or their e-mail program has a limit on what they can receive. Usually I can just re- send and they get it OK. Every now and then the size of the newsletter just exceeds what they can get in e-mail.
It's not a major problem now that I know what the issue is. A secondary web site is created where they can go and download the PDF. Walking a novice through how to download Adobe's Acrobat and assuring them that the program is perfectly legal and safe to use; explaining to them how to set up their browser so that they can receive the file and change back the settings after it's received has just become part of the process.
Suddenly with this newsletter my website software decides to throw a hissy fit. One minute the password access to the secondary website is working and the next minute it isn't. I would have been having fits, but being married to a programmer does have it's advantages. Rob checks all of the html coding just to make sure nothing's wrong in the uploaded files, re-sets all of the security settings and trys again. And again. And again. Finally he makes the call to Tech support.
Two hours later, most of which has been spent with either Rob or I on hold waiting for their most senior tech, they admit they don't know what's wrong and tell us they'll check it out and call back. An hour later they call and report that it's working now. They can't explain why it wasn't working before, they don't know why it was working intermittently, not can they assure us that it won't work intermittently in the future. Give me back my shuttles, I need to be making lace.
It's not a major problem now that I know what the issue is. A secondary web site is created where they can go and download the PDF. Walking a novice through how to download Adobe's Acrobat and assuring them that the program is perfectly legal and safe to use; explaining to them how to set up their browser so that they can receive the file and change back the settings after it's received has just become part of the process.
Suddenly with this newsletter my website software decides to throw a hissy fit. One minute the password access to the secondary website is working and the next minute it isn't. I would have been having fits, but being married to a programmer does have it's advantages. Rob checks all of the html coding just to make sure nothing's wrong in the uploaded files, re-sets all of the security settings and trys again. And again. And again. Finally he makes the call to Tech support.
Two hours later, most of which has been spent with either Rob or I on hold waiting for their most senior tech, they admit they don't know what's wrong and tell us they'll check it out and call back. An hour later they call and report that it's working now. They can't explain why it wasn't working before, they don't know why it was working intermittently, not can they assure us that it won't work intermittently in the future. Give me back my shuttles, I need to be making lace.
Friday, June 16, 2006

Have you ever tried to clearly map out a 3 dimensional drawing? Places where parts of the lace ovelap other parts mean that on a flat drawing, all of the tiny little numbers are stacked one on top of the other. It's hard for a tatter to tell which of 3 numbers occupying the same space actually ought to be used without guessing. After trying repeatedly to clarify the same tiny bits of drawing I finally gave up and started one more time. After all of that, you'd think that a very plain and simple edging would be a piece of cake. No way, not this time. As I rounded the 3rd corner of the hanky I suddenly realized that the ring joining into the corner treatment of the very first corner, was attached at the wrong point. There's no way I was going to re-tat the whole edging. Two little -snips- and the offending ring is gone. I have 4 ends to hide in one ring now, but the corner is finally attached in the right place.
At this point I should have realized that there is something definitely wrong with the way things are going, but being I glutton for punishment I push onward. As I finish off the blue base for the columbine and pull out my shuttle full of white thread to do the inner section of the flower I realize I have a different type of thread on this shuttle. It's not the size 8 perle I thought it was but some size 20 or maybe 30, 3 ply bedspread type of stuff. Not the same size or the same texture. I discovered the problem in time and all I had to do was change threads.
Except that I did't have a ball of white thread. All I had were some short pieces left over from
other projects. I could work with short threads, but it was going to take me that much longer to
get things done. I pressed on, knowing that there was light at the end of the tunnel even if I couldn't see it. As I worked on the second white petal I looked at how the flower was coming together. The construction was OK but the white part was way too long and out of proportion with the base. The best thing to do with it was cut it off and start again. Only, I couldn't start again, I didn't have enough thread. After debating with myself about all of the possibilities I decide I have to cut it off and I also have to save as much thread as possible. So, very carefully I cut the rings at the top of the petal throw away the tips and add in some new thread. With the crisis over I whip through the rest of the flower adding in new thread 3 more times.
At this point I'm thinking "Isn't tatting fun?" NOT! I finally have the columbine done and it's down to the homestretch. One more pattern to draw and pull into the newsletter, and I'm done. I get the drawing for the base completed and I'm thinking it won't be long now. The base is completed and I just have to do the cup shape for the centre of the flower. Then I run into another snag. I need to show how the pieces are connected, but it means changing the colour of all the different rows and redrawing part of the middle so that I can keep the rings and chains of one part distinct from the other part. Step by step I manage to get it done. I bring the drawing into the publishing software and then the colour starts dropping out to the diagram. I change to colour of one chain and another goes from black to green. I've been down this road before and I'm just too tired to play the game. One click of a button and my drawing is a picture. No more unexpected changes to my drawing. Finally, it's done and I'm ready for bed. Unfortunately it hasn't finished tormen ting me enough. BUT, that's a story for another day.
What happened to my Tatting?
I think there must be a time warp in the house, or maybe it's a black hole or something.
I've just finished uploading all of the information for the latest newsletter and while none of the projects were especially difficult, putting out this edition has been a real challenge! We had to go out of town for a while and I knew I wasn't going to be able to do much tatting while I was away so I left my shuttles home, confident of the fact that I had 3 projects and an edging nearly completed and ready to be drawn out...or so I thought.
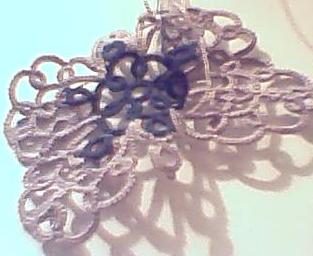
I was experimenting with taking a six sided snowflake shape and modifying it into a butterfly. Upon my return I discovered that the lovely blue and purple butterfly I was working on, looks great on one side but on the other side there are all these extra rings I don't remember putting there... The circular motif at the centre of the snowflake has these floating rings coming off the chains that make the base for the head and tail but I didn't need those rings on the wings so I just ignored them and tatted the butterfly as if they weren't there.
Imagine my surprise when I pulled this misshapen mess out of my sewing basket to create the drawing and realized that this completed project either had to be patched in no less than 4 places with teeny tiny little thread ends, or I had to re-tat the whole thing. I re-tatted it as being a faster way of getting the job done.
The other butterfly that had been done in a pristine white fell into my teacup. I wasn't about to re-tat yet another project so I just made sure it was dyed uniformly tea colour. I didn't really need more work that had to be re-done!
Which brings me to my 3rd so called, finished project. Now I ask you, when was that last time you saw a pansy with 4 petals?. The rows that I thought were lying all neat and pretty are a mess, twisting every which way but right. The colours are ugly together, the design is pathetic and even if I wanted to just add in another petal to fix it, why bother? What it really needs is a quick burial.
So as I re-tatted yet another design I wondered how quickly I could design and tat a nice representation of a 3D columbine to round out the newsletter. Well, at least there were some partial designs already sitting in my drawing program, I would just have to finish things off and make them look pretty. Wrong again. Since the initial sketches I had used didn't work out in thread the way I thought they would, I'd had to alter the design from the ground up, or in drawing terms, from the centre out. So all of my partial diagrams had to be erased.
Subscribe to:
Posts (Atom)