Saturday, May 29, 2010

32 of 30?

I have 32 of 30 designs tatted and diagrammed. Anyone see anything wrong with that number? I've already started pulling them into publication and doing the usual checking it twice routine and adding the step by step instructions and it's about 20% done. Or not. That 32 out of 30 number is to blame.
Last night the guys were here again. You know, those tech guys who are supposed to make my Air go. When they put in the new furnace we asked specifically if the air conditioning would work with the new furnace and we were assured that it would. When they installed it we asked them to check and make sure that both heat and air would work. It's hard to make the A/C come on when the outdoor temp is -0. It didn't so they tried again rewiring it so the both heat and air could come on. Then they replaced the thermostat. After which they replaced the circuit board which threw out all of the original wiring. When we hit record high temperatures earlier this week we tried the central A/C and although the unit came on no air was circulating. So we called our friendly guys to come and take a look at it.

The fan, which should come on with heat or air or by itself; only comes on with heat. They were sure that it was wired right and that the problem was the circuit board so they ordered a new board and a couple of days later they came back and installed it. It wasn't the circuit board. so then they thought it was the fan and ordered a new one. Yesterday they came back to install the fan. It wasn't the fan. They don't know what it is.

While they were taking the furnace apart to install the new fan I had uninterrupted tatting time and I decided to re-do some of the snowflakes in colour so that I can applique them onto a shirt. In size 20 thread several of them are 3 to 5 inches across. The plan is to attach 3 in a group add either a tatted or embroidered stem although I guess I could use ribbon which would be faster and I'd have a bouquet of flowers on my shirt. The blue snowflake is the first one so I was looking for compatible colours to go with it so I thought I'd try out Lizbeth Summer Fun.
Here it is unblocked. Yuck! The colours are pretty but the colour change is too short. It may work better when matched with a solid. I kind of knew that as soon as I had it wound on the shuttle, but I was hoping it would work. Anyone besides me keep going when you already know it's a mistake?

That left me no no alternative. I re-did it in Raspberry and now I'm on to my 3rd snowflake. I love the way this design works. the upside down dimpled rings with the join in the middle are a bit tricky.

I also want to do a couple of the snowflakes in size 80 so see how they do as bookmarks.

I have more projects on the go than hours in the day. I guess that explains why I haven't done a 25 Motif Challenge update in a while.

Wednesday, May 26, 2010

Done

If you visit this blog regularly you will remember that earlier this year we had a new furnace installed, which promptly quit on the coldest day of the year. After 5 or 6 service calls they finally got it working. This week in Toronto we are having record breaking heat, and guess what?


The fan in the new furnace won't come on with the air conditioning. So now on the hottest day of the year, we have no cold.
While trying to stay cool in my upstairs office, I did manage to finish my sister's birthday present. It's a couple of days late, but since she's gone out of town and doesn't know I'm giving her anything anyway, I'm not going to beat myself up about it. The picture doesn't do it justice because it's a shadowbox frame which isn't apparent from the picture. but between the poor lighting and the reflection from the glass, this was the best I could do and I wanted to make sure I remembered to actually take a picture before it's gone.


Edited to add new picture. The sunlight might have helped but you still don't get the 3D quality that's there in real life. Maybe it would work better if I threw the picture down on the scanner.


Anyway, here are the stats. The flower in the centre is the Irish Rose from my Marvelous Motifs book done in Lizbeth Violet/Pink Dark. The smaller bud is similar using just the base flower with 6 repeats instead of 8, and one less row. Then it was folded and shuttle joined at the edge to hold it in place. The bud at the tip was a half size centre ring with one pattern repeat zigzagged back and forth and again folded and shuttle joined at the tip.


The Pink flower is some no name perle cotton done with a row of ring and chain for the first row and a vertical row of smaller ring and chain joined to the rings of the first row. Three rings joined to each other make the little ball in the middle which was just knotted onto the central rings and the ends pulled to the back of the flower. The smaller pink flower is a basic daisy.

The blue flowers were tatted in Lizbeth Bright Turquoise Dark. They are basically 5 onion ring joined around a central ring.


The thread ends were taken to the back of the flowers and then tatted over to make the green stems. I think doing the stems took longer than the flowers and at one point I considered just wrapping the green thread around the ends. The leaf is just graduated ring and chain up one side and down the other.


I cut card stock to fit the frame and glued the flowers down with white school glue. Before anyone thinks I ruined some perfectly good tatting with glue, you'll be happy to know that I glued the pearl, not the lace and I glued the stems, not the flowers. The whole thing was formed in place and just glued in a couple of spots, which even if it yellows will be underneath and not show.

Monday, May 24, 2010

Work in progress

I'm working on a framed picture of 3D flowers for my sister for her birthday. I'm using the Irish rose from my Marvelous Motifs book as a focal point. I am thinking about how I can do a profile version of it as a bud.
The frame I have selected isn't very deep so I don't want anything with a deep profile. I've been playing around with some other flowers. I'll keep the blue one, but I'm going to replace the pink one with a plain daisy Add in a spray of one ring flowers to look like baby's breath and some greenery and it should work. As you can see, none of the ends have been sewn in yet. To save time I may just knot and glue because they'll be stuck down anyway.


I'm thinking of tatted stems and leaves but I haven't anything suitable to use as a vase so I think I'll just stick a bow on the stems.

Sunday, May 23, 2010

Skype

Earlier this year we downloaded SKYPE which is a free program so that we could talk to family that aren't local. If you don't have a high speed connection, it isn't all that successful, but if you do have high speed, Skype is a great way to stay in touch especially since you can not only do audio, you can also do video. We can now talk to family out of town as easily as we can to folks around the corner. As a bonus we can actually see how big the kids are getting or we can pick up the web cam and focus in on a circuit board or computer wiring connection to show how it's done.

Lately, several people on tatting lists have lamented the fact that when they have problems with their tatting that they don't live closer to someone who can show them the ropes. It occurred to me that this might be a useful way to coach tatting online. Of course before any of that can happen you need to have people with high speed connections, Skype on the computer and a web cam. The laptop comes with a basic web cam but we also have a Microsoft HD Life Cam so it has good resolution. Clear enough that I can show stitches on screen. It has possibilities. What do you think?

Saturday, May 22, 2010

Bummer


I've just realized that with very little modification 2 of the snowflake designs can be made into 3D snowflakes. That's a good thing, but in order to show you how it looks I have to actually tat them. One is small and won't take that long but the other is nearly 5 inches across. I already need to re-tat all or part of one of the other 3D flakes because I joined one of the arms at a point where I shouldn't have. Just cutting the join will fix it, but to do it properly I really ought to re-tat it.

What's not so good, is that I want to re-make several of the snowflakes which are pinned to my board to make colourful flowers that I can add onto some T-shirts. That's why one of the snowflakes is blue. I need to tat 2 more in colour for what I have planned and then sew down every blessed picot for easy wash and wear care.

What's also on the agenda is to tat some semi 3D flowers to mount in a frame as a birthday present for my sister. Her birthday is the 25th of May.

I also need to tat the designs from the folks in the Design-Tat class. Enough of them have been posted now that I can just sit down and tat them.

I'd like to do all of these things and start pulling the diagrams for the snowflakes into the software for publishing and I'd like to do it all this weekend. Good thing it's a long weekend.
The eagle eyed among you will have noticed this number. It's that close that I want this baby done!

Friday, May 21, 2010

26 of 30

Some things just aren't meant to be. I decided to throw in a cluny leaf for no reason other than the design was just too simple. It serves no purpose here. It doesn't add to the design to make it prettier. There isn't such a long chain that it needs to be broken up, I just added it to make the design a little more complex. So this one isn't going into the collection. Bye Bye snowflake.

Wednesday, May 19, 2010

What's your favourite patttern?

That's a trick question. You don't think so? Then let me ask you this:
Think of all of the motif patterns that you like. Now imagine having to tat it in a hurry because it has to be done by a deadline. Is it still your favourite pattern? If you had to tat something in a rush, would you rather tat a complex design with a lot of cluny leaves, or something simpler? See what I mean? You might find one design more aesthetically pleasing to look at, but it might require a lot more work to tat. On the other hand, some designs might be a favourite to tat, but they might not be a favourite to look at.
Some people tat because they just like tatting. Some people want to see the finished product. Some people want a challenge. Some people want variety. Some people want different things at different times. Some times I like to just vegetate with my tatting. I want to work on auto pilot and get up from my tatting with a finished piece of lace that I didn't have to think about too much. Some times I have an idea in mind and I want to create something new so it's a little more mentally challenging, like upside down dimpled rings.
Other times I'm tatting to create something that will be a gift and if I have the time to plan things in advance, I want it to be exquisite, original, unique and beautiful.

Of course I'm one of those people, you know, the ones that procrastinate, thinking that they can do a week's worth of work in a couple of days. So I often get to the first week of December and I haven't even started my Christmas tatting. If that isn't crazy enough I start adding in friends and neighbours that I think would like a little bit of tatting in their Christmas stocking. Or the week before a wedding I'm wondering if I have time to do edgings for a set of place mats or some other equally impossible task. So I have patterns that are my favourite to tat because they're fast to work up. And I have patterns that are my favourite because they are pretty when they are done. And I have patterns that are my favourite because they're a little of both. I've hit another milestone, as I've designed, tatted, blocked and diagrammed 25 of the planned 30 snowflakes for the new book and I was just thinking that this collection has a little of everything. Some mindless tatting, some mind bending tatting, some simple and some complex. I know a lot of people like to start doing their Christmas tatting early in the year, because, unlike me they don't procrastinate. By Christmas time they have lots of lovelies finished and ready to go. With this collection there will be enough snowflakes for everyone to have a favourite.

Friday, May 14, 2010

More Snow

This is a picture of one of the tatted snowflakes in the upcoming book. It's 3D and it has a star suspended in the middle. It's in the finished and blocked but not drawn state. I was going to put a crystal heart in the middle, but when all was said and done the heart looked too big for the centre space and so did the butterfly, but the star is just the right size.
It was hard to get a picture of it where you can see the 3D snowflake and the star in the middle with the wind blowing the way it was, but you get the idea. There's another 3D design done, but it's not blocked yet.

Tuesday, May 11, 2010

20 of 30

No, it's not a reference to the Borg collective. It's this number pinned to my board here:

These are the completed bits.

These are blocked and waiting to be written out.

These are finished. 20 of them, or at least 20 that I'm going to use. There are more than 20 on the board. I started writing the number on the board when I got tired of counting them repeatedly. Number 20 was a stinker to draw. I'm hoping some of the others in this box will be easier so that I can get this job finished sooner.
Why 30? I had plans for 1 a day for a month. They're done, I just need to get my butt in gear and get the rest of them onto the finished board so that number can be increased to 30 or more.

In their natural state they come in white, but I have plans to do some in colour for some other projects I have in mind.

I need to get these done and off my blocking board because I'm getting tired of working in white and I want to play but I need to keep at it or I'll just let it fall by the wayside. I was making progress adding one a day to my board but then stuff happened that needed my attention elsewhere. I am determined to get these into a book soon. Of course I was determined to do that before Christmas when I started designing these and now that I have more than 30 done, I'm looking at weeding some of them out.

Friday, May 07, 2010

Bookmarks revisited

We recently had some discussion about bookmarks on the HBT list which was sparked by someone talking about doing a bookmark for her mother's Bible. Bookmarks are fun little bits of tatting that let you do all kinds of interesting designs without a huge commitment of time. If you can tat uninterrupted, you can often complete a bookmark in a single evening. They're also flat and light weight so they can be mailed in a card for a quick gift. (You understand "quick" here is a relative term.)

I think bookmarks intended for Bibles ought to be made in fine threads. People who read their Bible regularly will probably have a good quality leather bound Bible with very thin pages. They're so thin they're called onion skin. Bibles have lots of pages and in order to keep the books small the pages are very fine. They are so fine, that any but the thinnest bookmarks will leave an impression on the page. Bibles are meant to be read often and last for a long time so they are usually very well made. They are also usually quite expensive for a good one, often costing over $100.00, so when you invest that kind of money, you want to take care of it.

This one is an odd ball, free form design. Most things I don't mind giving away, but this isn't a design that I'm likely to repeat so I kept it and I used it in my Bible for a short time but it was made in size 12 perle cotton and it's a little thick. That's why I made the new one in size 80.

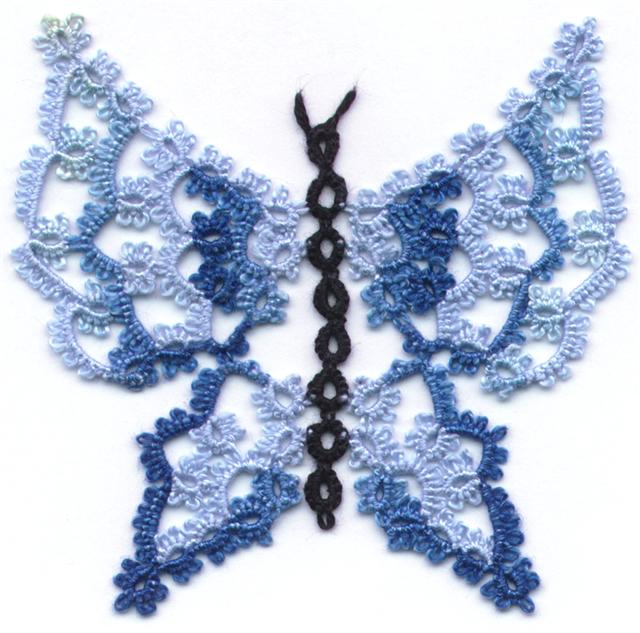
Beginners like to start with size 10 thread because it makes it easy to see the stitches, but size 10 thread isn't a good on the binding of a good book. When I mentioned tatting bookmarks in size 80 thread, there were several people commenting that they hadn't seen a lot of bookmarks intended to be made with fine thread. A nice size bookmark in size 20 thread will frequently look Lilliputian when it's done in size 80. This butterfly I designed to be made in size 10 but as it's mostly one long chain, it's not too bad if it's made long enough so that the butterfly and tassel are outside the book. There are several of this type of bookmark in my Transitions in Tatting from Flat to Floral book like the heart and red cross at the right. The pattern for the blue one is on my web site and it's been done in size 8 perle cotton.


The discussion about bookmarks prompted me to go through my archives looking for my bookmark designs. Most of mine have been done in size 80 thread. All of the cross bookmarks from my book Tatted Crosses where done in either size 80 thread or sewing thread which was even finer.


Then there were the bookmarks that I did over the 6 years that I produced the Tatted Lace Pattern Collection Newsletter. This one used dimple rings and long picots with a tiny row of split rings woven in between.
In 2005 I was hit by a car while riding my bike and the accident resulted in 5 breaks to my left leg and a chip off my right hip from the impact with the road. I had been creating new designs every few days, but the accident really took the wind out of my sails. I went months without inspiration. This rose bookmark was the first thing I created after I got out of the hospital and I did several as a thank you for various health care workers.

This one I designed for my sister in law when my brother passed away from cancer.
This one was just because I wanted a cross with a rose centre with simple arms. The one that's in the crosses book is prettier, but more complex to tat.
More recently I created a lot of square motifs for the Marvelous Motifs book and several of them worked well as bookmarks. I suppose most square motifs would. This one has another rose centre. I like roses. They make a nice base for a lot of different things. They work up fairly quickly but the problem that I have with doing a lot of them in size 80 is that I find I have to really wiggle the hook to make the lock join and I end up with a sore spot of my finger from stabbing it over and over again. This one was done in sewing thread.
This one done in variegated thread kind of looks like there's a flower in the middle of the motif. I only used 3 blocks to make a stubby bookmark. I suppose I could have made it longer, but I was in a hurry.
This one is a bit of a cheat because it was done in size 12 perle cotton and not size 80 which made it a bit thicker, but not by much. I would have done it in size 80, but at the time I didn't have enough of any compatible colours is size 80 to complete it and I didn't trust sewing thread to be strong enough to do the multiple split rings or cluny leaves required and not break. I think this is one of my favourite designs. It's really pretty, but definitely not a one evening bookmark.
Lots of bookmarks and none of them looking skinny mini even in size 80 thread. Just so you don't think I'm a bookmark snob, working only in fine threads, I found one I designed in size 20. It looked really skinny done in size 80. Dimpled rings are hard enough to close in fine thread. This pattern uses dimpled split rings. I tried it in sewing thread, which was all I had in green and it wouldn't take the strain. The thread broke on every ring so I gave up because it was going to be too skinny anyway.

Thursday, May 06, 2010

Bookmark in solid colours

I did another bookmark to send to my sister for her birthday. This one is done in 2 solid colours of vintage size 80 thread with a single end. I had to hide the end of the green shuttle 2 thread and the new end of the pink cloverleaf thread while fiddling with the spacer on a tiny bit of chain and since I don't mind sewing in ends I opted for sewing in the pink end. I was using a safety pin to hold the core thread open for that first join and the weight of the row of split rings wanted to bend in one direction and the weight of the safety pin wanted to bend in the opposite direction which kept making the tiny bit of chain twist.
I started this one after supper last night and sent it off in the mail this morning to my sister for her birthday. I hope she likes it.

Tuesday, May 04, 2010

Pattern for Bible Bookmark

I didn't think my Bible bookmark was anything special, it just suited my needs. Apparently quite a few of you think it's pretty good and wanted the pattern so I whipped it up this morning. Since I was designing on the fly, how it ought to be constructed, wasn't how I actually did it. So to save a lot of fuss and bother begin with a row of split rings. For an explanation of the symbols, click on Legend in the sidebar.

You can make the bookmark whatever length you want, you just need to start with an even number of split rings. The model has 20 and measures about 6.25 inches. Make sure you leave the mock picots between them wide enough for the large rings of the cloverleaves to join into on either side. If you are working with a variegated thread and a solid thread and you want the left side and the right side of the split rings to match, wind the thread onto the first shuttle and then unwind enough thread from the ball so that you can match up the colours coming from both the ball and the shuttle then fold the thread in the middle of a colour and put a loose temporary knot in the middle of the middle colour. That sounds like double talk but it'll make sense when you do it. Pull enough thread off the ball to use on the second shuttle and wind up both shuttles so that your knot is between them. Undo the knot and start tatting where the knot was. Now when you tat you'll end up with the same colours lining up on each shuttle.

Once you have the row of split rings made you can start the outer row of cloverleaves and chains. If you are using a solid colour for the cloverleaves you can replace the second shuttle with solid colour thread at this point. It's easy to make a shuttle join into the side picot of the cloverleaf. Unfortunately if you are working continuously, this row will start with a chain and the first join is made to picot that doesn't exist yet. Hang a paperclip, safety pin or a loop of thread over the core thread at the joining point as a spacer so that you can pull out the core thread to make the join when the first ring is tatted.

When you make the large centre ring of the cloverleaf, join between the first and second split rings. For each following cloverleaf, skip 2 split rings and join between the next all down the length of the split ring row. The last clover leaf will join in the mock picot before the last split ring. The end chain joins to the side of the clover leaf, to the starting split ring and then has another spacer for the join at the end and the first chain on the return row. Tat like the first row joining to the opposite side of the split rings. Finish the row joining into the last side ring and end where the asterisk is marked.

The model uses 3 marker ends two in the solid colour and one in the variegated. All of the ends are rows of split ring joined to the same point on the bookmark and marked with an asterisk on the pattern. The first solid colour end terminates in a 6 ring daisy. The first ring of the daisy is a split ring and the rest are normal rings. The second solid colour end is a cross which uses larger size rings that the split chain row. The first ring is a split ring, then one side ring is done with each shuttle and the last ring is done with shuttle 1.

The middle end is tatted with the variegated thread and terminates in a butterfly. Since the variegated thread from the first shuttle was used for the chain around the bookmark the colours will not likely continue to be synchronized on the second shuttle, so it was just as easy to cut it off and start again. Match up the colours again before starting this end. At the bottom of the row of split rings tat a short chain. Join the small ring of the butterfly to the chain. Tat the large ring with graduated picots. Tat the small head ring with large twisted picots. (TIP - Make a long picot and the first half stitch, insert a straight pin and twist the picot. Make the second half of the stitch and pull the pin out. To make the matching antenna repeat the process and after twisting insert the pin back in the first antenna. Pull both antennae to the same length and then tighten the second half of the stitch.) Make the second side of the butterfly ending with a chain. Then tie a knot and sew in the ends.

I made mine in a solid and a variegated size 80 thread with 3 ends, but you could make it all in one colour or 2 different solids or all variegated. You could use one end or many ends. You can make the ends all the same length, or you could vary the length. Mine were all different.

I was wondering if the numbers would be clear enough and after Gina's comment I split the diagram into 2 sections and uploaded a larger version of each which should make the numbers more readable. The split rings are 12/12 the clovers are R6-6-6-6, R6+10-10-6, R6+6-6-6 the stitch count between picots on the chains is 3. The stitch count on the ends should be clear enough to read.

Sunday, May 02, 2010

Tatted Bookmark

This is the most recent bookmark I designed. I used some of the vintage size 80 thread I won on ebay because I wanted to see if it was good for tatting or too frail from age to be usable. I'm glad to say that it worked out just fine. I selected a solid and a variegated that I though would work together well.
The variegated appears to be the same as some crocheted pieces included with the thread so I sort of had an idea how it would look. The colour change is very short for a commercial thread which really surprised me, but maybe vintage threads had shorter changes because more people used them for tatting.

I was making things up as I went along using pink for the cloverleavess and the variegated for the chains but it was too skinny and I didn't like the idea of the empty spaces left between the cloverleaves that happens when you join them top to top. So I added a row of split rings down the middle which both filled in the space and carried the variegated thread throughout the bookmark.

I didn't want to use tassels because they take too long to make and because this bookmark is for my Bible and I wanted several markers. I like to read a little Old Testament, a little New Testament and a little of the Psalms every day but I don't like to break the binding on my Bible by putting too much between the pages. With this bookmark I can leave the bookmark in one spot and take each of the ends and put them wherever I happen to be reading. Just for variety I used a different motif on each end. One has a daisy, one has a cross, and the middle variegated one is a butterfly.

I didn't think to match the colours on the split rings down the middle. I was just using as it came off the shuttles. When I did the ends I needed to put more thread on the shuttles so I matched the colours and I'm glad I did. If I was to do this bookmark again I think I'd match up the colours for all of the split rings.

The bookmark measures about 6.5 inches long and about 1 inch wide (2.5 x 16.25 cm) and as you can see from the picture the split ring ends are almost as long as the bookmark.

Friday, April 23, 2010

Geek Speak

Since I got this desktop unit about 5 years ago the hard drive and the backup drive have been in racks so that I could insert, back up and yank out the second drive. Hubby decided that repeated connections was maybe causing the system to have problems and it was time to put both drives into the computer permanently. About a month ago I got the blue screen of death when I turned the computer on. Re-booting the computer seemed to fix the problem. A couple of days later hubby turned the computer on for me and it just wouldn't boot. So he took the computer apart vacuumed it out and made sure that the connections were all snug. It re-booted just fine, but just in case we bought new cables and everything was running along just fine, but you never know whether what seems to be a loose cable might, in fact, be a failing hard drive.

We have had a drive fail before. It was before the advent of the internet and viruses were rare especially if you didn't contaminate your system with disks that had been in other systems. The computer started acting up. A picture that got corrupted, a zip file that got truncated, and then more and more things went wrong. It was a Seagate drive and when it was replaced my geek of a husband had to recover hundreds of damaged files and repair them. In the end it took several months of work piecing things together sector by sector. Now we keep everything backed up, just in case.

So when my computer had this little problem he thought it would be prudent to replace the hard drive. I'm not unhappy with my computer, but I'm leaning toward a new system, not just a new drive. Five years isn't old except in computer terms. A new computer means not just a new drive but a new motherboard, new CPU, new graphic card, in short, a new everything that might be old and failing in the old computer. Not only that, but other new hardware is more compatible with a new system and new software. Of course a new hard drive is about $50 and a new computer about $500. There is that.

So we got a new hard drive and hubby backed up all my files one last time and installed the new drive. The old drives were IDE and the new one is SATA so it wasn't just a straight swap. Before he could make the change he had to change the BIOS and to make sure that it was up to date he downloaded the latest drivers for my motherboard and flashed the BIOS. Then he plugged in the drive. Nothing. Zero. Zip. This is where it's good to have other computers in the house so that you can search the internet for help when your computer is in pieces. The new drive is fast, the old motherboard is slow and it needed a jumper to slow it down so that the motherboard could handle it. This little issue took 3 days to finally resolve. Lucky he happened to have the itty bitty hard drive jumper.

Then it was time to install the operating system. I was using XP on the desktop and Vista on my laptop and I didn't really notice any difference between the two so I figured that if everything had to be re-installed anyway, I might as well move up to Vista. So hubby installed Vista, the drivers for the graphic cards, printers, scanners, cameras, and other peripherals, set up the network and installed my other software which took another couple of days. Then he imported all of my email and set up my email program which took another couple of days.

He was sure that I was going to need XP running on the computer as well so he partitioned the hard drive and also installed XP with all of the attendant drivers for the graphic cards, printers, scanners, cameras, and other peripherals, set up the network and installed my other software. That took another couple of days to get the secondary system all set up, and he set it all up to dual boot so that I could use either system. Good idea, in theory, except that the partition showed the XP drive as E and it needed to be C to work. The software that was supposed to run and fix the drive letter issue scrambled the operating system so that neither partition would run and since it was basically a blank drive anyway he just reformatted it.

So in between researching how to set things up first to get the drive working and then how to dual boot, and finally how to change a drive letter and actually installing the operating system and all it's bits and my software and tweaking it so that everything was working optimally it was more than a week's worth of work down the drain. Then he started all over again and for the second time we had the discussion over whether to install XP or Vista and again I said Vista even though I knew there was one software issue that would have to be resolved.

So again he installed Vista, uploaded all the drivers for the on board stuff and the drivers for the peripherals, set up the network and installed all my software and tweaked it so that it all worked properly and then imported all of my files and data and made sure that it all ran smoothly.

In the interim I had transferred any day to day information I needed to the laptop and just continued working from the laptop. So of course everything from the laptop had to be brought in as well. Finally everything was moved onto the new drive and I spent Monday patching things up between old system/new system/laptop and Tuesday was my first day using the new computer.

The one unresolved software issue is the creation of PDF files in Vista. My old desktop publishing software is Adobe PageMaker. I love it, it's slick. I can re-size a picture to fit the publication on screen or crop it, if I want or I can take an odd shaped diagram and flow text around it. I could take a picture of a snowman in a hat and shape the text to flow around the bulges and indents. and once I've done that I can drag the picture anywhere on the page and the text will just re-align itself to the new position. In producing books it will automatically create a Table of Contents or an index. It's just slick and anything else I've tried feels like using a club rather than a fine instrument. The software came along with Adobe's Acrobat Distiller for making PDF files and all I had to do to create a PDF was click on PageMaker's Acrobat icon and my PDF was made. Slick and easy. The PDF function doesn't work in Vista.

Just to give you an idea of how good PageMaker is, Adobe stopped upgrading it several years ago. That's why it doesn't work in Vista. They've rolled it into a new product that does work in Vista, but it's just so darned popular that they keep on selling it. The new product has a lot more graphic capabilities and it lets you incorporate videos into your electronic publications and a whole lot more. Right now I can upgrade my PageMaker to the new product which come bundled with the new Acrobat for about $200 which is a good deal. Except that it won't run on my desktop because it's too old and slow, so I can update if I replace my computer which brings the bill to about $700 for a new system and new software.

Hubby has been scouring the net looking for software that will work with PageMaker and create PDFs in Vista some work, some don't, some can't handle big files, some might but you don't know for sure until you buy them. Wednesday he downloaded one and tried it on my computer. While he was using my computer I popped into his office to use HIS. When I looked on screen there was a black DOS type screen that looked like the standard backup screen and when behind it an error message. He apparently has been getting this error message quite a lot lately, but it seems to resolve itself when the system is rebooted and he hasn't had time to find out what was causing it because for the last month he has been working on fixing my computer.

This time his computer wouldn't reboot.

He started in Safe Mode and got it to reboot but the task bar and Start Menu were missing and none of the programs would start.

Virus scan wouldn't start.

Restoring the registry wouldn't work.

One possible fix was to create a new user with admin privileges, but that didn't work.

Each of these fixes that were tried and failed required rebooting.

Finally each reboot resulted in the blue screen of death.

The operating system was well and truly dead.

We need his computer working to do the income tax which must be in by the end of April.

It might be a virus but the only way to check it is to put on a working drive with a working operating system with a running virus program and scan the drive.

When we bought the new drive for my computer we bought 2. The plan was to install Windows 7 on the second drive and see how it runs. When you write software the only way to see if it runs on an operating system is to test it and see. We need to check all of our software packages on Windows 7 even if we don't use that operating system in house.

So we had a spare drive handy. It took several hours to format the drive and several more to install XP on it. Once we had a functioning drive, the first thing we did was pull off the vital information off the old drive and scan each file for virus. That only took until 5:00 AM. There was no point in going to bed when you have a potential catastrophe on your hands your mind is too busy whirling around with possible fixes and problems so we just worked through the night.

The next morning we started a full drive scan for a virus. Nothing. It's squeaky clean. A scan of the drive reports that it's physically sound. Something and we don't know what it was, but something, corrupted Windows so that it wouldn't run. None of the possible fixes have fixed it. we did get it fixed to the point of Windows booting again, but none of the installed software works so hubby is now re-installing all of his peripherals and software getting everything on his system back up and running.

At which point we are thinking that maybe I should go back to my old hard drive running XP off the IDE controller so that this new drive can be pulled and used to load Windows 7. That would put me, let's see, right back where I started a month ago.

Wednesday, April 14, 2010

Legend

I received an email today that has prompted me to do some tidying up. The email was an inquiry into the symbols that precede the crocus pattern. A long time ago when I started writing patterns, I wanted to let people know at a glance what they were getting in to. I have seen patterns labeled beginner, intermediate or advanced, yet I couldn't see any rhyme or reason for the labelling. Other patterns were labeled difficult because of the presence of split rings or split chains. To my way of thinking, if a pattern calls for a technique you can't do, you can't complete it no matter how easy or difficult the design.


So when I began designing I designated the pattern easy, takes concentration, or "throw the shuttles across the room". I've only ever designed 2 of the latter. I also mark the pattern to show which techniques they require. That way, a tatter knows at the outset what to expect. A catalog of these symbols and what they mean is printed at the front of each of my publications. I haven't included a description of what they mean in quite some time, so I've decided to put the information here, label it and then in future I can just refer to the label so that people don't have to wonder, "What do those odd symbols mean?".


Here's the symbols, or most of them.

The first one shouldn't be any surprise, it's an easy pattern. The second one means the pattern requires concentration; it's not a 'tat in front of the TV' design. The missing, "throw the shuttle across the room symbol is a 12 point star because you have to be a star to tat it, but I don't do many of those. That's the basic, easy to difficult symbols.

The next 2 symbols are ovoid shapes kind of like what a shuttle looks like. I guess it's no surprise that they mean there are shuttles in use. One symbol, one shuttle, 2 symbols, 2 shuttles, 3 symbols, 3 shuttles. (Yes you can occasionally use more than 2 shuttles.). The symbol beside it that kind of looks like a square with diagonal lines, also kind of looks like a ball of thread. That's because some patterns use a shuttle and ball of thread. I think it's better to know at the outset if you NEED a second shuttle, before you get in to the pattern and realize that things would have been much easier with 2 shuttles wound CTM. On the other hand, you can save a lot of precious HDT if you don't unnecessarily wind a second shuttle. Those are the, this is what I need to do this pattern symbols. If a pattern is easier to do with a double bobbin shuttle, the shuttle symbol will have 2 little circles on it.


The rest of the symbols refer to techniques. The circle with a line through it refers to split rings. Just like the ring is made part with one shuttle and part with the other. In earlier patterns I marked the ring with a line through it where the split occurred, but in later patterns I also shaded the section done with shuttle 2 as it seemed to help some people follow the pattern more easily.


Two parallel lines are just an indication of mock picots. Mock picots are such a non-entity. You make a picot but a mock picot just happens, If you do a row of split rings, you can't, NOT make mock picots. They're just a by product of doing the last thing and the next thing, but again it helps some people to know that they are there.


The figure 8 on it's side, aka the symbol for infinity, represents working CTM because like infinity, there aren't any ends.

The last symbol of linked chains is a symbol I use for split chains. In the pattern itself I show the chain with two arrows facing each other at the point where the chain is split. That shows the tatter to work the first part of the chain up to the arrowhead and then work the second part of the chain from the opposite direction back to meet it.


If there is cluny tatting I show a cluny leaf shape with lines across it. In the pattern I show the same symbol where the cluny appears with the number of wraps superimposed.


It's really all very logical and it helps users to know what they are getting into and to follow the pattern more easily. Doing a newsletter for 6 years and getting a lot of good feedback, has helped my develop better drawings that are easier to follow.

Now that I have explained my little legend, I've also gone through the blog and tagged all of the patterns. Just clicking on the Pattern tag should bring up all of the designs available on the blog.

Monday, April 05, 2010

Some spring time colour

The birds are singing, the black flies are biting, the flowers are blooming...Well not here they aren't. It's still a bit cold for most flowers. One of the earliest to poke their noses out of the ground are the crocus. A few years ago when the dark dreary depressing days were beginning to drag me down, I was really longing for some colour. Pristine white snow can change the world into a sparkling winter wonderland. When it's sat for a while and acquired a layer of dust, dirt and factory fallout, it starts to look like the world is covered in dingy dust bunnies.

To give my indoor world a splash of colour, I designed a crocus. A cheery little ball of colour on top of a spindly stem. Like a real crocus, it's only about an inch across done in size 20 thread. This one is Lizbeth Violet/Pink Dark #635.
The flower just uses rings and chains and isn't difficult to make. It starts with a central ring with 4 picots and ends with a mock picot and reverse work into another small ring. Then it's just ring and chain up one side of the petal and back down to the starting mock picot where you shuttle join to finish the petal. It kind of looks like this, except that I was watching TV and not paying attention so the mock picot got stretched all out of shape. I also forgot the picot on the last chain, so I had to wiggle the hook between the stitches to make the join on the next petal.

Crochet uses the term slip stitch quite often. It's not a term that used much in tatting, but it just means to carry the thread over to the next connection point. In this design it means that you do a normal join into the next picot on the central ring. From there it's just a matter of repeating the petal, joining into the matching chains on the first petal.

It gets a little tricky when you get to the last side of the last petal. Did I mention it's about an inch across? Ever try to tat inside a one inch space? It gets a little bit crowded. You could struggle with it, but I found it easier to turn the flower inside out and tat on the outside. That gives you lots of room to complete the flower.

I made a whole bouquet of them in blue, purple, yellow and white and have an indoor garden full of colour. They'd be kind of boring all on their own, so I made a matching leaf. The leaf does make use of split rings. It starts near the top of the leaf and there are graduated split rings that get larger as you work toward the base of the leaf. At the bottom, you start working a chain all the way up one side, make the outward facing ring at the tip of the leaf, and then continue the chain down to the base of the leaf. The leaf needs wire or some serious stiffening to keep it perky. I used stiff nylon fishing line because I don't like wire that can potentially rust, being used on my lace.

Here's my little bouquet and now you can make a bouquet just like this one. All you have to do is follow the pattern which is shown below.

Thursday, April 01, 2010

Lemony

I didn't get to eat chocolate and tat today, mostly because I was busy with other things, and too full of this: Yesterday was hubby's birthday and when I asked him what kind of cake he'd like he said lemon. So I made a cake with lemon filling and lemon icing and the darn thing took most of the day to make. On the up side, the whole house smelled lemony fresh.

Poor hubby, it was his birthday and from the second he got up things didn't go right. He woke up not feeling very well and the first thing he did in the morning was to turn my computer on for me and it just wouldn't start. While I was busy baking, hubby was busy fixing my computer. He took it apart to see what was the matter and after checking the connections it came on. That could mean that it's a bad cable or it might mean that the hard drive is going.

In between rebooting the computer I made him stop long enough to retrieve some of the more critical files. I have back ups of everything, but if I want to use it while he's working on the desktop it needs to be moved to the laptop.

We had planned on going out for supper, but he was feeling so lousy we stayed in. He enjoyed his cake, but a day spent fixing a computer isn't exactly a fun way to spend your birthday. Today we got to make a run out to the computer store and pick up a couple of cables, which he has now installed. O well, maybe tomorrow will be a better day.

Monday, March 29, 2010

CTC - Big boys and their toys

When you need to buy something for a youngster, you head off to the toy store, but when you want something for the big boys you head off to this store. At least, in Canada you do. No matter whether your sweetie is into building decks or electronic consoles, cars or hunting, fishing or skateboarding, you'll find what you need under this sign.
When the flyer with the familiar logo arrives, the table gets cleared off so that each and every page can be carefully reviewed. My particular sweetie has many talents and interests and this is the one store we visit every week. He thinks I'm being a super understanding wife, but truthfully his lifelong accumulation of hand and power tools means that anytime I need something done, he has the tools for the job and the knowledge to use them. I'm a powerful enabler. If he can make do with the little version, I almost always suggest the bigger, more powerful one. I'm not stupid. I know that if I want a professional job done, he'll need professional tools.

Over the years it has paid off well. Honey, could you move that phone line over here? Sweetie, the washing machine quit. Darling, I need a trellis over there. How about making a bracket for this gizmo? Can we replace this sink? Whatever I've needed, I just ask for and eventually I get just the thing, custom fit, made to order, perfect.

Of course the downside, is that I get to spend a lot of valuable tatting time browsing the shelves of his favourite store. I can't complain. I got the blue screen of death on my PC last week. He had it back up and running in about 10 minutes, during which time I just switched over to the laptop. Last night the dryer quit just as I put a load of towels in to dry at about midnight. Half an hour later it was running again. I could resent the time spent examining the benefits of this tool or that, but what repair company is going to drop in and fix my dryer at midnight?

The store? Canadian Tire, of course, but you'd know that if you were Canadian.

Wednesday, March 24, 2010

If you tat long enough...

I was doing an update yesterday on the 25 Motif Challenge and noticed a comment made by a newer tatter about how she thought she was finished with a pattern and cut the thread, only to realize seconds later that the design wasn't quite finished. It got me thinking about all the little "I can relate to that." episodes that we all have experienced at one time or other.

Things like:


  • The aforementioned, cutting the thread too soon.

  • Snipping through a picot while trying to cut off the finishing ends

  • Joining to the wrong spot.

  • Missing a picot.

  • Skipping an entire pattern repeat.

  • Running out of thread at the very last ring.

  • Hiding ends and having them pull back out.

  • Starting CTM so that you don't have ends to hide and then making a mistake at the beginning that you have to cut out so that you now have 4 ends to hide.

  • Using an entire ball of thread like a shuttle to avoid having to wind the second shuttle.

  • Unwinding a full shuttle to add beads in because you miscounted when you started.

Now if you can't relate to any of these things, just wait, you will eventually.


Here's something you won't see in my upcoming snowflake book.


As you can see, this design that started with the typical 6 points of a snowflake has devolved to where it would have only 3. What was I thinking?

Monday, March 22, 2010

Finesse

Just about every tatter I know personally, is someone I taught to tat. It's kind of like teaching someone to drive. Your habits, good or bad, become theirs.

I've been tatting rather prolifically, for a lot of years, over 30 anyway. There aren't enough tatters nearby to have a regular frequent get together. Once a year, isn't enough to effect changes in the way I tat. I'm pretty set in my ways. I'm not a granny sitting in a rocking chair that's too old to change. I'm also not too stubborn to change when I see a reason to.

Since I don't have a local tatting group to bounce ideas around with, a lot of what I know and what I learn comes from the on-line community. Sometimes I see different aspects of tatting being presented in such a way that it suggests that tatters who don't do things that way are doing it wrong.Being a very independent sort or person my reaction is 'who says?'

So just to give equal time to people who may do things differently, here's my perspective.

Front side/back side - I don't do it. I personally don't think it looks any better than tatting it half and half. I just don't. So I'm not about to jump through hoops to keep all of my stitches the same way around. To re-train myself to switch each time I RW would slow me down and I have too many designs spinning around in my head that need to get tatted and put down on paper. Besides, do a 3D Daffodil and which is the front, the inside of the outside of the flower? The top of the bottom of the base. How about a carnation? See? it gets nuts trying to figure out which side it up.

Sometimes I do front side/back side tatting (confused? so am I). When I'm working a design with multiple split rings joining together I work them so that they are all the same way up. The juxtaposition of multiple rings connecting to the same point with some of the rings, or some parts of some rings not all the same way around drives me nuts.

Counting the join as the first half of the next stitch. - I don't do this one either. To me, a join is a join and a stitch is a stitch. I have been successfully tatting anything and everything for years making a join and then a full stitch and my lace looks just fine, thank you very much.

Posting the shuttle through the ring before closing it. Tried it once. My other closed rings looked fine, the one where I posted the shuttle through looked twisted and I had to open the ring up so that I could put the shuttle back through. I have too much tatting to do to try that one again.

Tatting proficiency? Hmmm. Definition PROFICIENT skilled or expert. 30 years of tatting and teaching others to tat, 10 years of designing and publishing patterns, I guess that qualifies.

If not, I'm sure the tatting police will soon be at my door for spreading sedition. They're welcome, I'll just put the kettle and while they're peacefully sipping tea I'll wrap them in tatting so they can't get away. I'm sure they'll come around to my way of thinking eventually.

Tuesday, March 16, 2010

I love my iron

Now don't think I've gone all weird and am in love with doing laundry, far from it. BUT, as a tatter, my iron is a pretty special tool. Case in point. Yesterday I finished a snowflake design that I though was looking pretty good until I finished that last join and I knew that this design just wasn't going to work without some serious blocking. Blocking is not my favourite thing to do. I accept that as a tatter, it comes with the territory, but I don't have to like it.
As I slapped the snowflake down on my ironing board and pinned it out it occurred to me that this little job is made easier by the cleaning feature on the iron. Since the kettle is usually hot from making a cup of tea, I usually just pour a little of the already hot water into the iron and by the time I have my "cotton tea towel that doubles as a pressing cloth" on the board and the lace pinned in place, the iron is steaming hot. A quick swipe of the iron across the board to check it out and then the cloth gets folded over the lace and the iron on top. A quick push of the cleaning lever and a spray of boiling water hits the cloth covered lace. The feature is meant for cleaning out the iron and I use it for that too, but in short spurts it works gteart for wetting the lace. Then I leave the iron on it for a few seconds to mostly dry it out. I pull the pins, cover it again and give it another quick press. Instant blocking. I love it. I always use a pressing cloth on lace because I've used steam irons before that spit out scale. If I anything goes wrong the damage happens to the pressing cloth and not the lace. I've overdone the pressing before too. The pressing cloth has the scorch marks to prove it, but the lace is fine. The ironing board has 2 covers and 2 pads on it. That's because I scorched the first one. My old board had an asbestos cover, made back before they knew the dangers of asbestos, could tale any amount of heat, but the new one couldn't and I forgot. The double padding makes for easier blocking. I just angle the pins in and with the pressing cloth between the pins and the iron I can zap it with a lot of heat without scraping the finish off the iron or damaging the lace.

The iron was a gift from my honey about a bzillion years ago. I wondered about it when he got it for me since I was single at the time and all my clothes where the non-iron variety. I suppose when he saw me steaming hair ribbons with the kettle he figured I needed an iron. I guess he didn't know that velvet ribbon can't be ironed. At any rate, here I am, years later, very thankful that it makes blocking lace a 5 minute job.

Upon hearing that other people are using this technique, I reflected on the times NOT to use this method. It's fine for cotton threads. Don't use it on tatting that incorporates blending filaments. They are plastic and they melt. Don't use it if your tatting includes plastic beads. I always use glass. I didn't once. Thankfully I was using a a paper towel as a pressing cloth, so there was no harm done, except to the tatting.