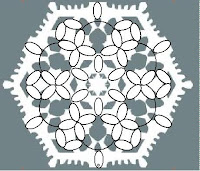
Then I deleted the paper cut out and was left with just the drawing and I proceeded to tat it.
I anticipated that I'd have to increase the size of the rings on each row, so I started with inner rings of 5-5 I expected a big hole in the middle of the design because I wasn't starting with a central ring, but I though it might look really cute with long woven picots in the middle so I started with long picots and ran into my first snag. If you want to weave the picots they need to just touch the edge of the ring on the opposite side of the motif, but it's hard to know how long that distance is when you haven't tatted it yet. so I took a guess. I was using a sort of unconnected cloverleaf with the inner rings at 5-5 as mentioned and used 3-3-3-3 for the side rings ending in a split ring up to the next round.
That's where things got squirrely, or I got tired. I needed 4 connected rings of graduated sizes, joining to 2 more larger connected rings. I tatted it, undid it, tatted it again, undid it again, looked at the drawing and reasoned it out and tatted it again, and again. Then I got fed up and cut if off.
At least now I know how long the central picots have to be. Of course I'm obviously NOT using this design which might work when I'm more alert to figure out what I need to do. But I've decided that since the dozen split rings I'd need to tat would slow down my tatting speed and I either need to rework the design or scrap it altogether, I am once more going back the the drawing board.


2 comments:
You are so creative!!! I never would have gotten that beautiful looking design out of that cutout!
I agree with God's Kid!
As for the previous 2 snowflakes, I had a blast tatting them, albeit in colour. They are such elegant patterns - each round! Thanks once again for sharing :-)
Post a Comment