Monday, April 22, 2013
Designing on a whim
My 4 version parallel Bible is a B-I-G book. I like having more than one translation side by side because it gives a better indication of what the original text meant. The Old Testament was originally written in mostly Hebrew and Aramaic and the New Testament was written mostly in Greek. I don't speak any of those languages and have no plans on learning them, so reading in multiple translations often helps clarify things. Of course such a large tome means that the average bookmark just gets lost in it.
I finally gave up on hunting for my bookmark inside the pages of my Bible and set about making one long enough not to disappear. I wanted something simple, pretty and really long. I was working on a design for another project that made a fairly broad band of lace and I thought it would make a good choice because I wouldn't have to modify it much.
I selected 2 solids and a variegate from my stash of size 80 threads and went to work. I used the variegate red/pink/green for the large rings with the solid pink along the outside. Then I used the solid green in the split rings down the middle. The threads were mixed brands of vintage Coats and Clark and Star which might explain why the split rings down the middle are smaller than they ought to be.
If I were doing it again I would make the split rings larger. As it is, when I noticed that the green was tatting up smaller, I left larger spaces between rings. At the ends I tatted large inward rings with the variegated thread and large outer rings with the pink and then just repeated down the second side.
Since the bookmark is really long, the wide band looks proportionate, rather than long and skinny. I didn't want a skimpy tail on it, so I just continued the split rings ending in larger rings to make a cross at the end which saved having to make a tassel. I like the look of tassels, but they're time consuming to make and I wanted something quick. Now I have a bookmark that's so long, at least one end will stick out where I can see it.
It's nice to be able to make whatever I need without having to search through dozens of books or wait for an online shipment to come. One of the reasons I stared designing lace was that even when I looked through books I didn't always find what I wanted.
I dabbled in designing, right up until I made the lace for my wedding. At that point I got over being timid about doing my own designs and jumped in with both feet. One of the things that I do with the Design-Tat course is give people the building blocks necessary to jump in the deep end and design their own patterns. It's a very liberating feeling, being able to make what you want without a pattern.
If your interested in trying your hand at designing, there's a new Design-Tat course starting. You can sign up for it here. The cost is $15 Canadian payable through PayPal. A lot of people wanted the drawing tutorial, but didn't need the designing class, so it's available separately, and you can find it at the same link.
Monday, April 08, 2013
Drawing Tutorial
I've been at it again. For the last few years I have been doing an online tatting design course, giving people a background in how to create their own designs. A natural extension of that was helping people to take their new creations and turn them into visual patterns by using drawing software.
The first time you try to make a tatting pattern using software, the results can be hilarious. Or tragic. Depending on your temperament. How do you get these shapes on screen? How do you get them where you want? Is there some way to have control over how things look? Is there a right way and a wrong way to do it? What about using colour? Should you make your rings teardrop shape or oval? There are lots of questions and of course, the drawing software help files aren't really geared toward tatters.
I initially created a basic tutorial to help budding designers get their patterns into drawing format. As the classes progressed I added more and more information complete with screen shots of what the software looked like and where to find pertinent features. Of course things were complicated by the fact that the software I used for class, which was free, had significant changes every time I did another design class.
After re-writing the whole thing for the fourth time. I decided to change to do a more generic format. The tutorial still has screen shots showing you what you need to do and where to find things, but it's been done so that if the software that you use, isn't the free one, or if you're on Mac or Unix instead of PC, you can still find what you need and know where to look for it.
Since the information is now more detailed and more comprehensive it's been put into a single large PDF file. You no longer have to wait for the course and get the information piece meal, you can just download the whole tutorial and get to work.
There's everything in it, from how to draw your first ring, to creating designs with the software.
If you're interested, the PDF is available from my store for $15.00 Canadian payable through PayPal. The link is here, under Drawing Tutorial, the first item on screen.
Sunday, March 17, 2013
He cares
Everything in the Christian life is about faith. There is an element of service to it, but mostly it's just about faith. To begin with, you need to believe that God IS. You have to believe that He exists. Now you might believe that somewhere, "out there" that there is a Supreme Being who exists, but it doesn't do you much good if God exists and He doesn't care any more about you than you care about an ant under your foot. So you need to believe that He not only exists, but that He cares about you.
There are many places in the Bible that tell us that He does care, like: John 3:16 For God so loved the world that He gave His only begotten Son, that whoever believes in Him should not perish but have everlasting life. 1 Peter 5: 7 Casting all your care upon him; for he cares for you. Psalm 55:22 Cast thy burden upon the Lord, and he shall sustain thee: he shall never suffer the righteous to be moved.
God cares, and as we approach Easter we are reminded of just how much God does care. You see the penalty for sin is death. You don't agree? That's OK. The penalty is still death. God IS and one of the things that He IS, is the Creator of all things. It's His universe, He gets to make the rules. You don't like it? Tough. God is still God and He calls the shots.
He's not only God the Loving and God the Creator, He's also, God the Righteous. and God the Holy. Sin can't track alongside a Holy and Righteous God. Sin is an old fashioned word. We don't think of it, or understand it much these days, but it really just means, that you missed the mark. You tried for the bulls eye, but you missed it. This Holy and Righteous God, set down some rules to live by, things like; don't murder, don't steal, don't covet and some other rules like don't worship anyone except God, don't take His name in vain and other rules. You probably know what they are, or if you don't, you can Google them.
These rules are called the 10 commandments, but when Jesus was talking about them in Luke 10:27, He said they really boil down to just 2. Thou shalt love the Lord thy God with all thy heart, and with all thy soul, and with all thy strength, and with all thy mind; and thy neighbour as thyself. Ever get really annoyed with someone? Was that loving? No? Then you missed the mark. You don't have to break any of what we might think of as the biggies, like murdering someone, just treat another person in an unloving way, and you missed the mark. What happens when you miss the mark? There's a penalty for it. Do you think you could go through life and never blow it? No? Me either.
See, God recognized that we don't have the capacity to always, with everyone, do the right thing. So He came up with this really bizarre plan to fix the situation. Sin has this huge penalty. It's death. Death is permanent. There's no do-over. Finito. Done.
So how does a Holy and Righteous God, who knows that the penalty for sin is going to condemn us to death keep us from killing ourselves, by default? He gets someone else to take the fall for us. Well that might work, but who is going to be crazy enough to apply for THAT job. No one, that's who. So God did it Himself. They are His rules. Break them and some one has to pay the price. No one else could, so God put His own head on the chopping block and died, so that we didn't have to.
God took all of the sin, all of the crap and corruption that WE did, onto Himself. He took the death penalty, so that we don't have to die. Now here's the thing. This substitution that He did, only works, if we want it to, it isn't automatic. It's like a Monopoly, "get out of jail free card" that's available to anyone, but you have to play the card. You have to believe that God really does love YOU so much, that he was willing to take the death you deserved and give you life instead.
That's where faith comes in. 1 John 1:9 says If we confess our sins, he is faithful and just to forgive us our sins, and to cleanse us from all unrighteousness. You missed the mark. So don't be an idiot, admit it. He has already promised to forgive it. He'll wash away all the garbage, and let you start over with a clean slate. You have nothing to lose and everything to gain. Just admit that you blew it, and ask Him to forgive you and make everything on the inside new again.
Not only does He wipe out the old, bad stuff, He, Himself will take up residence inside you. Can you imagine how easy it can be to live a perfect life if God is on the inside helping you? The amazing thing, is that you will know, that He is there, and He is real. Don't waste another day in the same old rut. It's time for a new beginning. You won't regret it.
Have questions? Want more information? Email me or leave a comment.
Wednesday, March 13, 2013
Tatting in my pocket, and a Bible on my desk
Just like there's always tatting in my pocket, there's always a Bible near by. They're all different versions and bookmarked in different places. Wherever we happen to be we pick up the nearest one and carry on reading. The other day I picked an NIV that was marked in Philippians 4:6 "Do not be anxious about anything, but in everything, by prayer and petition, with thanksgiving, present your requests to God." A little bit later, I read, this time in a KJV Matthew 21:22 "And all things, whatsoever ye shall ask in prayer, believing, ye shall receive." Then I picked up an ASV and read in 1 Thessalonians 5:16-18 "Rejoice always; pray without ceasing; in everything give thanks: for this is the will of God in Christ Jesus to you-ward."
During a time when things were being hectic and stressful, I had randomly hit these verses. Be anxious for nothing. Boy, did I need that reminder. Don't sweat it, just tell God the problem, being thankful that He's in control and will sort it all out. Really, when God's in control, you don't need to be anxious and you can be thankful because, He's always got your back.
Everything you ask for, you receive, when you believe that you will. Believing in the impossible is difficult, until you remind yourself Who it is, you're talking to. God, who created all things CAN do ANYTHING. And He loves me, I'm His kid. I have the right to ask Daddy for anything. And I have the right to expect to receive what I ask for.
Some time ago we had a bill coming due for over $1000.00 more than what we had in the bank. I had no idea where to get the money from. I talked to Daddy about it. I told him I didn't have the money and I didn't know where it was going to come from, but I was trusting Him to see that I got it. A client had asked about fixing a little problem, which we did, and told them we'd charge a couple of hundred for it. The client showed up a few days later to drop off an envelope containing payment, only instead of the $200 requested, they paid us $1500. The little job we did had saved them a lot of time, effort and money, and they were just passing along the benefit. I don't need to know how God is going to do it, I just need to believe that He will.
Being in the middle of a difficult situation can make you miserable if you let it. The admonition is; to rejoice always, pray always and give thanks always. If you know that God is always on your side always doing for you, what you can't do for yourself, you can always thank Him before it happens, because you know the outcome will always be in your favour and that's enough to make you laugh-out-loud-happy.
In Genesis 45:5 "Now therefore be not grieved, nor angry with yourselves, that ye sold me hither: for God did send me before you to preserve life." (KJV) Joseph was sold as a slave by his own brothers and he went through unpleasant experiences. Yet, in the end, he was no longer a slave, taken out of prison and raised up to a position just under the king. He endured really bad stuff, but in the end not only did he get promoted to an exalted position, he was placed so that he could save himself, his family and his nation. In selling him as a slave, his brothers had intended evil, but God intended good.
God's intentions are always good. He doesn't destroy, tear down, or rip apart. God creates, builds up, heals and restores. He may not do it in our timing, but He will always bring about good in the end. It's worth while rejoicing about.
Saturday, March 09, 2013
Tatting, designing and rambling
I am slowly working my way through the yellow doily again, the one with the spaghetti chains. Calling it the yellow doily is a misnomer because this one is obviously pink and purple.
Then I have been re-writing class lessons for the design class, in between which there have been issues. Like hubby's computer got hit with a virus, TWICE. Each time he has insisted on full scanning of every computer in the office, just in case. No sooner had that issue been handled and we found out our domain had been hacked. Honestly, I don't check my domain all that often. I know what's on there and I only have to look at it when something changes. Having a blog, means that most of the changing stuff happens here where I don't have to nag him about uploading it. It also means that if I think of something to say, I just blurt it out and you get to suffer through it.
We discovered the domain hacking by accident and realized that the search engine had posted a warning that visiting our site might expose user to malware. Apparently every folder on our domain had a file uploaded that redirected people to a porn site. Embarrassing and frustrating. Supposedly our IP provided continual hacking and virus protection. Obviously, it didn't work very well! Needless to say we had virtually no sales coming through our website from the time of the hack until we noticed it and contacted the IP. Supposedly they fixed the problem.
Immediately after that fiasco, my laptop started acting up and had to have a recovery disk run on it. I only use the laptop intermittently, often just for reading, but still, it was an aggravation.
Then hubby got a phishing email. He has set the spam filter on our domain about as high as it can go, so it ought to have been stopped, but it wasn't. That isn't what irritated him, what really upset him is that he has an email address that he ONLY uses with the IP. which means that no one else has it. So the phishing email was just a lucky (or unlucky, depending on your perspective) hit. That's the last straw. We're changing web hosts.
Having our own domain means that nothing should change on the website except for a momentary blip as it re-routes. We might be without email for a couple of days as the international systems get re-routed since the email is part of our domain.The nitty gritty has already been done with the new web host, it just needs the DNS switched over, but hubby has decided to let that go till next week.
I have another book in process. This one will be mostly quasi 3D things.
Sneak peek:
One of the things I'd like to try designing is a motorcycle. So I've been looking at lots of pictures thinking about how I might accomplish this. I have no doubt that I COULD design one, but I want to make a design that other people could do too.
Friday, February 22, 2013
Think on these things
The pressure of things has been getting to me lately and I was feeling kind of down. I read in my ASV Bible Phi 4:6 In nothing be anxious; but in everything by prayer and supplication with thanksgiving let your requests be made known unto God. That sounds simple enough, don't be anxious, just ask God. It is however difficult not to be anxious and worry.
Feeling like I needed a pick me up, I searched the internet for inspirational stories and read a few short excerpts. It's amazing, how reading about little every day incidents of joy, can change your perspective on your own life. Then I remembered the rest of the passage from Philipians.
Phi 4:8 Finally, brethren, whatsoever things are true, whatsoever things are honest, whatsoever things are just, whatsoever things are pure, whatsoever things are lovely, whatsoever things are of good report; if there be any virtue, and if there be any praise, think on these things.
So whatever's going on in your life right now, think on the good things. It will change your outlook.
Thursday, January 24, 2013
Elephant Flake
While looking for some examples of things that use spaghetti chains I came across the Elephant Snowflake. Years ago I was designing snowflakes and one of the patterns I created started well enough, but grew to enormous proportions. You can see from the picture that it measures almost 10 inches across which is far too large to hang on a Christmas tree, unless of course the tree is also gargantuan. After it was done it seemed to me to suffer from spaghetti chains, but to be honest, it's been kicking around in my tatting cabinet since 2008 and it's still holding it's shape, so maybe it isn't a lost cause after all.
This other little piece was an attempt at creating a doily with daisy shapes around the perimeter, but it definitely has spaghetti chains. There is no support, no structure and while the concept might have merit, the finished piece is just crap.
I also have this gorgeous piece which measures 15 inches from point to point and I love everything about it. It was intended as a gift for my sister, but since I haven't written out the pattern for it, she hasn't got it. That's all right, she doesn't know I was doing it for her and truthfully, in the years since it was completed, it's kind of taken up residence here, so I don't think she'll ever get it. I think I may have to do another design for her.
Since I have several unrecorded designs, I have been kicking around the possibility of putting them in a book, but it doesn't seem that people really tat doilies much any more, which means that the doilies would have to go in a book of mixed "stuff". My current batch of tatting to put it in a book projects are all quasi 3D which doesn't seem like a good fit. So maybe I'll just hang on to these and ponder the possibilities for a while or maybe inspiration will hit me like a bolt out of the blue. You never know, it could happen.
Wednesday, January 23, 2013
Spaghetti Chains Part 2
You've heard the expression that "a picture is worth 1000 words" and I try to find examples of what I'm talking about to help with my explanations. Sometimes though, I know of perfect examples, but I don't use them because:
A. They belong to other people and I don't want to hurt anyone's feelings
B. They are the creations of other designers and I won't knowingly infringe on anyone's copyright. (And I won't ask for permission see A.)
Consequently I'm stuck with using my own designs. That creates a problem, because once I have identified what NOT to do, I generally don't repeat my mistakes. That means that I don't have good clear examples to show people. It's part of the reason that my post about spaghetti chains has only one picture. I was trying to show you what I meant by re-tatting a design I did that had spaghetti chains, but having my website hacked created a lot of extra work and I ran out of tatting time. I did get as far as the spaghetti though :)
You can see that on the first row the chains go wherever they want and the clovers on the corner twist. The outside of this design has no structure to hold it in place. So I added another row.
This denser row added some structure, but it still twists in a hundred directions. Don't worry though, I did finally get that sucker pinned down. Here's what the original finished doily looks like.
See that nice negative space in the middle? That's those spaghetti chains that opened the design up and made it pretty. The denser row around it gave it definition. On their own spaghetti chains usually give you a crappy design. That doesn't mean you shouldn't use them. They have their place, you just need to be aware of them and know what they'll do to your design.
Tuesday, January 22, 2013
Spaghetti Chains
When I first began designing, way back in what seems like the Dark Ages, I often wanted to create certain shapes and wasn't sure about how to do it. One of my early attempts was this bunny. It looks like a bunny. OK, if it doesn't look like a bunny cross your eyes and squint. The design, such as it is, was made up of mostly overly long unsupported chains. Since I wanted to use this design as a pin, I tatted it over nylon fishing line, which gave it the support it was so sadly lacking.
I have seen designs done by other people over the years, one that springs to mind is an utterly enchanting design of a teddy bear that I fell in love with when I first saw it. Then my inner designer screeched in horror. Absolutely adorable, but totally lacking in support.
Now, don't get me wrong, there is a time and place for the simple outlines created by chains. They are perfectly fine if you plan to attach the finished piece to fabric or if you intend to seal it inside an acrylic coaster or key fob or in some other way, give it the support that it needs.
However, if the finished product is going to stand on it's own, those extra long unsupported sloppy, floppy chains are going to be a problem. They have no more backbone than a wet noodle and I call them spaghetti chains. In a doily, you will spend more time rearranging the chains and pushing then into shape, than you will enjoying your handiwork. In a snowflake, the arms will sag and droop without serious stiffening. In earrings and pendants the design will fold into a sad little blob. In all of these instances your effort and ingenuity will not elicit praise, but sad commiseration, which, if you are like most designers, is not the response you're looking for.
After numerous design attempts I have learned to test my designs for droopiness by holding things like motifs by one corner or edge and see if it will stand straight. If it will I know I have a nice tight design, if it won't, I take another look at it's construction. If I have spaghetti chains going on, I look for ways to add in a ring or two at key areas to give the added framework. Sometimes adding these rings detract from the design. At that point I have to step back, look at the design and do one of two things; scrap it, or decide that the overall design is just too pretty to scrap. In that case, spaghetti chains or not, it's a keeper.
Thursday, January 10, 2013
Too, too, too.....I just don't believe it
Here's a picture of some of the rejects, bits that are TOO. Too big, too small, too fat, too plain, too open, too something.
I suppose, that it's the same problem with novels and screen plays. The author has a story idea and then has to fit all of the other bits and pieces in to make it work. It still drives me nuts. How many movies have you watched where there is an ax murderer, rapist bad guy running around and the heroine just accidentally forgets to lock the back door/window? Like that's ever going to happen. Most people in urban areas, step inside and automatically lock their doors. The only time the doors are unlocked is during full daylight when lots of people are moving back and forth between house and yard. Even then, most people check to make sure the doors and windows are locked before going to bed.
When preposterous things happen in a story line I end up yelling at the TV if it's a movie or throwing the book across the room if it's a novel. I keep seeing easier more practical ways of working things out. The other day I was reading an historical romance, as opposed to a sex in the suburbs, novel and the only thing that kept me reading, were the antics of where they kept trying to hide the dead body. Once I grasped that it was mostly a farce, I could suspend my criticism somewhat. Although the supposed "historical" novels get my goat when modern day attitudes are attributed to historical people. I think that bothers me more because anyone who reads historical novels tends to know a bit about how things worked in the good old days.
What really got me about this one was the convoluted idea that the body of the deceased husband had to be hidden for a few days so that the wife could sponsor her sister for the season, get her a husband and thereby have access to her dower to pay a family debt. Once it was known that the spouse was dead she would have to go into mourning and wouldn't be able to attend frivolous things like balls, concerts and parties so I guess it could happen, maybe. What I wondered immediately though, was why bother? If the deceased spouse, a really nasty guy, is dead, then his surviving wife has full control of his wealth which was originally her dowry. Why doesn't the widow just announce to one and all that the wretched man is dead and have the lawyer pay off her family's debt? No, that would be too simple, too practical, too realistic, too straight forward.
Surely it's much more believable that 3 well bred ladies in all their finery would carry a rolled up rug through the house, past all of the servants to leave the body in his own bed. Especially when historically, ladies would not even touch a rug, let alone carry it, that's a job for servants. Keeping him for a couple of days requires ice, lots of ice which again is a job for servants. How do ladies get that much ice into the house and up to the bedroom? How do they dispose of the water from the melted ice? Another job for servants. How do they explain that the master of the house is too sick to leave his room, but there is no need to build a fire to keep him warm, or clean out the ashes? More servant work. If he's too sick to leave his bedroom, who brings him his meals or empties his chamber pot? All little things that don't add up and make the whole story line preposterous.
Then there are the inevitable "historical" scenarios where the hero and heroine are thrown together and into bed with one another within days if not hours of meeting one another. In historical times, with historical attitudes, it would never happen. Well bred ladies did not go places unattended. Their parent or guardian would not let them out of the house without a chaperone whose job was to see that the lady was not, ever, placed in a position where she would talk to a strange man and well bred young men would not attempt to talk to a young lady until after being introduced by a mutual acquaintance.
What about the police/detective/mystery stories where ordinary citizens tramp through crime scenes picking up clues? Reality is that once a crime scene has been identified by the police, no one is allowed in except the police. Picking up bits and pieces from the crime scene? Are you joking? That's an invitation to some quiet time apart at public expense.
Do writers think we're all idiots? Are we expected to just believe that these things are not only plausible but normal? Oh, I forgot..... it's fiction.
Thursday, January 03, 2013
New Year's resolutions
And why I don't make them. Making resolutions for the New Year, isn't something that we did at home. I remember a class in public school where the said resolutions were our written assignment and I hadn't a clue what the teacher was talking about. There's a lot of hype this time of year about making resolutions with suggestions for everything from quitting smoking and losing weight to spending more time with family and being more loving. All of these things are beneficial and worth while. but I have never been inclined to make any resolutions for the forthcoming year.
The principle reason I don't make resolutions is that I think they are a waste of time. If I have spent some time doing an internal review and made some decisions that changes need to be made, I don't wait for the new year, I do it right now. Now, when I'm thinking about it. Now, when whatever has prompted the decision is fresh in my mind. Now, when the desire to change is present.
For me, and I expect for a lot of other people, if anything is going to change, the desire to change has to be there. Making decisions on personal improvement of any kind can't come just because an arbitrary date has been reached. Real change comes because we want to change. No matter how beneficial the goal, you aren't going to reach it unless you want to. That's way most New Year resolutions aren't kept. People make the resolutions with the best of intentions, without real desire for change. So it's no wonder that by the time the first of February gets here, most of the resolutions have fallen by the way side.
If you want to make changes in your life, make them. Don't wait for Jan 1 to come around again, do it when your thinking about it.
Friday, December 07, 2012
I Hate Do Overs
When you're a kid on the playground and a ball slips out of your hand or you're balance is a little shaky and you stumble you can always do it over again. Do over is a favourite call for most kids.
Then there's the other kind of do over. You know the kind I mean. It's the do over where you've just finished knitting a sock and you have to do it all over again to make the mate, because as we all know feet come in pairs. So if you're tatting a baby bootie, cheer up, just as the first one is done, there's a whole new bootie to start.
Ears come in pairs too. So every earring you make means there's another one coming up. The same thing happens with mitts and gloves. I hate things that come in pairs because no matter how much I psych myself up, I know that a finished one isn't the end, it's only the middle.
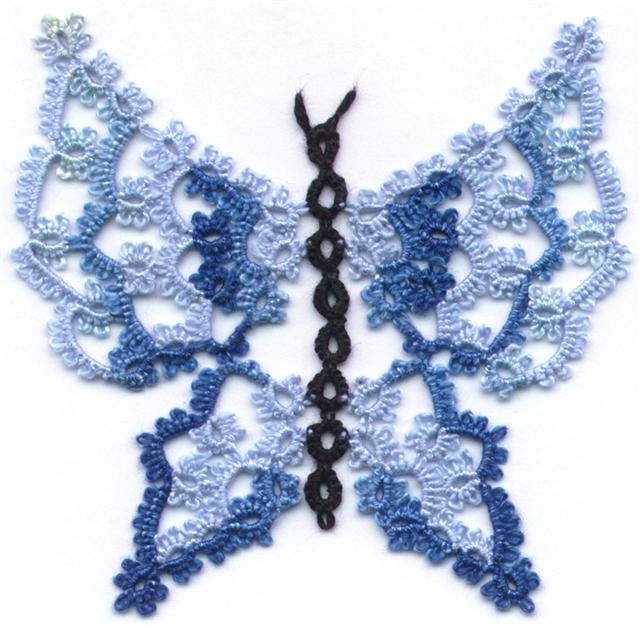
I like working on a project and when it's done. IT'S DONE! Having to revisit a pattern makes me cringe. I made the butterfly that I use as my logo and stupidly gave it away. I have the pattern and more thread, but I just don't want to have to do it over.
I have a novelty bookmark that I did which was a free tatted tree with flowers at the base and a butterfly for a tassel made with several colours of size 12 perle cotton. Because it was freely tatted with random rings as leaves and a solid tree trunk made with several rows of chains, it would be difficult to reproduce it exactly. I'm rather fond of it because the trunk makes a nice straight side to fit into a book and the idea of a piece of tatting that's also a picture, just tickles my fancy.
The other day hubby was vaccuming and he decided to dust of my night table. I am not a neat person. My night table is covered with the usual flotsam and jetsam typical of a night table and bits of ephemera that even I have forgotten was there. I don't much care if the bits of thread and the odd bead gets sucked into the bowels of the machine. But since we had just had a discussion of "Did I have any white hair ribbons hanging off the dresser?", as something white had just gone down the tube, I was a little concerned when a similar exclamation was uttered as he ran the machine over the night table. The only thing I know for sure was on the night table, because I use it all the time and love it dearly, was a certain one of a kind bookmark.
When the unknown object had flown off the dresser and down the throat of the machine I didn't even bother to look, but when the same thing happened to the night table I had to check. The bookmark I had created with size 10 thread as a project for my beginners class sat proudly on the table, but the other original, took me weeks to make it bookmark, was no where to be found.
It's OK, I could make another...I hate do overs. If it's in the machine it's going to be in the middle of a very full bag of dust dirt and hair... It just went in, it has red flowers on it, it should be easy to see. Right? Maybe I could fish it out with a crochet hook.
Not only could I not fish it out with a hook, I couldn't see anything but grey dust inside. Even after I cut the bag apart I couldn't see anything but one big hair ball full of dust. I poked, I prodded, I turned it upside down. Then I got both hands in ripping things apart and came up with....a white shoe lace. I know what got sucked off the dresser. I tore some more. Then finally, I found this little grey lump. It kind of felt a little bit like it might be tatting, so I coaxed it out of this big ball of snarled hair. I still wasn't sure what I had, but after a bath with lots of hot water and detergent, I have my one of a kind bookmark back.
I'm so glad. I hate do overs.
Monday, December 03, 2012
Hanky Bonnet
There has been some talk recently about making a baby bonnet out of a hanky and some questions about a suitable edging. You can use any edging whether it's a really simple half ring edging, or a more elaborate edging made with several rows of tatting. Most commercial hankies are roughly 11 inches square and that means 44 inches of edging should be adequate. To make a hanky bonnet first tat the edging and attach it to the hanky like this:
Typically you wouldn't use a hanky with an embroidered flower in the corner, but that's what was handy, so I used it for this tutorial. Fold back about 2 inches on the front and stitch along the edge of the hanky where the lace is and it should look something like this:
Then fold back about 2 inches on the back, but stitch it about a half inch from the fold to make a casing. This will allow you to run a ribbon through the casing. When you tie the ribbon, it will gather the back of the bonnet shaping it.
Not having a baby head handy I stuffed it with a ball of thread to show you how the back looks.
To finish it off add ribbon ties on the front with optional ribbon rosettes or tatted motifs in the corners where marked with an X. Extra ruffles and nice on girls, but not as necessary for boys.
Depending on the size of the baby, you can make the bonnet larger or smaller by increasing or decreasing the size of the folds. If the baby is a preemie, you may want to start with a smaller hanky.
Wednesday, September 26, 2012
Ranting
Some time ago there was some discussion in Toronto about creating an afrocentric school. The idea was a school especially for black people that addressed black history and black culture in a way to engender pride in black heritage. I thought, and still think, that it's a really stupid idea because the curriculum in this specialized school is not what the rest of the population will be taught and when the children are re-integrated into the rest of society, they are going to believe that everyone learned the same things and it will be a bit of a culture shock to find out that the rest of the population doesn't share African roots. It makes much, much, more sense to me to bring the highlights of that heritage and those cultural issues into ALL of the schools so that everyone can be enriched by them. The children with African heritage can take pride in where they come from and the other children gain a greater understanding. Of course they didn't ASK me, and they went ahead and opened the afrocentric school and they are having some problems with it now.
Today they are talking about opening a gay, lesbian, bi, trans gender LGBT high school, (that has already been dubbed the queer school). Which has got to be a really stupid idea on so many levels. The thrust of the proposal is to create a safe place for students. Wait a minute, back up here. A safe place for students. So if you are fat and being bullied because of it, does that mean we need a separate school for fat kids?
The issue isn't that we need to create exclusive place for children and teens, the issue is that we need to teach tolerance and understanding of differences. There won't be specialized work places for people based of race, religion or gender, so it just makes a whole lot more sense to teach the younger generation growing up how to get along with one another. That IS one of the purposes of school. It isn't isolation we need, it's inclusion.
OK, I'm getting off my soapbox now.
Tuesday, September 11, 2012
What makes a good pattern?
I haven't been keeping up with the blog, I have been tatting a little, but not a lot. I saw a comment the other day about Anne Orr's baby bootie, or as it's called in the book, Baby Socklet and Shoe. I've tatted it, but the design is a stinker, at least , in my opinion it is. It is pretty and it looks all right when it's finished, but it's one of those piecemeal patterns where you tat a piece and lay it aside, then you tat a different piece and lay it aside, then you connect the pieces together by doing yet more pieces. Pieces drive me nuts.
When people talk about a good pattern, or a nice pattern, or a "go to" pattern, They are often talking about very different things, but they use the same terminology. It must really confuse new tatters. A lot of people looking for something to tat for a christening often choose this pattern. It isn't especially difficult and if I remember correctly it takes about 11 hours to complete. I remember the number because someone asked me what I would charge for making them and I had to figure out the hours and I can't remember if that was for one or the pair, although I think it was the pair. What I DO remember is that having to do the bits and pieces really irritated me, so much so that I did my own version, following along the same lines, but working the whole thing in only 2 pieces. The Anne Orr bootie calls for size 30 and I used a size 50 in mine
One of the things I realized as I was finishing it off, is that thread doesn't stretch like yarn. I know. You'd figure that after tatting for all these years that I would recognize something as obvious as that, but I just didn't think about the simple things, like getting a non stretch bootie over a tiny foot. Happily, I remembered this vital piece of information just as I was working on the last couple of boot rounds and instead of working around the top of the bootie in a circle, I stopped at the front and worked back over the row just done, which meant that if I had been doing front side/back side tatting it would have been a real nightmare because I would have had to do everything on the row backwards. I don't do front side/back side, so I just turned and kept going.
Is it a good pattern? Maybe. It's pretty enough and it doesn't have lots of pieces, but if front side/back side is a major issue for you, you'd definitely hate this pattern.
If you are just learning to tat, a design that uses just simple rings and chains is going to be a great pattern, but if you are experienced, that kind of pattern will drive you around the bend with monotony. If you need something for a quick gift, you might gravitate toward something that has a simple design, but if you want to make something with lots of WOW factor, you might want something more elaborate. If you were making a gift for another tatter, you might choose something with lots of clunies, because you know that another tatter will appreciate the time that goes into them, but a non tatter might be just as impressed with something that just uses chains.
Sometimes your definition of a good pattern is neither how the finished lace looks, nor the techniques it uses, nor how long it takes to complete, but depends solely on how the pattern is written. Some people don't like using written patterns, and some people can't stand visual patterns.
Now and then, people will refer to a design as being their "go to" pattern and often that simply means that the pattern is their first choice to tat, just because they have it memorized and they don't have to go look for the pattern or refer to a page when they are tatting. That doesn't mean it's particularly pretty, or quick to tat, or well written, it just means it's memorized.
So what about you? What makes a good pattern for you? Is it the visual appeal of the design? Is it the way that it's written? Is it the techniques involved? Or is it something else? Inquiring minds want to know.
Wednesday, August 29, 2012
The summer that wasn't
I have been tatting. Well, sort of tatting. I had an idea. It required a lot of tatting and a lot of fitting things in. The lot of tatting went all right. The fitting things together didn't so now it's stalled.
I tatted a picture. Actually I had most of the pieces done around Christmas time planning a gift, but my sweetie did a scroll saw piece instead, so I let it sit. Then we needed an impromptu birthday gift so I finished it off. I was trying for something Victorian and used dark red and gold with lighter blue accents, thinking I'd try for a mass of single ring flowers done sort of like babies breath but in navy, it didn't work. Or at least it didn't work the way I wanted it to and I opted for a 4 ring butterfly in navy instead. I mounted it in a shadowbox type frame that suited the 3D flowers, but it didn't look right so I changed the frame, re-mounted the flowers and ended up with this, which I'm still not happy with, but the recipient liked it and that's what matters.
This summer has been the pits. I picked up a summer cold AGAIN for the second year in a row. The cold was long gone, but I still felt totally lethargic. Then I started with the heart palpitations which really put a damper on things. I hate being sick. I hate going to doctors, they never have anything good to say. So I don't go.
Hubby has been working like a regular little beaver, churning out woodwork pieces to beat the band. He made a second work bench, replaced the wheels on the band saw and went to turn a round stool top on the lathe, only to discover that the motor was in the way with the lathe hung on the wall, so he had to make another bench for the lathe, before he could start. Then he made a stool that swivels for working in the garage. A second stool was made for a neighbor that helps him out from time to time. A third stool was made for me. Then he took our park bench apart to re-finish it.
I feel like a lazy sloth in comparison. An now that I have thoroughly depressed myself, I think I'll go lie down and read a book.
Friday, July 13, 2012
Pet Peeve number 1
I was rummaging through a bunch of old tatted bits looking for something I know is probably in there. I didn't find it, so I'll have to keep looking. What I did find is the Inverted Heart Snowflake from my Tatted Flurries book that I tatted in Lizbeth Summer Fun. I like the colours, but the short colour changes make the design look like a dog's breakfast.
The dimpled rings are almost invisible in this thread, but here's what it looks like in a solid colour.
The design pops out.
Here's Summer Fun matched up with one of the colours in the mix, a plain pink. This is the anklet design, Hearts and Bows from my Summer Tatting book.
Here's the scan to give you a clearer picture.
Of course in this design the variegated thread is just used for the chains and it's a subdued background accent.
But here is the same colour paired with a solid turquoise and a solid pink for more than just chains.
I like variegated threads. In tatting it usually take a long time to transition from one colour to the next, but in the new threads like Lizbeth, the colour changes are faster and the results like in the first snowflake, just becomes a jumble of colours so that there isn't any gradual change, but rather an abrupt switch. This, to me, makes the finished piece look chopped up. Your eye jumps from spot to spot in one huge chaotic jumble of colour. Pairing the variegate with a matching solid colour, gives the design some continuity and the eye a chance to rest. I didn't care where the colours landed on the butterflies, because of their final purpose, but I have to say that in my opinion tatters need to take a step back from the variegated threads, so that they can be enjoyed more. That's just my opinion, feel free to disagree.
Thursday, July 05, 2012
Summer Tatting now available
After a long delay, a book I was working on LAST summer, is finally ready. A minor injury made it difficult to tat or to use computer keyboard and mouse, then other things conspired to keep me from working on it including software which just refused to cooperate.
Summer Tatting is here, full of bright breezy summer designs for bracelets, anklets and necklaces. The book is available from my web site in both print and E-book format.
The E-book is available right now, the print book will be back from the printers soon. The pricing of the book, which INCLUDES shipping and handling is:
Canada 15
USA 16
International 18
The E-book which is available in PDF format and downloaded from my web site is:
All countries 14
Monday, June 11, 2012
Why does one job lead to ten more?
I wanted a little something to put on a hair clip and I started with a flower. I didn't like the way it was working up.
Then I was going through some old designs and found this butterfly so I thought I'd give it a try. Lizbeth size 20 in Summer Fun and Light Turquoise were used for the first one. I was looking for mostly solid coloured rings and variegated chains, but I found the Summer Fun has long stretched of turquoise with much smaller sections of the other colours. and when you use 2 matched shuttles and the only part of the thread you can see is turquoise, it's hard to keep things straight.
I needed 2 for 2 little girls, so I did the second one in Summer Fun and Light Dusty Rose thinking that I'd end up with pink where the other one had blue, but I started with the pink and should have started with the variegated, so I got pink chains instead of pink rings.
The butterfly fits on the hair clips, but, I don't really like the way that they sit. Too much of the clip shows.
Then I thought maybe if I glued a bead over the body onto the hair clip it would help to cover up the metal, but I don't have a large enough attractive looking bead.
A 3D flower would cover more of the hair clip and you don't have to think about which side is up. I like my butterflies flying up instead of down. A downward facing butterfly just seems wrong. When I laid the first butterfly down so that I could pick up my scissors to cut the thread ends, it happened to land on a new ball cap in basic black and I noticed how cute it looked. When the second one was done, I realized the 4 of them would fit neatly around the cap. So if I did 2 more, I could attach them to the hat and dress it up. I'm not sure if I like the design so I might try to tweak it a bit, but if I tweak it, it won't match up with the other 2, so I'll have to do 4 more and then they might not fit the hat. I finally opted to remove the partial row on the flower and fill the inner section with some large beads. It gave some sparkle and filled out the flower without doing more tatting.
Once I had the hair clips sorted out I went back and finished the butterflies and like snowflakes, no 2 are alike, partly because of the variegated thread and partly because I started with different colours and partly because a switched shuttles at different places. I probably ought to do another in 2 solid colours so that I can see which colour goes in which place, but I think I'm done with this flutter.
Now that I have them done I could put them on my cap, but I was hoping they wouldn't sit so high on the crown. Maybe I'll just stick them on and have done with it. I don't mind sewing, it's just the fussing with it to make sure that it's dead centre, because it'll drive me nuts if it isn't. I have some light and dark turquoise edging that I goofed up on which can also be added to the cap, except that it's only long enough to go around about a quarter of the cap. That means I only make enough to go part way around and taper it at both ends, or I tat a lot more edging.
This started as a, wouldn't that look cute project which is rapidly taking on a life of it's own and hubby is already in the middle of one of those. He started out to make a stool. So he needed to cut 2 x4's to the right size for a seat. One of the wheels on the bandsaw has broken bearings so it doesn't roll easily. All of the equipment is on wheels so that it can be pushed against the wall when not in use and make room for the car to fit in the garage. So the bandsaw needed new casters. The set he put on the first time were welded on so he had to cut them off, make a new base and tap holes in the angle iron base to screw in the new casters. Once the boards were cut to size he drilled holes for dowels in each board glued and clamped the boards and made a solid piece for the seat that he could turn on the lathe.
The lathe is mounted on the wall to keep the floor space clear for the car, but when the square seat block is mounted on the lathe for turning, it hits the motor housing. In order to be able to turn the seat, he needs to move the motor below the lathe instead of beside it and if he wants to have full use of the lathe it really needs a table, on wheels of course, so that he can move it aside when it's not in use. So he had to build a lathe table and he had to build supports for the motor under the table that would allow the motor to move when the pulley is shifted to change speeds.
Why is it that doing one job often leads to ten other jobs that you really didn't plan on doing? Is it any wonder that nothing ever seems to get done?
Thursday, June 07, 2012
Unappreciated
I received an email several days ago from a freelance write doing an article on tatting for a Canadian magazine. The email asked about young people tatting and I don't really know a lot of young tatters and I emailed back with that information and thought no more about it. Today I got a call from the journalist asking for more information. As much as I can tell them all about tatting, tatters on the internet, videos to show you how and the fact that many of us tat in isolation rather than in groups, what they (the magazine) really want to know is how relevant tatting is to young people.
I recognize that magazines need to address the interests of their readers and more importantly to them, the needs of their advertisers. Consequently, the articles that get published are the ones that relate to the largest segment of buying public, which happens to be those under 30. High school students living at home and just starting to work, university students starting their careers and families with young children all spend money on both necessities like cell phones, cars, and clothing as well as recreational things like ATVs, sporting equipment and hobby materials. So while grandma might buy an occasional ball of yarn, what the money making machines like the magazines and their advertisers, want to know is what is junior spending his money on.
I may be useful for providing historical and practical information about tatting, but they don't really want to talk to me, they want to talk to kids. Suddenly, I'm irrelevant and I resent that. Or is it, I represent that?
Subscribe to:
Posts (Atom)