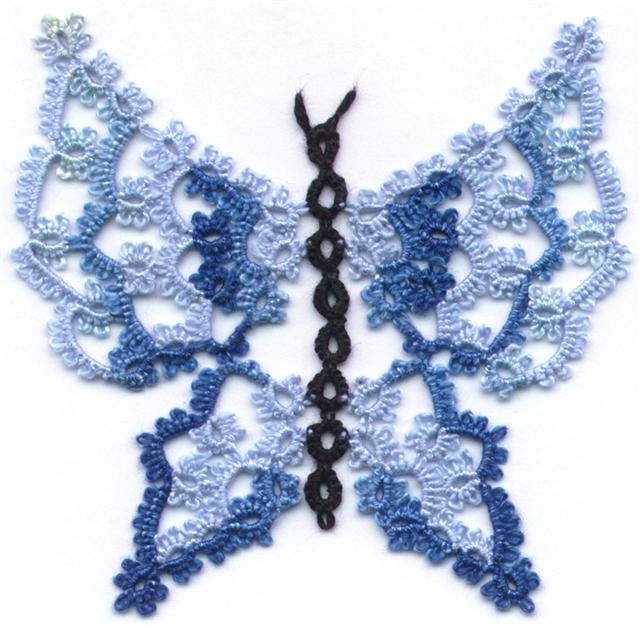
Wednesday, November 21, 2007
Just a note

Thursday, November 15, 2007
It was just a sigh of relief.
Colour me, one happy camper.
I think when the show airs you'll be able to click on the links for current shows or archive of segments to see it online.
Wednesday, November 14, 2007
Is it time to panic now?
I don't have time to be sick, I have to clean the house, buy a new wardrobe and tat lots of fantastic things that will make lots of people want to learn how to tat and I have to do it all in 6 days. Piece of cake, right?
There's no point in panicing so I may as well just sit back and enjoy the ride.
Thursday, November 08, 2007
The Good, the Bad and the Ugly
In September of 2006 he started going into a period of time where almost every other day he experienced at least some of the Meniere's symptoms, then in November 2006 when he was scheduled to see the specialist, it more or less cleared up. They tested his hearing and reported that his speech recognition was gone in the one ear and his hearing was down to about 50%. He can tell by the sounds he can and can't hear, what his level of hearing is at even before the tests are done, so that was no surprise. Other than that, he was fine -translate that as functional- from then until May 2007 when he started having repeated "drop attacks".
Drop attacks are what they call it when you are fine, and one second later you fall to the floor dizzy. I guess that's why they call them drop attacks. You don't want to be driving a car and have a drop attack. From May through to mid October he experienced 2-3 drop attacks each day. The attacks are so distressing that once he lays down, to keep from falling down, the stress is so great that once the attack is over he just falls into a deep sleep. It's just plain exhausting.
In mid October his hearing suddenly came back nearly to normal and the dizziness and drop attacks stopped. Praise God!
A few days later he noticed while eating supper that his lips were numb. A little while later the inside of his cheek went numb too. It was right before the weekend and there was a lot going on so we put off going to see the doctor for a couple of weeks. The numbness didn't progress any further, his speech wasn't slurred and his mental faculties all seemed normal. He had felt a bit like he was coming down with a cold so we figures it was viral and didn't worry about it.
The second he got in to see the doctor he was immediately referred to a neurologist and sent for tests. They seem to think he's maybe had a mini stroke. Everything's back to normal and the numbness has gone, but they've already scheduled him for a bunch of tests.
His Mom went into the hospital and no one in the family thought it important enough to give him a call. Just because he lives 300 kilometers away is no reason to assume that he doesn't care. He tried to reach her for 3 days at the retirement home and finally called the front desk. His sister works at the retirement home and they insisted that he should call his sister rather than just saying your Mom is in the hospital. GRRRRRR!
After a whole bunch of phone calls wherein every family member gave a different story, he finally called the hospital and talked to the nurse to find out what was going on. She was sick. they thought it was high blood pressure but her heart and lungs are fine. She had a bladder infection and they gave her an antibiotic (which caused her to hallucinate, but that's a whole other story). While she was in the hospital the kids sold her house and gave away all her treasures. She's too frail at 96 to go back into the retirement home that she had only been in for a couple of months and the family is going to put her in a nursing home. They don't know which one and it's doubtful if any of them will remember to call my husband and tell him where they have put his Mom when she does get out of the hospital.
Yesterday, just before we made the trek to the hospital for one of the many tests my sweetie has to have, I received I foot thick stack of paper from the lawyer in regard to the car accident 2 years ago. Pages and pages of stuff to review and information to dig out and commit to memory so that I can spout back the details when requested. Doesn't that sound like FUN?
And now onto some good news. I got an email the other day from CBC TV - that would be the Canadian national station sort of like the BBC is in Britain. The do a show called Living in Toronto and they thought it might be interesting to do a bit on - are you ready for this? - TATTING.
I answered their questions to the best of my ability, but one of the things they asked about was courses available in Toronto. Now there may be places in Toronto offering tatting courses, I used to teach tatting in our local Michaels store, but they weren't well attended and the store doesn't really carry proper tatting supplies and it just wasn't a great fit. Toronto is a big city and I am sure that there are tatting classes going on in various places that I don't know about, but I suppose that as tatters go I am as well plugged into the tatting community as anyone and I didn't know about them.
I'd like to teach tatting, but I'd like it to be a regular thing at a regular time that people know is available all the time. I can and do teach from my home, but people that you meet casually, in the doctor's office, in the line ups at banks, cash registers or walking down the street, don't know me and for all they know I might be an axe murderer. Let me assure you that I'm not, in fact an axe murderer, but would anyone believe me? I mean it's not that I look frightening or anything but then neither did Ted Bundy... Anyway, back to tatting. Folks feel better about going for lessons in a public place because it just seems safer.
The local library does apparently have conference rooms that one can rent by the hour. I'd need at least 2 hours at a time and I generally like to do 4 weeks of classes that works out to 8 hours at about $25 an hour. I'd hate to book 8 hours and have no one show up. My local corner of the world which is like a suburb of Toronto used to have yarn stores and fabric stores and craft stores where tatting classes would be a natural fit, but most of them have been put out of business by WalMart so I was wracking my brain cells, all 2 of them, trying to think of what I could do.
Being a resourceful person, I wrote to my City Yahoo group, (yes we have one to discuss things like keeping the city green and reducing landfill and other good stuff) I explained my situation and asked if anyone had any ideas. Laurie the owner of the Pottery Painting Place our local ceramics store did. They have a party room that they use on weekends but the rest of the time it's empty. She asked if I was interested. Do dogs bark? Of course I'm interested!!!!!!
Tomorrow I go to meet Laurie for a face to face and sign a contract. Although she didn't request any payment, the person who used the space previously gave her $2.00 for each student that turned up, which I think is more than reasonable. I have commercial space near to my home that I can get to easily where I can teach on a regular basis any time Monday to Friday. How awesome is that? I'm absolutely thrilled.
Now how do I go about getting students? I'm figuring a newspaper advertisement might help but 1 ad for 1 day in a local paper might not reach many people. We get the paper 4 times a week here in outer suburbia. It's delivered free and half the folks don't even read it, preferring instead one of the large Toronto papers.
I'm sure there is a creative (translation, free) method of advertising. I'm thinking that if I can do this swiftly, and have a class up and running next week (Yikes!) that I could go back to CBC TV and tell them that Yes there is a tatting course available in Toronto. That would get me city wide television advertising which would make tatting very visible, very fast. Can it be done?
Friday, October 26, 2007
Adding a link, Adding a Links List
 First of all, click on the Basic heading to access your basic settings.
 Scroll down until you get to Global Settings and make sure the compose mode is set for Yes so that you get the wysiwyg editor. Hey, I'm not a computer geek, so I want things real simple.
 When you create a new post there will be a bunch of little icons along the top. The one that is circled in the picture above is the icon to click on to set a hyperlink. If you want a particular word or phrase to be click able, first highlight the word or phrase. Then click on the hyperlink icon.
 That brings up the hyperlink window set to Type http:, and you can click on the little arrow to change it to an email link.
 Enter the URL you want to link to. URLs always start http:// so make sure you copy the full link information from the address bar of your browser, or if it's one of your Favourites copy the address from the properties of the link. You are less likely to make mistakes if you copy and paste the URL than if you type it out. Paste the URL in the space provided. The example above shows the link for Jane Eborall's blog. Then click on the OK button and the text (remember the text you highlighted?) will now have a line under it showing that it's a link.
Note: If you are using the link from your Favourites, find the favourite and right click on it. That will open a menu with a lot of stuff in it. Go down to the entry that says Properties and click on it. That will open the Properties dialog and the URL is in the middle of it. Highlight the URL, right click and select COPY from the pop up menu.
If you want the link to really stand out you can also colour the text. Just highlight the text again and then click on the little colour box icon. It's the one to the left of the hyperlink icon. It will open up a menu with a lot of coloured squares. Click on the colour you want and now you hyperlink is a different colour from all of your other text.
To add links in the side bar begin by clicking on Template.

Which will display this screen

Select Add a Page Element which will bring up a menu page of items you can add to your blog. Select Links List by clicking on the button ADD TO BLOG.

This will give you another option in your Template called Links. Click on Edit.

Which will display a screen like this one where you can add, edit and delete links to be shown in your sidebar. Click on Add Link.

Enter in the URL that you want to add and a name that you want to show up in your side bar. In the example above it's Jane Eborall's blog and the name that is to be displayed is Jane.
Once the link is added it shows up on screen with the name you have given the link the words Edit, Delete and an arrow pointing down. Click on Edit if you want to change or modify the link. Click on Delete to remove the link and click on the down arrow to move it down in the links list, or on the up arrow to move it up in the links list. To add another link click on Add Link again and follow the same process.

When you are satisfied that you have everything set up the way you want it, Click on Save Changes. Now when you look at your blog there will be a links list.
Once you have added the LINKS element to your blog you can go in at any time and add to it just by clicking on Edit and entering the new URLs you want to add.
It's as simple as that.
Tuesday, October 23, 2007
I've been tagged
Here are the rules which you must abide by if you are tagged.
1. Link to your tagger and post these rules.
2. Share 7 facts about yourself: some random, some weird.
3. Tag 3 people at the end of your post and list their names (linking to them).
4. Let them know they’ve been tagged by leaving a comment at their blogs.
Seven random or weird things, hmmm, let me think. There's nothing weird about me, so it'll have to be random.
1. I've been a Christian for 40 years which is almost the same amount of time I'm know my wonderful hubby.
2. I love cheese, I think I'd rather have a big chunk of cheese than a chocolate bar.3. I'm a tea drinker, skip the booze, just give me a good cup of nice hot tea.
4. My eyes are a beautiful shade of green, but only when I'm really upset and crying, so the beautiful green is off set by a blotchy red face. I'll never make it in the beauty category.
5. I get motion sickness on carnival rides so I avoid them.
6. I tat everywhere, in the bathroom, walking down the street, waiting at the check out, on the bus, train, in the car, in my sleep and I don't think it's even a little bit weird.
7. I love cooking and baking and trying out new recipes and I've often printed off a new recipe from the internet and cooked it for dinner when we're having guests, even if I don't have all the ingredients at hand. (You have to be adventurous about some things.)
So many folks have been tagged now it's hard not to tag someone already tagged, so I tag
Sue because she's gone too long without posting.
Mary who spent so much time hosting the exchanges that she didn't get to enjoy the fun of blogging about what she was doing.
LaRae because like Sue, she hasn't posted for a while.
Wednesday, October 17, 2007
The embroideredy that didn't work
 For some reason the camera just doesn't want to take a decent picture of it. I guess it's been doomed from the start, but I had to get it finished just so that I can put the embroidery tools away. I love the turquoise colour, but the thread is dull and lack lustre. It wasn't easy to work with, but after everything else I was determined to work with it. When I came to doing the flowers I ran into the same problem of matching up contrasting colours that didn't just clash with the vivid turquoise. The thread is manufactured in China and doesn't have the same sheen and twist as DMC or Coats Anchor and it snagged and snarled all the time I was working with it.
When it was all done I, popped it out of the hoop and hand washed it in Ivory soap to get rid of the printer ink and the soiling from working on it, and slapped it down on the ironing board to press it dry. Out of habit from working with lace I sandwiched it between sheets of paper towel and applied the iron. Good thing I did. The lovely vivid turquoise thread bled like mad into the paper towel. I have a perfect imprint of the turquoise section.
 The butterfly is done, and now that I know that I could create all kinds of unique transfers just by scanning, cutting, pasting and printing, I'd love to embark on making a whole quilt of embroidered pieces. Unfortunately, I also discovered that my hands won't take the hours of stitching the would be required. So I guess I'm not going to get a one of a kind embroidered quilt, but I am going to be able to sleep at night without major pain medication. Just as well really. I don't have enough hours in the day to tat and embroider. I picked up a pair of pillowcases I may do as a gift, but I don't think I'll be doing much more than that. Now I need to think of something to do with an embroidered 8 inch square that has been embroidered in thread which might bleed when it's washed again.
I think I may take all of the suitable transfer images that I found on the internet and put them into a PDF file. At least then if I do decide I want to do another chunk of embroidery, they'll all be in the same place. I can always put the file into the PDFPick software and use the embroidered butterfly as the front cover to remind me of what's in it.
Monday, September 24, 2007
Tatted Dress

I have lost all of the contact information I had for Sharon or I'd just write and ask her for the details. Her mother didn't have a computer, so all of the contact we had with Sheila was through her daughter.
Tuesday, September 18, 2007
Five years of creating newsletters

There were 2 doilies, a snowflake, 2 pairs of earrings, a heart frame, 2 bookmarks, 3 3D flower designs, a motif turned into a V-neck collar, a chatelaine, an amulet bag, 2 edgings, a necklace, and a snowman family.
I can see my tatting progress each year because it's all recorded in the newsletter. I know how much I tatted, what kinds of things I've made and relatively how long they took. I know that none of them took more than 3 months because every 3 months there's another newsletter. I don't look back over the year and think, "What did I make this year?", I know what I made because it's all recorded in the newsletter. At least, most of it is. I tat more than what is represented here but this is a big chunk of it.
One of the benefits of the 25 Motif Challenge is that it give people an opportunity to keep a record of their own progress. A lot of people when they started out, didn't think that they could tat 25 motives in a year. Maybe for beginners it is a bit of a stretch, but piece by piece your skill and your speed improve and suddenly you realize that you are doing it, you are accomplishing that impossible goal of 25 Motives.
Over the last 5 years I have designed and executed an average of 19 patterns per Volume. It started out as a black and white publication that was mailed out 4 times a year. Now it is a colour publication emailed out 4 times a year. The subscription price when I started was $20 Canadian and 5 years later it's still $20 Canadian.
If you are interested in ordering the newsletter, or if you are interested in past volumes, click here for the order form. If you want past volumes, please specify. The pictures for the projects in each volume can be seen here.
Volume 1 Edition 1, Edition 2, Edition 3, Edition 4
Volume 2 Edition 1, Edition 2, Edition 3, Edition 4
Saturday, September 15, 2007
A new look

I had envisioned the floral edging being flat, but a gross mis-calculation resulted in a bzillion more repeats than necessary. However, by the time I had completed about one third of the final row I knew that the only way to fix it was to cut off the last 2 rows and redo the penultimate row with single large outward facing rings to space out the floral repeats in the final row. This realization occurred at the same point at which I knew there were not enough hours in the day to cut off the rows and experiment with an alternate variation and still have it completed in time for her birthday. I tatted on with this gloriously full ruffle and completed it as shown.
Some time later my sister admitted that while she liked the ruffles, the collar was too large for any of the clothes she owned and that she much prefers her dresses and blouses with the neckline - at the neck. Consequently she wondered if the collar could have a piece cut out of it and made smaller so that the neck opening was smaller.
I did mention that there are several rows of mignonette, didn't I? It's really hard to hide short ends in the bare threads of mignonette. I was really loathe to try retro tatting 4 or 5 tiny mignonette rings to give me enough thread to hide ends and I suggested that a better alternative was to add more rows at the neck to decrease the circumference of the opening. It sounded like a good plan at the time and the collar was returned for re-working.
The first problem occurred when I pulled out a ball of thread to start working on it. The thread I had was a different dye lot. I know it's white, but there are shades of white and this collar used a bright white and the ball of remaining thread in my stash was creamy white. The little bit of the bright white thread I had was insufficient to finish the collar so I put the collar aside while I considered what to do.
The second problem was to design some inner rows that would bring the neckline up the required distance. I sat down with the drawing program and sketched out the existing pattern and several variations of inner rows to see what I could come up with....................
The third problem was that everything I tried looked awful. A single row of ring and chain large enough to fill the gap was too big and heavy for all the delicate rows of mignonette. It made the lace look clunky instead of light and airy. Two rows of ring and chain either filled in too much of the neckline or not enough. Rows of chains didn't match the design and more elaborate edgings detracted from the elegant and lacy floral edging.I put it away to think about how to resolve my problems of no thread and no pattern, which, when you think of it, are pretty basic problems. That was in Feb 2006 when I drew out the pattern of the existing collar to put it in the newsletter.
The other day I was rummaging around in one of my storage chests and I found a bag with some tatting bits and a ball of thread. Not just any thread, the thread, the thread that is the exact size and dye lot for the collar. I had put it away for safe keeping, so safe that I couldn't find it. Since none of my drawings had worked I figured I might as well just attach the thread and "wing it".
 It worked. The collar now has a smaller inner circumference. There are 2 more rows of mignonette about half the depth of the lower rows and one top row of mignonette/small ring. It's still light and airy, the rows gradually and naturally decrease so that it lays flat and it looks like it was designed that way. I'm quite happy with the results.
All that's left to do is finish up the sides and modify the closure slightly. I still haven't decided whether I should stay with the single closure at the top or use 2. The original, and another at the new top. Either way, the collar is done now, and I can block it and send it back to my sister.
Tuesday, September 11, 2007
Buttertart Squares

Thursday, September 06, 2007
Catch up
 Knowing that I'd have a long car ride going up to the camp where the reunion was held, I decided it was a great opportunity to sew some tatting onto my bag. I mentioned in an earlier post that my jeans are black and the 2 craft bags I use are also black so I figured that I would eventually add tatting to all of them. The other day I was cleaning up and had to move some tatting aside, so I slid it onto one of my bags and decided that it looked pretty good. I used the ride to sew it all down. I had intended to attach this to a pillow, but in 2 years I haven't attached it yet, so a bag is as good a place as any to display it.
Tuesday, September 04, 2007

Tuesday, August 28, 2007

Monday, August 27, 2007
Teaser

Thankfully the car door didn't do any damage to my hand. Rob's first word after finding out that my hand still moved was to ask if I'd be able to tat. It's good to see we have our priorities straight :-) So I am still tatting. Here's another wee peek at a bit of something going into the newsletter.
I know the picture is blurry, it's from the web cam and I'm too busy to go get the digital camera, but you won't guess what it is anyway.
Friday, August 24, 2007
More Threads
 You would think from the amount of blogging that I get done that I don't do anything. I'm actually online and blogging quite a bit, just not here. Most of my time is spent in the 25 Motif Challenge blog keeping it up to date. In between I try to keep on top of designing new things for the Tatted Lace Pattern Collection which I publish. I'm behind with getting it out, but in my defense I did manage to get the challenge kicked off for another year. At least I think I have, I'm still trying to get a couple of things going. Before I made any changes I wanted to write to the affected participants so they knew what was happening. It was an extra step and more work, but one I thought was necessary.
Thursday, August 02, 2007
Thread Comparison
 Take a look at the picture on the left. All of these flowers were tatted using the same pattern and there are 7 different brands of thread that all look remarkably close in size. There is a measuring tape down both sides one in metric and the other in inches so you can judge for yourself.
The first thread is Flora size 20 and it's a 6 cord thread that's nice and crisp the stitches slide easily and the thread doesn't fall apart if you have to undo and redo sections of your tatting. It isn't as well polished as some 6 cord threads so it has more of a matte finish. This is marginally the largest of the samples.
Monday, July 30, 2007
Happy Anniversary

The headpiece I made for our wedding. Happy Anniversary honey, I love you more and more every year. Thanks for being mine.
Saturday, July 14, 2007
Needle Tatting or Shuttle Tatting
When the needle tatted piece is tatted very tightly on a fine needle, the end results look the same as a shuttle tatted piece which is worked in a somewhat loose manner, so that there is no apparent difference. The process of how the pieces are made is totally different and therefore the finished pieces may look the same, but they aren't usually.
With needle tatting the stitches are formed on a needle, similar to the way you 'cast on' stitches in knitting, doing knit one, purl one and then the threaded needle is pulled through the stitches. The finished lace however is only as fine as the needle you are using to make it. The typical method for doing this creates a "mock" ring. You can make a true ring, but most instructions you will see create a mock ring.
Mock rings are just chains formed in a loop and joined at the base. They are not as stable as true rings so they can lose shape after they've been washed a few times. If the work gets cut or torn the whole thing can unravel, so to stabilize it (make it keep it's shape) and prevent it from unravelling you have to tie a knot after every ring.
Needle tatting can be done making true rings which produces a sturdier lace that won't unravel if it gets cut. Remember that the thread has to be drawn through the stitches that are formed on the needle, so one of the drawbacks is that the thread can become worn from the friction of pulling it through the stitches and there is just so much thread that you can manage on a needle. Shorter lengths of thread are easier to handle, but result in more ends to hide.
Needle tatting is easier to learn, but the finished product is typically looser, floppier and more padded looking than the same piece shuttle tatted. The needle you work with has to have a big enough hole in it to put the thread through, but a big hole also means a fatter needle. Since the stitches are formed on the needle a fat needle makes fat stitches. Fat stitches aren't as tight or crisp looking as stitches formed directly on the thread.
Some designs can only be done with a needle because the design requires being able to get the thread into places where a shuttle won't fit. Stringing beads on a needle is certainly faster, so for making jewellery, people often choose to use a needle.
In shuttle tatting the stitches are formed directly on the thread so the work is as fine as the thread you are using and the finished piece generally looks crisper than a piece done with a needle. As mentioned a project which has been shuttle tatted loosely and one which has been needle tatted very tightly, will look the same. Rings are true rings that don't need anything to hold them in place. If shuttle tatting gets cut or torn it will only unravel back to the last whole ring. The thread you use is held on the shuttle and wrapped around the left hand then the shuttle is manoeuvred around the thread on your hand to form the stitch and by switching the tension between the right hand holding the shuttle and the left hand, the stitch is flipped or transferred to the thread on the left hand.
Co-ordinating both hands simultaneously to get the stitch to flip takes a bit of practice. So shuttle tatting is harder to learn, but the results are worth the effort. Using the same thread the needle tatted article will generally look puffier and more padded. Both finished items will look quite similar and the untrained eye would not see any difference.
Which method you use depends on your preference. People who do both use the method most appropriate for the project. You couldn't shuttle tat with yarn very well, but you could needle tat with it. Then again, with the size of holes you'd have in the rings a project made with yarn wouldn't be very warm ;-) People with arthritis who have a hard time flexing their fingers, find needle tatting easier on their joints. The same is true for any kind of hand/wrist/arm injuries. There is a place for both types and it's mostly just a matter of preference.
Tuesday, July 10, 2007
Embroidered Butterfly

hand-embroidery challenge. This is a poor scan of it still in the hoop and the bright turquoise blue is really much brighter.
I began by selecting colours and I was all over the map. I have no goal. I finally decided that I was definitely going to use the turquoise blue. I love the colour. I came in a no name batch of embroidery thread and years ago I bought the whole batch for that one colour. I haven't used it yet because A- it needed to be something special and B- it doesn't blend with any of the other colours I have in the Anchor and DMC floss.
Once I decided to use the blue I had to match other colours to it. I selected a darker teal blue and a very pale silvery blue that is almost white. I can work with a monochromatic palette, but I thought I'd add in another colour for some interest. My chest of embroidery floss has several hundred blended colours of thread from years of doing petit point pictures, but the only colour that appealed to me when laid alongside the eye popping turquoise, was an equally vivid yellow.
Then there's the body. I did it in black and added some pale blue highlights and I'm not sure if I love it or hate it. I used 3 strand of thread but I'm thinking that one strand would let me get in between the rows of split stitch easy so that the pale blue just peeks out in between the black.
I tat excessively and the repetitive motion causes pain at the base of the thumb. I have discovered, that holding a needle to embroider aggravates that already tender digit. Now I find that the pressure of resting the base of the thumb on the desk to use the mouse hurts too. So it looks like embroidering enough squares to make a quilt is going to be out of the question.