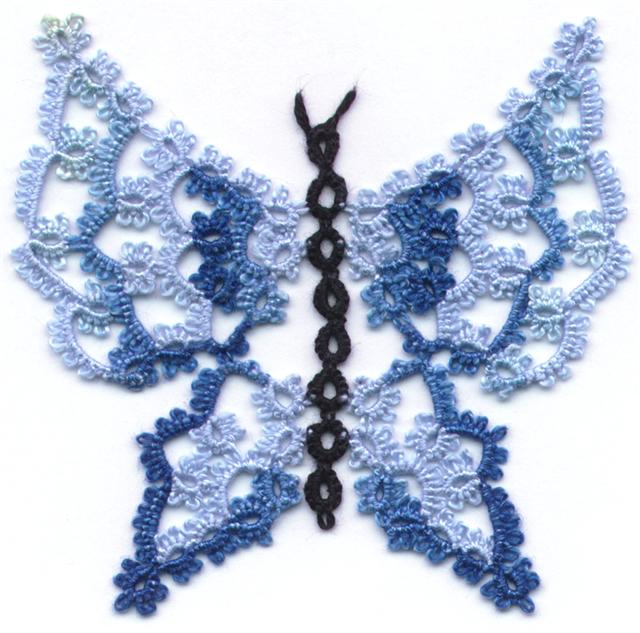
Tuesday, August 28, 2007

Sadness


Bob Rout - My Brother

Jan 1, 1946 - Aug 28, 2007

Monday, August 27, 2007

Teaser


Thankfully the car door didn't do any damage to my hand. Rob's first word after finding out that my hand still moved was to ask if I'd be able to tat. It's good to see we have our priorities straight :-) So I am still tatting. Here's another wee peek at a bit of something going into the newsletter.


I know the picture is blurry, it's from the web cam and I'm too busy to go get the digital camera, but you won't guess what it is anyway.

Friday, August 24, 2007

More Threads

I had a "fun" time yesterday. Hubby was diagnosed with Menieres and made a scheduled visit to the hospital for a check up. He way too dizzy to drive, (I don't drive) so we took a taxi. While waiting for the interminable tests to be done I had an opportunity to talk to a lady whose friend did lace of some sort, but she didn't know what kind. Then an older gentleman who had been watching us throughout our discussion walked over and introduced himself saying his wife was a tatter. It turns out his wife is Joyce Harper and I was in a round robin with her several years ago. We had a nice little chat before hubby and I had to change rooms for yet another test. I took my big craft bag full of a change of clothes for hubby and I and all my tatting supplies, but got very little tatting time in.

After we were done we called a cab to go home. When the cab came it was a van and hubby opened the door for me to get in. My bag got stuck of the armrest and I put my hand on the outside of the van to keep my balance while I twisted around to untangle an pull my bag in. Meanwhile the driver, finally figuring that he ought to do something other than sitting like a bump on a log decided to get out of the van. He opened the door which pushed my hand off the door and as I used my left hand to brace myself to pull all the stuff over my left shoulder my fingers went around the frame between the front and back door and the driver slammed the door shut. All four fingers inside. OUCH! After we got home I made a quick trip to the doctor's for x-rays. Nothing broken, just swollen and the important thing is, I can still tat.

You would think from the amount of blogging that I get done that I don't do anything. I'm actually online and blogging quite a bit, just not here. Most of my time is spent in the 25 Motif Challenge blog keeping it up to date. In between I try to keep on top of designing new things for the Tatted Lace Pattern Collection which I publish. I'm behind with getting it out, but in my defense I did manage to get the challenge kicked off for another year. At least I think I have, I'm still trying to get a couple of things going. Before I made any changes I wanted to write to the affected participants so they knew what was happening. It was an extra step and more work, but one I thought was necessary.

I'm still working on the goodies for the newsletter and part of the delay is that I wanted to add a few more flowers made with different threads to the bunch already pictured. I can't get the newsletter done until I can take these off my blocking board. So here is the same picture with a few more added at the bottom.

Manuela is a nice crisp 6 cord thread that's nice to work with that's a little less shiny that the Olympus, but shinier that the Flora. That means that in my opinion, the Olympus slides easier and the Flora less easy and the Manuela is right in the middle. They are all nice threads to work with, but if you are making a doily or any larger project, Manuela comes in a 50 gram ball, Flora in a 25 gram ball and Olympus in a 10 gram ball. That means that for an average size doily, (12 inches across) you could use 1 ball of Manuela, 2 balls of Flora or 5 balls of Olympus. I'm just throwing this information out there so that a beginner has some useful information on purchasing threads.

DMC Cebelia size 30 is a 3 strand thread slick, shiny and soft. Its a nice thread to work with that slides easily Cebelia and Coats Opera are comparable threads. they are both 3 strand soft threads that are nice to work with. The don't take well to a lot of retro tatting.
Coats Royale size 20 is another 3 strand soft thread much like Cebelia and Opera. It works up to the same size as the Flora size 20. and comes in large balls but only in white (and ecru?).
The last thread on the board is a Coats Button Craft thread Dual Duty Plus. It's a glace thread with lots of body and although there isn't a size on the spool it works up about the same size as the DMC Cebelia 30 or the Altin Basak 50.
And now that I've shown you all these threads I can pull the flowers off my blocking board and use them!

Thursday, August 02, 2007

Thread Comparison

As a tatter we use a lot of different threads. A single strand of thread can be easily pulled apart. Two strands are a little bit harder to break, but when you start twisting strands together they become much stronger. If you take embroidery thread you can see that it's made up of 6 strands of thread, but if you look closer, each of those strands is made up of 2 loosely twisted strands. If you look at perle cotton the strands of thread are much thicker, but there are only 2 strands not six and the strands are more tightly twisted.

A 3 strand thread can have finer individual strands than a perle cotton, but the strands are twisted much more tightly together.

You may have heard of people talking about 'S' twist and 'Z' twist. The letter S starts on the top right and moves to the left. The letter Z starts at the top left and moves to the right. In the same way strands of thread can be twisted together by twisting them from the right to the left or from the left to the right. Flora and Olympus are 6 cord threads which have strands of thread twisted in both directions. First pairs of strands are twisted together in one direction, then 3 pairs are tightly twisted together in the opposite direction. A 6 cord thread is strong and durable. It will take tatting and retro tatting without becoming worn or fuzzy.

Most tatting threads are cotton. You can use other fibres, but the majority of the time you use cotton. Cotton is soft, fluffy and fuzzy and when it's spun together it's still fuzzy. Threads with lots of fuzzy bits in it doesn't tat very well. John Mercer a 19th century chemist devised a method of chemically treating cotton fibres to remove the fuzzy bits and it also gives the thread a nice shine. The process is called Mercerization and even today we see the word mercerized on most of the threads we use for tatting. Fuzzy bits don't slide very well so most of the threads that are really good for tatting are mercerized. Polishing the thread gives it extra lustre and makes the knots slide easily.

Sometimes I want a really fine thread to create something delicate like an edging to float on the edge of a wedding hanky. Other times I want a nice thick thread to make a quick project. Whatever I'm making, I sometimes find that while I have the right colours in my stash, they're not all from the same manufacturer or they're not all marked with the same size.

Take a look at the picture on the left. All of these flowers were tatted using the same pattern and there are 7 different brands of thread that all look remarkably close in size. There is a measuring tape down both sides one in metric and the other in inches so you can judge for yourself.

The first thread is Flora size 20 and it's a 6 cord thread that's nice and crisp the stitches slide easily and the thread doesn't fall apart if you have to undo and redo sections of your tatting. It isn't as well polished as some 6 cord threads so it has more of a matte finish. This is marginally the largest of the samples.

The second thread is Opera size 20. It's a 3 strand thread that's more polished than the Flora so it's shinier and it's softer to the touch. It will take some gentle retro tatting without too much effect, but if you have to re-work the same piece several times the thread gets fuzzy and starts to fray.

The third thread is Oren Bayan size 50 which is a 3 strand thread and shiny like the Opera thread but it seems to be a little more tightly twisted and a little crisper and stronger so that it has less of a tendency to fray.

The fourth thread is Altin Basak size 50 another 3 strand thread. It may not be apparent from the picture, but this sample is the smallest of the 7 flowers. The thread is tightly twisted and well polished, but not as shiny as the Opera or the Oren Bayan. Again, as it seems with all of the 3 strand threads, they don't handle re-tatting very well.

The fifth sample is Olympus size 40. In my opinion it is the best thread of any of these shown to work with. It's a crisp 6 cord thread with a nice polish. If you tat tightly with a 6 cord thread, the project will hold it's shape without much need for blocking. The thread has a nice sheen to it and it will take multiple attempts at tatting and un-tatting without any apparent affect on the thread.

The sixth thread is DMC Perle (or Pearl) 8 which is a 2 strand thread. The thread is soft and lustrous, and the stitches slide easily but the thread won't take well to multiple attempts to tat and un-tat. It can separate and fray easily if you grab only one of the strands doing a join, but if you work carefully the sheen makes for a lovely finished product.

The seventh sample is 3 strands of embroidery floss. This is a no-name thread and didn't make a very satisfactory flower. DMC or Anchor embroidery floss have a nice sheen that makes the stitches slide easily. However, this sample makes the point; 3 strands of embroidery floss makes a finished project roughly the same size as all these others.

I haven't done Cebelia or Manuela size 20, but I will and you will see that they too are almost the same size. So there you have it. 7 different threads with sizes marked on them from 8 to 50 and yet the finished size of the tatting is almost the same. So the next time you need a colour and you don't have it in the selected brand, you'll know what you can substitute, and if a pattern calls for a brand you don't have, instead of giving up until you can get to the store, select and alternate brand, and get to tatting.

Monday, July 30, 2007

Happy Anniversary

While there are a lot of things I could blog about, like the week from h--- where installing a garage door opener required repairing the ShopVac and rebuilding the storage loft and the 1 month old computer with all of hubby's programming, our business records and personal banking records suddenly quitting. Or the fact that I have tatted the same 3D flower in 7 different types of threads to show the thread comparison. BUT all I'm going to post is this:

The headpiece I made for our wedding. Happy Anniversary honey, I love you more and more every year. Thanks for being mine.

Saturday, July 14, 2007

Needle Tatting or Shuttle Tatting

One of the most frequently asked questions is, 'What is the difference between needle tatting and shuttle tatting.' I suppose the best answer is 'Everything and nothing' .

When the needle tatted piece is tatted very tightly on a fine needle, the end results look the same as a shuttle tatted piece which is worked in a somewhat loose manner, so that there is no apparent difference. The process of how the pieces are made is totally different and therefore the finished pieces may look the same, but they aren't usually.

With needle tatting the stitches are formed on a needle, similar to the way you 'cast on' stitches in knitting, doing knit one, purl one and then the threaded needle is pulled through the stitches. The finished lace however is only as fine as the needle you are using to make it. The typical method for doing this creates a "mock" ring. You can make a true ring, but most instructions you will see create a mock ring.

Mock rings are just chains formed in a loop and joined at the base. They are not as stable as true rings so they can lose shape after they've been washed a few times. If the work gets cut or torn the whole thing can unravel, so to stabilize it (make it keep it's shape) and prevent it from unravelling you have to tie a knot after every ring.

Needle tatting can be done making true rings which produces a sturdier lace that won't unravel if it gets cut. Remember that the thread has to be drawn through the stitches that are formed on the needle, so one of the drawbacks is that the thread can become worn from the friction of pulling it through the stitches and there is just so much thread that you can manage on a needle. Shorter lengths of thread are easier to handle, but result in more ends to hide.

Needle tatting is easier to learn, but the finished product is typically looser, floppier and more padded looking than the same piece shuttle tatted. The needle you work with has to have a big enough hole in it to put the thread through, but a big hole also means a fatter needle. Since the stitches are formed on the needle a fat needle makes fat stitches. Fat stitches aren't as tight or crisp looking as stitches formed directly on the thread.

Some designs can only be done with a needle because the design requires being able to get the thread into places where a shuttle won't fit. Stringing beads on a needle is certainly faster, so for making jewellery, people often choose to use a needle.

In shuttle tatting the stitches are formed directly on the thread so the work is as fine as the thread you are using and the finished piece generally looks crisper than a piece done with a needle. As mentioned a project which has been shuttle tatted loosely and one which has been needle tatted very tightly, will look the same. Rings are true rings that don't need anything to hold them in place. If shuttle tatting gets cut or torn it will only unravel back to the last whole ring. The thread you use is held on the shuttle and wrapped around the left hand then the shuttle is manoeuvred around the thread on your hand to form the stitch and by switching the tension between the right hand holding the shuttle and the left hand, the stitch is flipped or transferred to the thread on the left hand.

Co-ordinating both hands simultaneously to get the stitch to flip takes a bit of practice. So shuttle tatting is harder to learn, but the results are worth the effort. Using the same thread the needle tatted article will generally look puffier and more padded. Both finished items will look quite similar and the untrained eye would not see any difference.

Which method you use depends on your preference. People who do both use the method most appropriate for the project. You couldn't shuttle tat with yarn very well, but you could needle tat with it. Then again, with the size of holes you'd have in the rings a project made with yarn wouldn't be very warm ;-) People with arthritis who have a hard time flexing their fingers, find needle tatting easier on their joints. The same is true for any kind of hand/wrist/arm injuries. There is a place for both types and it's mostly just a matter of preference.

Tuesday, July 10, 2007

Embroidered Butterfly


I've taken a bit of a break from tatting to do some embroidery and I'm not at all happy with the way this is going and I think what is giving me the most trouble is that I don't have a specific purpose for the finished piece, so I have no goal to work towards. I like butterflies and so I used the butterfly design from the Yahoo group
hand-embroidery challenge. This is a poor scan of it still in the hoop and the bright turquoise blue is really much brighter.

I began by selecting colours and I was all over the map. I have no goal. I finally decided that I was definitely going to use the turquoise blue. I love the colour. I came in a no name batch of embroidery thread and years ago I bought the whole batch for that one colour. I haven't used it yet because A- it needed to be something special and B- it doesn't blend with any of the other colours I have in the Anchor and DMC floss.

Once I decided to use the blue I had to match other colours to it. I selected a darker teal blue and a very pale silvery blue that is almost white. I can work with a monochromatic palette, but I thought I'd add in another colour for some interest. My chest of embroidery floss has several hundred blended colours of thread from years of doing petit point pictures, but the only colour that appealed to me when laid alongside the eye popping turquoise, was an equally vivid yellow.
I thought that I would do the butterfly going from dark blue nearest the body and the brighter blue on the outside. I wanted a stitch that would cover the area quickly and I worked a couple of rows of fly stitch starting from the tip of the wing and working toward the body. Then I did the outline of the outer edge of the wing in chain stitch in the bright blue. U-G-L-Y I liked the fly stitch effect but the colour was too dark. I ripped it out and tried again using the yellow for the central stitch to see if it brightened things up. U-G-L-I-E-R. I ripped it out again the dark blue just wasn't going to work. I outlined the second wing in bright blue as I thought about what to do with it.
The yellow and blue seem happy side by side so I tried again using just the yellow. Better, but I didn't like the stitch so I ripped again. By this time the fabric was beginning to show signs of wear so I started in on the second wing and started just filling the area with rows of straight stitches. It covered the area, but it had no real eye appeal. I outlined the area in split stitch as I considered what to do. Yellow is not my favourite colour, so to partly cover it up I began couching down the straight stitches with the pale blue. I'm not sure if I like the effect or not.
I began a second row of chain stitch in the bright blue and I've done this kind of thing before where I follow the outline in ever decreasing rounds until I end up in the middle and the lines of the stitching draw your eyes to no where. I stopped before I had gone to far to turn back because I have the feeling I'm not going to like how this shapes up.
I have an idea to turn these oval shapes on the outer edge into the "eye" that you see on some moth wings. They were outlined in black to stand out. With the pale blue I used a spider web filling stitch which gave me a raised round shape in the middle and I extended the weaving to fill in the oval shape. I am thinking I might use the dark blue on top of it as an iris with a yellow french knot in the centre. But I don't like how it looks and I'm thinking maybe I should rip now before I waste more time on it.

Then there's the body. I did it in black and added some pale blue highlights and I'm not sure if I love it or hate it. I used 3 strand of thread but I'm thinking that one strand would let me get in between the rows of split stitch easy so that the pale blue just peeks out in between the black.
When I started I chose an 8 inch square of fabric and then I started thinking I could do a bunch of squares, maybe all the same butterfly but done with different colours or maybe several different designs done with harmonious colours that could be pieced together as a quilt. (It's that goal thing again.) After re-doing the same part of the same wing a zillion times my thumb started hurting in a major way. There's not much to show for all of the stitching I've done, mostly because I've ripped it all out.

I tat excessively and the repetitive motion causes pain at the base of the thumb. I have discovered, that holding a needle to embroider aggravates that already tender digit. Now I find that the pressure of resting the base of the thumb on the desk to use the mouse hurts too. So it looks like embroidering enough squares to make a quilt is going to be out of the question.
I need to tat. I have an obligation to the subscribers who have purchased the Tatted Lace Pattern Collection Newsletter to create the designs for them. I can't afford to let any other activity, not matter how enjoyable, impair my ability to do that. It's frustrating me, because by nature I like to jump into an actively with both feet. I rarely have unfinished projects, they are either in the process of being done, or they are completely abandoned. I am being pulled to either, just get this done now or just give up on it entirely.

Friday, June 22, 2007

Chatelaine


Someone asked me if I had a pattern for a chatelaine and I didn't at the time. Traditionally a chatelaine would hold the keys to all of the valuables in the house and it would be worn either around the neck or on a belt at the waist.

I don't like the idea of something hanging around my neck, so I wanted a design that could be hung from a belt or a belt loop. I was also thinking that if you are sitting and tatting (not many of us stand to tat) that something at the waist would be closer to your work anyway.

I figured that if I was making a tatted chatelaine, it would probably be for a tatter to use. I suppose different fibre arts would use different tools, but I only included those things that I use all the time. I have a pair of scissors, a fine crochet hook and several needles for hiding ends. My scissors are the folding variety and quite heavy, so I wanted the tatting to be strong enough to hold the weight and not break.

I needed a base medallion to attach the various "ends" to so I came up with the idea of tatting onto a plastic curtain ring and attaching a spring clip like the kind on a dog leash, to the plastic ring. That way most of the weight is on the plastic ring, not the lace. The spring clip attaches easily to a belt loop or can be slid over a belt. I also wanted the design to be flexible enough that it would be easy to add more ends for more tools, like picot gauges or magnifying glasses, or whatever else people might need. The simplest way to attach these tools was a jump ring and lobster claw clasp. The lobster claw allows you to remove the tools when necessary.

One of the tools I use the most and always have to go look for, is a needle to hide my ends. I use several different needles, depending on the size of thread I am working with at the time. If I'm using size 80 thread I want a very fine needle that will let me hide the ends without pulling the tatting out of shape. Very fine needles don't have an eye big enough for threading size 10 thread into, so I need a larger needle for that. I want to be able to carry the needles around with me and not get stuck with them. My solution was to use a piece of felt the same colour as the tatting. The end with the felt sewn onto it folds up and secures with an invisible dome fastener. The needles are slid into the felt and the felt is folded over and snapped closed. Even tatting needles could be secured this way.

I did a sketch using beads and the sketch kind of reminded me of a flower with a light colour in the centre a darker colour outside and then green on the chains. Unfortunately I didn't have enough beads of the right colours to do the whole thing, so I made the one pictured without beads. I did the sample at right with beads to see what it would look like. I like the idea of beads on it and I may do another at some time with beads.
I don't didn't use a chatelaine until I was making the little beaded black amulet bag shown in a previous post. Every few stitches I needed to use a fine hook to make a bead join. I had a very fine size 16 hook and I lost it. Since I had just made the chatelaine it seemed like a very good idea to attach it to something big enough that it wouldn't get lost again. I asked Rob to cut it off at the flat bit and drill a hole in the end. Now it's on my new chatelaine and I'm not likely to lose it again. (just in case I bought 2 anyway LOL) When I started the amulet bag I used the chatelaine continually as I alternated using needles to thread on beads and the hook to make bead joins. Now it has become a standard part of my tatting stuff. I know that if I grab my shuttles thread and the chatelaine I'll have everything I need to work on any of my projects.
The pattern for this design is in the latest Tatted Lace Pattern Collection newsletter.

Tuesday, June 19, 2007

Decorating Dilemma

I have my jeans selected for the Tatting Treasures from Trash challenge. I was thinking I could just zip a seam along the bottom and I'd be done. I used to sew a lot, but I haven't done much machine sewing for years. Since I started this challenge, I feel obligated to actually make a bag out of jeans rather than using an existing bag. But I have this problem.......


When I'm out an about and I need to carry more than just shuttle and thread I use one of 2 fanny packs. (My apologies to those of you from other parts of the world that object to the term.) I'd show you the other one too, but they are identical.


When I'm teaching and I need to carry books, several types of thread, handouts and all kinds of paraphernalia, I use this large heavy duty craft tote. It has a couple of pouches on the outside and another zippered pouch on the inside and it's big and durable.

When I'm away from home and need to carry several projects to keep me busy I use this intermediate size bag which is roomy with a couple of pouches on the outside and a zippered gusset in the bottom that opens it up to be a little larger for when I over stuff it.

Notice a recurring theme here? All of these bags are basic black, that goes with everything. I never worry about being co-ordinated, I just always use basic black. Notice the jeans? They're basic black too. All of the jeans in my closet are black except for the blue pair with the ripped out knees I keep for painting in.

So here's my problem. Do I decorate one (or all) of these bags for the challenge? Heaven knows I have enough bits, pieces and half done laces to completely cover them all. The stuff I showed here was just a part of the collection. Or do I make the jean bag?

I obviously don't need another black bag, so I was thinking about making a back pack so that I had something to use when we go bike riding, except that bike riding is one of those times when I don't usually carry any of my tatting with me. Between needing to concentrate on riding and juggling the parrot, I don't have free hands for a shuttle. Carrying the parrot while wearing a back pack is an invitation for the bag to get chewed. Lace and bag alike are likely to get ripped.

Also, making a backpack out of this pair of jeans is going to be awkward because of where the wear spots are. I can do it, but it will mean taking it apart and salvaging usable bits to re-assemble. That makes for a lot of machine sewing and spending tatting time fussing with other stuff that I don't want to do.

On the other hand, since I started this ball rolling I feel obligated to go through the process.....What do you think? should I make a bag or go with an existing bag?

Tuesday, June 12, 2007

More FPs than WIPs

This little amulet bag is one of the designs from the latest TLPC newsletter. It was such a stinker to do mostly because I was working in black thread, doing split rings and adding in beads. I have no idea what someone would use one of these little bags for, but a while ago someone said they were interested in a pattern for one, so I designed one.

Actually, the bag itself wasn't that hard to do except for the first bottom row where the front and and back are joined together. The first time around I tatted all 4 rings of the first pattern repeat and then I couldn't climb up into the next row. The black thread was hard to see and doing the bead joins with a teeny tiny hook, I kept splitting the thread and having to carefully untangle it without shredding the thread.

I created it with a fold over closure and to keep it closed I added a see through dome fastener which doesn't show up in the picture. The pointed section could be omitted and it would just have an open top.
The fringe was added at the end. I simply took a long length of the thread, strung on the blue beads, added one black bead at the end and then ran the needle back through the beads. I played around with doing a design in the fringe and after drawing up a few possibilities I scrapped them all and went for simple.
I make an effort to create new and different things for the newsletter. Several people have said they really like doilies so I design some doilies, but other people have said they don't care for doilies at all so it becomes a challenge to come up with new interesting and different things for each issue. A number of people in the 25 Motif Challenge decided to join the challenge just to see if they could tat that many items in a year. Doing the newsletter, I know what I do each year as many of the articles find their way into the newsletter.
Some of the things I create are intended to be gifts, but other things, like the amulet bag I have no use for, they were created solely because it was a pattern someone requested. They go into my stash of completed items and when I find an appropriate person to gift it to, it's gone. Consequently I'm getting quite a collection of Finished Projects rather than Works in Progress. The only WIPs I have are the ones I am currently working on and as soon as a WIP becomes a FP I start another one.
By the way, if anyone has ideas for patterns they'd like created, let me know. As soon as my current WIP is done I need another idea!

Tuesday, June 05, 2007

Square Motif Play

I created this square motif for the 25 Motif Challenge. I had seen a picture of a crocheted something or other on the internet and I took the general idea of it and recreated it in tatting. Since I like to see the pattern within pattern created when you join motives together I did 4 of them. They were pretty enough but 4 little joined motives don't look like much of anything. I kind of liked the negative space in the middle and wanted to recreate it on the outside border. I also wanted to repeat the arches used in the corners so that I could carry a design element of the motif into the outer border

This was my first attempt. A week's worth of tatting time just to see that it looked like crap. Grrrr! The arch between the motives ruffled like mad and just wouldn't lie flat. The chains around the corners took away all of the square definition and made the corners round. Really ugly and no way to fix it except cut it off.

Once I cut the offending border off I had an arch section of the exact proportions that I could play around with. I didn't want to do anything elaborate on the corners because I wanted the focal point to be the arches, but I also didn't want them rounded.

Here's the final result and I'm quite pleased with how it turned out. The negative space created pattern within pattern so that the joined motives look more like a planned whole than just a collection of motives. Your eye is drawn to the X created between the motives and it takes a moment to see that it's just 4 motives with a border.

Sorry to burst the bubble of those who think that designers just "get it right" the first time. The truth is that sometimes it's just a lot of slow slogging doing it over and over again until you like the results.

Thursday, May 31, 2007

Tatted Lace Pattern Collection for May is out


I finally got the May TLPC newsletter out, which means my work is done and now I can play. The 2 designs already shown are a hatband for a sun hat and some flowers to spiff it up. I bought the hat last year and didn't get around to doing anything with it. Here's the hat with the tatting attached. Unfortunately it was really hot out when hubby and I were doing this so we didn't stop to take another shot of it with the flowers in the sun. There's a different picture on the web page but you get the idea anyway.

Sunday, May 27, 2007

Another Tease

This is another pattern that will be going into the newsletter. I initially did it in white but I thinl the variegated will look better. You can see the finished piece in the newsletter when it's up later on. The link to the newsletter is on the sidebar. I have some more diagrams to finish and some ends to sew in, pieces to block and photographs to take before I can get this baby put together and sent out.

Then I get to start all over again!

Thursday, May 17, 2007

Dusty


This is me at the computer, can you tell? The face in the way is Dusty and like all pets she thinks she's human.

I've been tatting until my wrists are sore, but nothing much to show until it's done. I just decided today that I'm going to leave the square motif as it is, or at least if I do a finishing edge it will be something simple that can be worked up quickly. I'm coming up on my self imposed newsletter deadline and I need to publish rather than complete so things aren't going to look as spectacular as I'd hoped.

I posted about it previously under "Square Play". So do I cut off what I've done, or only cut out the offending part of 3 rows of tatting and piece in 3 alternate rows in 4 places. Let's see, that would mean for each cut out section, 2 ends at the beginning and 2 ends at the end of the old thread (4), 2 new ends of the new thread added in (2), for 3 rows (6x3=18) and there are 4 sections that need to be cut out (18x4=72) Do I want to hide 72 ends or just start from scratch? Which do you think would be faster? Re-design and re-tat 3 rows around a 5.5 inch square base, or re-design re-tat 4 sections and hide 72 ends. Hmmm, think I'll cut it off and start over as that's sure to be faster, especially since one of my other projects was done in size 10 thread and already has a bzillion ends to hide.

Wednesday, May 09, 2007

Best laid plans- and all that jazz


When we started the 25 motif challenge I had anticipated designing some motives and morphing them into hearts and butterflies during our one year trek. I began with the best of intentions, and designed a few little motives and sketched out how they might be transformed into hearts and butterflies. October I was in a mad rush to get the tatting done for my brother's 50th wedding anniversary, followed immediately by the mad rush to get the November newsletter completed. Then there was the Christmas rush. See a pattern here?

I posted a couple of pictures of some motives I had done and then there were the Christmas snowflakes sent out to my siblings, all 8 of them and about a dozen simpler beaded snowflakes that were given out with gifts. One of the motives I created went onto the red shirt as a V-neck treatment. There were 9 of them. The square motive that is currently in time out, isn't a complete project yet but the 4 motives are complete.


Here's a couple more that I have done. I had an idea that the one on the left might lend itself to becoming a butterfly, but when I added the rings for the body it stopped looking pretty so I gave up on it.

Then there the motif from the V-neck shirt that I worked on converting into a heart. Why is it that the lace in my head just isn't as pretty in reality? I'm not even going to try to tweak this design into some semblance of respectability. It's as done as it's going to get.


Wait a minute, that's 25 motives. No hearts, no butterflies, just the same motives done a bunch of times and all of the lace for 3 newsletters.... and a whole bunch of hours spent blogging the fun everyone else was having with the challenge.

I want to explore what can be done with square motives, but then there's the Tatting Treasures from Trash denim bag challenge. Some days I think I have the attention span of a gnat.

There you have it. I did plan on 25 new designs, but what I accomplished was tatting the same designs a lot of times. So I am officially giving myself permission to move on to the bag challenge. It wasn't what I planned to do, but it's done. All of the designs for the May newsletter are giving me a hard time and I want need to be giving it all my attention.

Friday, May 04, 2007

Bits and Pieces with Purpose

See this jumble of thread? Want to know what it's all about? I was interested in the comments made by a woman who had inherited a workbasket which contained some pieces in various stages of completion. She was comparing 2 pillowcases and noted that one used a very fine thread and another used a very thick thread and she wondered why her aunt would have worked the 2 pieces so differently.

It made me stop and think of what someone might make of the collection of tatting supplies and half completed bits that I have. Since most of what I do are new designs, I have a lot of trial bits and pieces done with crappy thread because I was just trying something out. I've kept piece of things I did when I first started tatting and bits of edgings I was trying out, sample motives I tatted up and pieces of threads I tried out.


I wonder if they would know that this lump of pink and blue is really a place mat that I stopped working on because I got tired of rows of the same old stuff and the store quit selling the thread so while I might be able to complete it, colour matching might be a problem.

This piece was an early attempt at doing a treatment for a V neck. I had the idea of making the lace as an inset and trimming away the fabric to fit it in. What stopped me was that doing the first side was easy, making the second side to match meant counting stitches for every little section and the more I worked on it the less I liked how it was looking.

And what about these blue flowers? They were intended to be appliqued on a tablecloth or place mats, but when I picked up the balls of thread I didn't notice that the size 8 perle cotton I thought I had bought, was actually size 5. They'll never get completed.

Here's another failed designing attempt. A small 5 sided motif intrigued me and I wanted to see what it would look like bigger, so I played around with a one shuttle border. It doesn't lay flat and not amount of blocking is going to improve it.

Here's some bits and bobs that have no use. Gold and pearls on an ear wire so this was obviously and attempt at an earring that went wrong. How do you like the mutant 3D daisy? The doily is from an old crochet magazine that included a couple of tatting patterns. Way back when I didn't have any tatting books a friend gave me this pattern. You will probably recognize it from several old publications. The aborted doily is incomplete because in my opinion anything with floppy bits on it's perimeter doesn't deserved to be tatted.

That's just a smattering of the fragments, snippets and incomplete pieces from the bottom of my workbasket. What about yours? What do you think people will make of your leftover bits? Do you think some distant relative will scour the internet looking for thread to match an incomplete piece that you put aside in disgust because you hated working on it? Will all of your treasured pieces from round robins and exchanges show up in a bulk lot of "vintage tatting" on ebay? How about a useful way to keep and use all of your little bits? How about using your cast off bits and incomplete pieces, your mistakes and your ugly trials and turning them into something useful, durable and educational? How about dressing up an old pair of jeans and recycling them into a craft bag? How about (drum roll please!) another challenge!


Here's the idea. Just like the 25 Motif Challenge you can work at your own pace. Take an old pair of jeans, cut off the legs and sew them along the leg end to make a bag. Add a handle, you can use the leg pieces sewn as a strap or do something else, it's up to you. Then decorate the bag with all your old scraps and bits or use the pieces from your 25 Motif Challenge. If you don't like the colour of your old bits you can do what CQers do and dye them any colour you'd like. Here are some ideas from an embroidery challenge to get you started. If you don't have a pair of jeans you can cut up, there are a lot of yard sales or thrift shops where you could find something suitable.


If is sounds like something you want to try let me know either by e-mail or by leaving a comment. For this challenge I will set up a separate blog and each participant will be added as a "Team Member". Blogger allows blogs to have team members so that each person can add their own pictures and comments. That will make it much easier for me and it's why I'm willing to handle another challenge. Your regular Google account will let you access the blog to update your progress. At least, I've been told it will, I haven't done it yet.


Thursday, May 03, 2007

Square play

Here are some square motives that I have done. and they all have possibilities.
This one is a simple 4 ring base with a ring and chain border and with a little playing with the photo it could be assembled to look like this.

Or this.

Either way it's going to leave some big gaps between motives.

Here's another one that I was working in a strip until I fell out of love with it. The gaps between are too big again.

I've been playing with another square I designed and I want to turn this one into something more than just a square motif, but I don't have a lot of time to play around with it. The design is fairly solid, at least solid for tatting. I used very tiny rings so that I didn't have really wide open spaces, but at the same time the long chains in the corners allow for some negative space to attract the eye.

The intersection of the corners is pretty, and I thought I'd try to invert the shape to reproduce the effect on the outer edge.

Sort of like this..... See the problem? To get outward facing curves I need to tat it from above, which I could do, if I worked it first and attached it using a separate row, repeating the corner sections as shown here. But you can see the problem, I'd have to work 3 rows before the joining row and I'd end up with points at the intersection of each pair of motives rather than a straight edge.
After some consideration of how I might do this weird inverted tatting, I thought I'd just repeat the corner arch instead.

Which created it's own set of problems. These 4 rows worked around 4 motives took about a week of tatting. (We were doing income tax, which didn't leave a lot of brain cells or tatting time.) It's ruffled. Badly. Another row may make it flatten out, but I doubt it. And now that it's on there I don't think I like the idea after all. The only solution is to cut it off and start over.

An edging without a corner is only half a design. A motif without an edging to finish it off is likewise incomplete. The next time you see this motif it will have metamorphosed into something different.

Wednesday, May 02, 2007

Toying with Squares

Way back when...I used to do a lot of crochet and I remember seeing lots of things created with crocheted squares. Not just granny squares, but beautiful, gloriously lacey squares. Trouble is I can't find anything in my old pattern books. OK, I admit it, I didn't look really hard, digging through a file cabinet full of old books, magazines and leaflets just doesn't appeal to me. I spent last week doing the accounting in preparation for doing the income tax, last weekend helping hubby replace the spark plugs and wires on the car, Monday helping him clean out the garage and Tuesday sorting through it all again at the recycling depot. More wasted tatting time looking through books just wasn't going to happen.

Searching the internet is something that my bruised and battered body CAN handle and along the lines of interesting things you can do with a square I found a couple that I'd be willing to try reproducing in tatting. Here's a Bolero
The layout shows how to position the squares so it would be easy enough to convert this to tatting.

Or how about this very open shrug?
It's nothing more than a short scarf laced up with ribbon to form arms. I could do that in tatting. without much trouble, although I think I'd like a little more back to it for warmth. If it's done in little squares it's easy to add a short row or two along the back.


Then there was this one.
Very open, and very easy to reproduce in tatting.

Or there is this idea of square motives used to embellish a T-shirt.
This one reminds me of the rose motif in my last post.

I could see any of these reproduced in tatting. Except that tatting usually isn't done with yarn, and cotton doesn't stretch. I have added tatted motives to sweatshirts and T-shirts without any problem but if the finished product needs to stretch it has to be made with yarn or another type of flexible elasticized "thread". Needle tatting would be more appropriate for that type of project.

I need to do some major thinking before I attempt a project like this. The newsletter keeps me pretty busy designing and the 25 motif challenge takes most of my blogging time. I've already decided that I'm going to try to tat a bookmark to send each of my 8 siblings on their birthdays. I'm not sure that I can do it. I'd like to design new ones, but I may just go with something simple like this one I designed a couple of years ago for the 5 girls in the family and then create something more masculine for the 3 boys.
Nothing like jumping into a whole pile of work is there? 20 new patterns a year for the newsletter, while tatting 8 bookmarks on top of the 8 snowflakes or whatever I decide to do for Christmas, on top of tatting for the 25 Motif Challenge and blogging for the challenge blog and I'm still thinking of taking on a major project! I must be nuts. Still...it would be nice.

Friday, April 27, 2007

One is not enough

Motif, that is, especially when they are square. Designing a motif is fun because no matter what you thought you were making, sometimes the design just takes on a life of it's own and tells you what it wants to be.


I used to do a lot of crochet until tatting became my passion obsession and you can't do much crochet without being infected by the need to do granny squares, which will lead to all kinds of square things being done. Squares make afghans and tablecloths. Squares make vests and slippers. Squares make bags and...you get the idea. Squares are nifty things.


One of the really interesting things about squares, or any motif really is that they are pretty on their own or in groups. Like this one I designed a few years ago for the newsletter which you can see here
(By the way you can see all of the previous issues in the archives by just changing the Volume and Issue number at the end. So vol-1-4 here is changed to vol-3-1 or whatever volume you want to see. http://www.gagechek.com/slb/news/vol-1-4/ )

I think this one might be my favorite design. It's just pretty as it is. I did it in size 20 Opera thread. Which is about the same size as size 40 Olympus and a smidgen finer than size 20 Flora and it came out about 3 inches across or about coaster size.


But look at this.


That lovely little border edging around the rose becomes this gorgeous dainty lattice work.
Look at the intersecting corner. Isn't that just too cute for words? I love motif designs that work so well as a whole cloth that you have trouble telling whether the centre of the motif is the centre or the corner. This one is obvious, of course because of the coloured flower in the centre.
That's the trouble with a motif. One is never enough. you have to work enough of them to see what the intersecting corner is going to look like. Sometimes the intersection is better than the motif.

Just think of all of those old granny square designs that you could turn into elegant pieces by doing tatted squares.

One really isn't enough. I have received numerous e-mails from people asking for the pattern and many of them already have it. This motif was featured in the August 2003 newsletter but due to lack of space the cover page only shows a single motif. Often the true beauty of a motif doesn't show itself until it's part of a bigger whole. Then some of them truly are greater than the sum of their parts.

Wednesday, April 11, 2007

Blocking, Stiffening and Storing Tatting

Here are some of my thoughts on Blocking, Stiffening, Framing and Storing your tatting. Some years ago I had several lengthy conversations with the textile conservator at the Royal Ontario Museum. She dealt with ancient and fragile textiles and I spoke to her about the proper way to treat those textiles and newer laces. So while I'm not an expert, I did get my information from one. I know what ought to be done to preserve our laces, but my feeling on the subject is that unless the lace is a special occasion piece such as wedding laces or christening outfits, it ought to be treated like any other fabric. So while I don't pamper my tatting, I don''t abuse it either.

This is going to be a long, wordy, picture free post which I may add pictures to later, but for now I'll just stick it here as a reference tool. So if you're looking for pictures, move along there aren't any here. If you're looking for information, grab a cup of tea, coffee or whatever and sit down and read to your heart's content.

There's whole bunch of things that are helpful to know. So here it is divided into 2 categories. Tatting with modern threads will stand up to washing as well as any fabric. I regularly throw my tatting in the wash with the rest of the laundry. So there goes the theory that you have to treat it with special care. LOL

Colours can bleed. I did a bunch of the Grace snowflake on my web site and the red did bleed into the white, but when I kept rinsing it, the red bleeding disappeared. Modern cottons (at least in North America) use processes that resist the bled out dyes. That particular thread bled every time I used it, but with additional washings the dye disappeared so it wasn't permanent. The best solution of course is to use colourfast threads, but when you don't know how the thread will react to water it's always best to test a bit of thread before investing a lot of time into tatting with it.

What I do with small projects is wash my hands, pick up the motif and rub it in the suds, then rinse it out. Orvus is the recommended soap for fragile laces, but ordinary Ivory soap is a good choice and available in most grocery and department stores. According to the conservator who did the research Ivory laundry flakes compared favorably with Orvus. Any face and hand soap can be used (preferably not detergent) the major difference between the soaps is the dyes and the perfume additives. Newly made projects usually only have the soil from your hands on them so they aren't really dirty unless the dog/cat got to play with it. So gentle washing is usually sufficient.

Most of the threads that we tat with are cotton and cotton wants to curl when it gets wet. Blocking uncurls the fibres. If the project is small I block it on the ironing board and if it needs symmetrical blocking I throw a checked tea towel on the ironing board first. It gives a nice grid to pin things out on.

I am not as precise as some people who do tatting for exhibition and judging so I'm a little haphazard about my blocking, but I am also very good at eye balling it and don't use a grid most of the time. You know your own ability so work accordingly.

Lay the damp tatted piece on the board and spread it out. Pin the centre down. When I use the ironing board some pins will go through the holes in the board and others will hit the metal, so I turn them sideways so that they go through the padding and turn to lay between the padding and the metal of the board. Use stainless steel or brass pins for pinning to avoid rust.

Then pin out the outside edge at the compass points North, South, East, and West stretching the tatting as you go. It will stretch out. Then pin out in between NE, SW, NW, SE. Once you have the outer edges pinned out, start pinning out the shape of the piece. I don't like the look of pointed picots so sometimes I pin the ring or inside a chain, but pinning the picots does do a better job of crisping up the work because it pulls on the stitches. If you are doing an exhibition piece, pin every picot. Yes that's a lot of pins, do it anyway!

Next I push the pins flat, (sideways between the padding and the metal frame of the ironing board) and lay a pressing cloth or paper towel over the work. Press the lace with a hot iron. (What, your rayon thread melted? I told you this was for cotton. If you're working with something else use common sense.) Be careful of doing this if you use plastic beads. I use glass beads almost exclusively and had a horrid mess the one time I pressed a piece with large plastic beads on it. When the piece is almost dry pull the pins out. Lay the pressing cloth over it again and press flat.

Why use a pressing cloth? Because if you don't you'll flatten out the lace so that it doesn't look as pretty. The raised portions will be shiny where they were in contact with the iron.

For fragile, antique pieces and inherited heirloom pieces where you want to take more care use a large mason jar or any (glass) container with a secure lid. Add Orvus or Ivory laundry flakes or shavings of a pure soap and distilled water (or tap water depending on how careful you want to be about it). Add the lace and shake gently to agitate it. Rinse the piece thoroughly until the (distilled) water coming off of it is clean enough that you would drink it. Pin it out gently. New threads are tough and will take a lot of pulling, but ancient threads aren't, be careful.

If the piece is too big for the ironing board purchase a block of construction foam (styrofoam). It comes in big 8 foot pieces about 2 inches thick, so you can cut it into smaller chunks for blocking. I use a couple of small chunks for edgings and a big 2 foot square piece for things like doilies and collars. With these pieces I pin them out wet the same as on the ironing board and just leave them pinned to dry. Often I'll pin them first and then wash them already pinned, as it saves time. I just hold the whole thing under the shower, soap up my hands and lather the lace, then rinse again under the shower. I sometimes have one project pinned on one side and a second or third on the other side depending on their size/shape. If you need a grid to work from, you can attach a square of gingham cloth to the board and use it for your grid.

For exceptionally large pieces, tablecloth size big, you need to pin it out on the mattress. A job which is best done early in the morning unless you have a spare bed you can use. If it's too wet you can dry it with the hair dryer. Make sure you get all the pins out when you're done. You don't want anyone rolling over and getting stuck with a straight pin.

Pieces of white lace may be periodically laid out on the grass or over bushes so that they can be bleached by the sunlight as it does brighten them up. Hurray for ultra violet light!
------------------------------------------------------------------------
Stiffening can be done with sugar, starch, glue or commercial treatments. They all have their pluses and minuses. Note: If the piece has beads on it, the stiffener may make the beads look dull and ugly. Rather than dipping the piece in the stiffener you may want to apply it with a brush.

Sugar - heat sugar water until all of the sugar has been absorbed. Dip the piece in the solution and pin it out. If your solution is too thick it will clog the picots and look ugly, water it down and try again. The good thing about sugar starch is that it washes out and doesn't harm the fabric. The bad thing is that critters will eat the lace to get to the sugar. If you have a problem with pests in the house don't use sugar.
Starch - wheat, rice, or corn starch can be used and the purer the better. For the kitchen challenged, things like corn starch go in first then add cold water. Heat the mixture until it's clear. Immerse the lace and pin out to dry (see the note on beads). This is the ONLY archival quality stiffening that can be used as it does stiffen, it can be washed out and it isn't attractive to most critters.
Starch, Commercial - can be used but generally doesn't give results as stiff as the first 2 choices and there's no guarantee that it won't harm the fibres. Different products give different results and have different drawbacks. Experiment with little pieces first before you throw a large piece of lace it these.
Glue - White glue of the kind that children use also known as PVA glue can be diluted with water and applied to a blocked piece of lace. Most of these glues either don't wash out at all or don't wash out completely. The long term results (long term as in 50 or more years) is that the pieces will yellow to varying degrees. That may be OK on some things but not so nice on snowflakes.
Clear Nail Polish - I have heard of people using this for small projects like earrings both to seal the finishing knot and to stiffen the tatting but I have no personal experience with using it so I can't comment on it.
Commercial stiffening products - things like Stiffy and a bunch of other brands of fabric stiffeners will stiffen the lace. Many of them are permanent. Some of them yellow with age. Some of them are made with polymers which do break down with age. Plastics off gas when they break down and cause damage to textiles. So use these with discretion unless you don't care about the lace.
-------------------------------------------------------------
A lot of people like to frame their lace for display. If you are permanently mounting the lace make sure you use acid free archival quality materials. Use a pure cotton fabric backing and sew down every picot using cotton thread (or match the fibre, eg silk on silk). You can mount it under glass but the glass must not touch the lace so there has to be spacers between the glass and the lace. The framing must allow for air circulation. Sealing the lace behind glass results in condensation from temperature changes which will damage the lace.

If the lace is just being stored make sure to use acid free paper, or 100%cotton sheets, between the laces and store them flat. Larger laces which must be folded should be stored either with sheets of acid free paper between them or with sheets of cotton fabric between them. All laces should be taken out and aired at least once a year and re-folded in different places to avoid permanent creases which result in permanent damage to the fibres.

Laces should never be stored for a long term in plastic boxes or bags as this will result in yellowed fibres. Likewise they shouldn't be stored in shoe boxes or other similar boxes as they often have a higher acid content which will harm the fibres.