Saturday, September 30, 2006

Newsletters


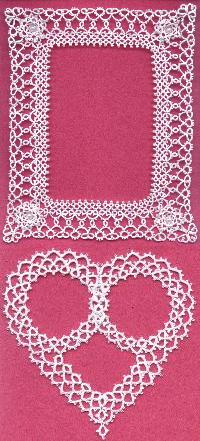
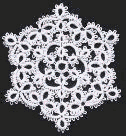
This is a long rambling post about newsletters and deadlines and such. Several years ago I published my first book which a lot of people really liked. Here's a picure of the cover. The cost and aggravation of publishing it put me off doing another book. I had a lot of designs percolating around in my head, like the 3D snowflake Georgia has in her class pages that she called the Superbowl Sunday Snowflake. I think 10 is the minimum number of designs I would put in a book and I had a dozen or so already tatted and drawn.

I didn't want to go through all that bother again and I started to think that maybe a newsletter would be a good idea. I had enough unpublished works that I could fill up at least 2 or 3 newsletters and in the intervening months I figured I could do a few more to finish out the first year. My sweetheart hubby created a web page to show the pictures of the tatting in colour although the published pages were black and white.

Things went reasonably well for the first couple of years. Bookkeeping for income tax purposes was a bit of a headache with the newsletter running from November and the tax year running from January. After the first year I started having people subscribe mid-year and that was OK for a while. Then I had some people renew early, and a few who skipped a couple of issues then renewed and things got really wild. I think I've managed to get things back on track now. Maybe.

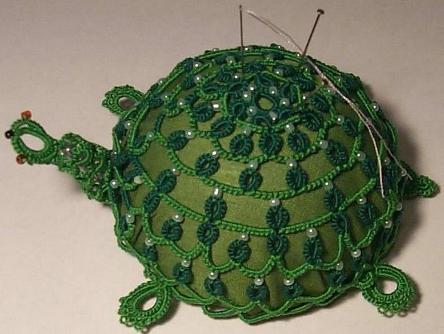
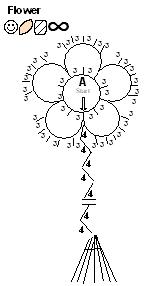
Anyway The accident last year really threw things off. My stack of already created designs has been depleted. My energy and creativity have been at low ebb for way too long. I just don't have the energy to start over again when a drawing isn't right. I get a perfect drawing, start to add in the stitch count and have to scrap the drawing and start again because there isn't enough room for numbers. The turtle in the last issue had to be done about 6 times just to get the head and neck right. I found myself going cross eyed night after night just trying to get it to work out.

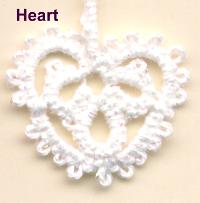
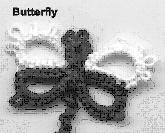
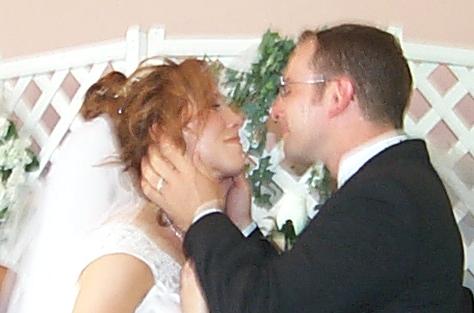
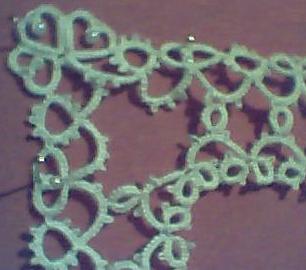
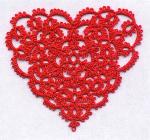
This last quarter I did the wedding album, lace for 4 placemats (which I didn't use) and I need to do something special for my brother's 50th wedding anniversary. I'm one month into this quarter and I haven't started the lace for next quarter and what I really want to do is pull together the lace for a book. I'd like to use the 25 Motif Challenge to create snowflakes and morph them into hearts and then morph them again into butterflies, all while showing the designing process. It's the kind of thing that I don't think will go well into a newsletter, but maybe it would.

Creating the newsletter used to be fun, but lately it's become a chore and I panic each quarter that I won't be able to create as much lace as I need as fast as I need. While my sweetheart is very supportive he's inclined to tell me to quit if it stresses me. Doing things electronically took a huge burden off. He's such a stickler for precision that he insisted on doing labels for every envelope and made sure that the labels were straight and the stamps positioned precisely. Anything less than perfection, just wouldn't do.

So now I'm thinking can I still do the newsletter? Can I handle the pressure? Should I change the format to allow doing a series on designing? Would the subscribers go for that? What if something else slows me down like the accident did? What do you think? Anybody want to comment?

Friday, September 29, 2006

There's Life after a Newsletter!


This was a very hectic summer for tatting. When the May newsletter went out I was already thinking of the August one. As I've mentioned, I was going to use the pink doily, but when I came to doing the diagram for it I discovered that my picture was way too blurry. Rob likes to sharpen all the scanned images, but sharpening the image actually blurs the stitches. I try to do one larger project and several small ones for each newsletter and at the last minute I had to replace the large doily with an alternate project. The alternate project is this Turtle pin cushion. Isn't he cute?

I decided this year that I should put some of the Christmas-y stuff in the August issue so that people can tat them in time for Christmas. I really like how the snowman turned out and the little angel was a great way to use the face beads I found in the Dollar store.

I had in mind to tat a lot of butterflies this summer, but with doing the wedding album and yards of lace for placemats and being sick and going to the doctor for lots of pre-surgery appointments and back to doing physio 4 times a week, I just ran out of hours in my days and energy to do much of anything when I was home.

The 25 Motif Challenge is going well. I'd like to get a bunch of stuff done for that. Actually, it fits it well with a book idea I've been thinking about and I'm itching to get started. Of course doing daily postings for the challenge is another reason why I haven't had a lot of "free" time lately.

Friday, September 08, 2006

There aren't enough hours in my day


Updating the 25 Motif Challenge Blog doesn't give me a lot of time for updating my own blog. Not that I've had much time lately. Rob has been back to the doctor for more tests. I've been back to the doctor to see about getting some of the hardware out of my leg. I'm at Physio 3 times a week trying to get a bit more mobility in the leg and back for massage a couple of times a week to see if some of the kinks can't be worked out. All in all, there aren't a lot of hours left in the day.
I washed the tatting and the fabric to do the placemats, then laid out the fabric for cutting. The label on the bolt of cloth said 60 inches, but it's only 45 and I don't have enough fabric to make 4 placemats. So I'll do something else :-( I got 3 of 4 drawings for the August newsletter mostly done. One is drawn but the 3D part is giving me trouble. One of them I haven't even drawn yet and tonight and tomorrow are a write off.
I need to do some cooking/baking tonight or we won't eat tomorrow at the family picnic. It's time for our annual family reunion and each family brings a picnic lunch and then we have a corn roast for supper. This year we are combining the reunion with the family shower for the recently married couple. Did I mention that half of the invitations didn't get out and therefore no shower was planned ahead of time? Instead of placemats they'll be getting a tatted doily, not this one, my sister has it, but the same design done in cream. It's one of the doilies that went into the newsletter.

Tuesday, August 29, 2006

25 or 30 Motives


For some time I have been thinking I ought to do another book, but I want to do one that shows the design process of tatting. People will sometimes ask me how I come up with my designs and I think it's maybe easier to show the process than talk about it. So for my 30 motives I'm planning on doing snowflakes, hearts and butterflies and showing how one can lead into the other. So here are my first 3 entries.

The first is a motif that I made into a doily by joining 7 motives together. To produce a more interesting starburst shape I repeated the design in reverse from the side into the centre. Click on the picture to see the doily.

The heart is a variation of the snowflake and you can see the design repeated again in the wing of the butterfly. It may take me a while to get the next set done as I don't seem to have much tatting time these days.


Friday, August 25, 2006

Burns Bashes and Disasters

I didn't get anything useful done today due to a series of unfortunate accidents. The kettle full of boiling water got knocked over a splashed all down Rob's forearm. On the way out to the doctor the garage door got stuck and wouldn't close properly. Rob slammed the door to get it to close and the glass globe on the light above the door fell off, hitting him on the head, bouncing and shattering on the driveway. After a quick trip to the doctor's office where the burn was dressed and his arm wrapped in gauze from the elbow to the wrist, we returned home.

The shattered glass was vaccuumed up from the driveway so that we could put the car in the garage and again the door wouldn't close. It took a while to figure out what was wrong. The door is about 30 years old and the frame has rusted in places so that it doesn't fit squarely on the track. It's time for a new door, so Monday they'll be coming to replace the door.

Rob has collected tools ever since he was a kid. In addition to the wood lathe, band saw, drill press and other assorted pieces of equipment, he has a wall full of hand tools. Being the quality manager for a hand tool manufacturer, On several occasions the owner of the business sent him home with boxes of tools. Consequently Rob built a custom lock/door opener for the garage. The button inside the house that opens the door also turns on the lights in the garage and another signal light inside the house. We had accidently left the garage door open once and you can't see if the door is open from inside the house, so now we have a signal light.

The new door is a different style, so the opening/locking mechanism won't work on it. The old door left a space above it that we have used for storage. We're not sure if the storage area will be usable with the new door. If the space is needed for the new door to roll up into it, we may have to move the storage area. This area is chock full of lumber and other "stuff" that we have no other place to store. So this weekend we'll have to see about re-wiring the garage, maybe moving the lumber somewhere else and of course, replacing the broken light fixture. Rob has to do all of this while bandaged from elbow to wrist.

And a fun time was had by all. NOT.

Thursday, August 24, 2006

Time for a change of direction

I've changed my mind. I think I'll change the patterns going into the newsletter and use a previously designed but as yet unpublished design for the newsletter. I'm itching to start the 25 motif challenge and I have too much still to go on the things I was planning to use. Some days it's easier to go with a whole new design from scratch than to fight with something that just doesn't want to co-operate with.

For about the zillionth time Rob has suggested I discontinue the newsletter. He hates to see me frustrated and he doesn't want to see me overworked. He still hasn't figured out that I do my best work under pressure :-)

Saturday, August 19, 2006

One job finished, 5 more to go


Yayyy. I finished my 8th strip of edging! Now I can get on to making these blasted placemats and finish of the stuff for the newsletter. I still can't decide what to do on the face of the placemats. I have some daisies done, but I may not bother, or maybe I will. I don't sound indecisive, do I?

I thought my turtle pincushion was done, but the more I look at it, the less I like it. It needs more work. Drat! I wanted to get started on the challenge and I have drawings to do yet. My snowman needs some touchups and my angel needs a halo and I still have to draw the patterns out.

I went back for more physio today and boy does my leg ache. You wouldn't think that one broken leg would cause this much aggravation, but I still feel like I'm playing catch up. I haven't managed to get one newsletter out on time since last year.

I would have been on time though if it hadn't been for the wedding album. That took a lot of my tatting time this quarter, so I guess I am getting sort of caught up. Each newsletter has been delayed which means I haven't been free to start on the next one until later in the quarter. I'm beginning to wonder if maybe I should quit doing the newsletter as then I could just take it easy and do a book, publishing when I'm ready instead of trying to keep to a deadline.

I was going to show a picture of the turtle, but I think I'll just keep you guessing till he's done.

I really did hope that I could get to work on the challenge. I have in mind to do a book of snowflakes, a book of hearts and a book of butterflies with at least 10 patterns in each book. That's while I'm doing the newsletter. Keeping up with the Challenge blog has caused me to neglect my own. How many hours are there in a day? Anybody got any extra they can loan me for a while?

Tuesday, August 15, 2006

My Current WIP

Having talked about the 25 Motif Challenge, you'd think I'd be one of the first to sign up, right? I haven't yet, although I will eventually, but I have some big projects on the go right now and I can't get into it until I'm done. I have a newsletter to tat for and I've just finished the lace for a wedding album that took a big chunk of my tatting time. I still have things to complete for the newsletter.

I'm working on a set of mixed media quilted placemats with tatted edging on two sides, and I think tatted daisies, and maybe a dragonfly or a turtle or something in one corner. Then I'm thinking that I'll quilt it by sewing the tatting on to the placemats and add quilted bees or something. I'm madly tatting 8 edgings to fit along the narrow side of 4 placemats. All of the tatting bits will probably go into the newsletter, but I want one placemat finished to show how it all fits together. I want the tatting on the front, but the outline quilted on the back.

At the moment I have 5 of the 8 edgings done and I'm thinking daisies because I don't have a lot of time. I'm doing all of the tatting in white because the placemats are a bridal shower gift for a couple that haven't decided on their colour scheme yet.

I want to add tatting to the placemat and quilt it to keep the batting in place, but I know I'm going to have to space things so that I can hold the batting in place in strategic locations. I could just machine stitch a checkerboard pattern on a diagonal but that seems kind of boring. I originally thought of just a spray of 3 daisies with stems on the left side, but then the whole right side would be devoid of stitching. So I though of maybe a turtle in the lower right and a dragonfly on the upper right. If I use a turtle I could do some concentric circles reminiscent of ripples in water and that would take care of the quilting in the lower right, but I'd still need to fill in the upper right.

I have been thinking that if I just scattered daisies and stems across the whole mat that would resolve the issue of spaced quilting, which may be a simpler solution, but not as creative.
Maybe a spray of daisies and a celtic knot quilt design? That's a lot of hand sewing and these things are needed for September 9th.

I'm still thinking of possibilities and what I decide determines how fast I can get the newsletter out, which determines how quickly I can join in the Motif Challenge.

Saturday, August 12, 2006

25 Motif Challenge

We've been talking about starting a tatting challenge and the more we discuss it the more possibilities there are. So that people can follow the progression of thought I thought I'd post about it on my blog so that people can offer their suggestions and input.
Here's the ideas we have been kicking around so far. We started out talking about a 100 motives. That's a lot, especially for people with busy lives. So we trimmed it back to 25 motives. We have discussed a time limit on this challenge and we considered anything from one month to the end of the year. I'm leaning more toward the end of the year personally just because of all the other things I have going.

Since the purpose of this challenge is to get as many people involved as possible we first of all need a really, really big turn out. One of the things that’s really helpful is to be able to show off what you have done and to receive encouragement from other people to keep going. For this purpose it has been suggested that each participant have their own blog where they can show what they are doing. That way everyone involved can check on each other's progress, comment on their work, offer suggestions and applaud their attempts.

Newbie tatters may want to participate but they are intimidated by the idea of creating even one new design so we have kicked around the ideas some more and here are some of the possible ways we could go.

We could break the challenge down into levels.
Beginner 5
Intermediate 15
Advanced 25
We could further add to the challenge so that for example advanced tatters need to do 5 motives one shuttle only, 5 ring and chain, 5 with 2 shuttle patterns, 5 with split rings, 5 with clunies or something similar. Intermediate could do a smaller number of the required designs.
For very new tatters, they could participate as well, not designing something new but just adding something to an existing design, such as adding beads or doing the pattern in 2 colours or other simple changes.

We haven't been talking about patterns just pictures of finished work so there's no copyright infringement to worry about. However, if we do end up with a tremendous response we could do a publication and include the designs much as was done years ago when a lot of the on-line tatters all contributed to a group publication. We haven't got that far in the discussion yet.
Where new tatters want to try modifying an existing pattern they can begin with any of the public domain designs without any concerns about copyright infringement.

What is a motif? We have kicked it around and considered that anything that is one round is a motif. So it could be a round, square, heart, cross, or butterfly shape or anything else your little heart desires. We could do 5 of each or whatever you want.

One of the other things we have discussed is that if the blogs all linked back to one another we could more easily see how each person has progressed. Blogs will let you add links down the side so each time somebody signs up, everybody else adds them to their blog links and they add everybody's links to their blog.

Anyway these are some of the things we have been discussing and I thought before a lot of mis-information started flowing through the tatting lists that it might be helpful to see what's been discussed so far.

Friday, August 11, 2006

Heart Bookmark


This is another small bookmark which can be done with size 10 thread. This design is just a little cloverleaf with a chain around the outside. The heart shape is more pronounced if you make the picot at the point of the heart a little bit bigger than the other picots in the outer chain.

The Doily that Didn't Make it


I haven't written much mostly because I picked up a summer cold. I have been working on some tatting though, mostly things to go in the newsletter. I was planning on including this geometrical doily I did some time ago. Years ago I did snowflakes for my siblings which were enclosed in their Christmas cards. I did one design which I loved, but it took a long time to complete and needing 8 snowflakes in a short amount of time I decided against it.

I started over with a much simpler pattern which worked up quickly but wasn't as lovely, so I did another variation. The second was more intricate and took longer to make. So I did a third variation and then I could decide which one to use. I had 3 of 8 variations so I either needed to make 7 more of one of the choices or keep going and make 5 new variations. Time was running out so I opted for 5 new designs.

I have a crochet tablecloth made up of motives that have a filled in wine glass shape the stem of which is created by a diamond shaped area of open work. This open work looks a lot like tatted rings and every time I looked at the table cloth I wondered if I could re-create it in tatting. What does that have to do with the aforementioned snowflakes? I drew out a possible working plan and selected one of the snowflakes as a starting point. Over the years I have taken several of these snowflakes and turned them into doilies which I call my snowflake doilies. This geometric design was one of them.

It isn't going to make it into the newsletter though. After taking several pictures of it so that I had the design recorded, I gave it away. Trouble is the pictures aren't clear enough to draw a complete pattern from. I'm going to have to re-tat it to get the picture written down and some other things have come up which have taken a big chunk of my tatting time. I suppose I will have to re-do it sometime, but it isn't something I'm looking forward to. Having enjoyed the process the first time through I'm not looking forward to repeating it.

Saturday, July 29, 2006

So That's Where It Went

I've been feeling for a long time now like I was missing part of my e-mail "conversations". It's kind of been like missing a sentence here and there in a dialogue. Very disconcerting.

Yesterday hubby was using the DVD burner on my PC to convert some home movies to DVD so I used his computer to check mail. Imagine my surprise to find that several of the messages from my e-mail lists identified as SPAM! Since our IP introduced spam filtering my husband and I have had far fewer ads for Viagra, mortgages and the rest. What a relief to be rid of all that garbage mail.

Some time ago hubby went in and changed our spam filtering from normal to aggressive. It was about that time that I started to feel left out of the conversation. My e-mail is set to delete spam off the server. I never see it. Yesterday I changed my e-mail settings so I could see what was happening. Yep. The system has been deleting my tatting e-mail.

The good news is, I'm not losing my marbles, people aren't talking behind my back, it's just a good old computer glitch.

Tuesday, July 25, 2006

Another simple book mark


Each of these little bookmarks allows beginners to learn new little techniques. This is another of the bookmarks that can be done using chains only, but it requires the use of a paperclip to make mock rings (MR). Begin at the base of the butterfly and when completed the end is used to make the optional long zigzag chain.

Slip the paperclip over the shuttle thread before you begin. A large paperclip gives you something that is easy to hold onto and it will hold open the beginning space so that you can close the mock ring. Start where marked, tat the required number of stitches and then pull on the paperclip. This pulls the core thread back through the stitches to open up a loop. Slide the shuttle through the loop and pull the MR closed. First mock ring completed.

Again slide the paperclip over the shuttle thread and tat the next MR joining it to the first. The tiny ring at the top has 2 picots for the butterflies feelers.

Repeat for the second side of the butterfly. Join to the base of the first mock ring and add a zigzag chain to complete.

A zigzag chain, is also known by the names ricrac and sometimes rickrack, sets or Victorian sets. A regular chain wil curve because the top of the stitches is slightly wider than the bottom. If you want a straight chain you do a zigzag chain. This is produced by tatting the first half of the doublestitch for 4 or 5 stitches and then doing the second half for 4 or 5 stitches. Each time you switch from first or second halves the direction of the top part of the stitch changes giving the chain a zigzag top.

Friday, July 21, 2006

A Change of Style

It was pointed out, that if I'm going to post patterns for people to try, I ought to change the background so that they can print it. Duh. I must have been having a blond moment not to have realized that myself. I knew the patterns could be printed just by doing copy and paste since they are visual, but any textual information on a pink background wasn't going to be readable.
So, we're now plain boring practical white.

One of the reasons I like white for tatting. It goes with everything. It doesn't detract from anything you put it with or on. It just always adds to the mix.

White is nice.

Wednesday, July 19, 2006

Small Bookmarks


There are lots of sites on the internet where you can learn how to tat including mine at www.tattedlace.com so I don't want to duplicate that information here. What I do want to cover in the next few posts are some simple beginner patterns both for those who want to learn how to tat, and for those who want to teach others.

One of the easiest ways to learn how to tat is to begin with chains using 2 contrasting colours of thick thread. Thick thread like size 10 or bedspread cotton means that you can actually see the stitches as they are being formed. Using 2 colours lets you differentiate between the shuttle thread and the ball thread.

The problem with tatting chains is that you can't really make much with them. Can you imagine going in to your first tatting class and having the instructor say "Today we are going to make a long string of knots ." Not a very interesting project to generate enthusiasm for tatting.

I developed several small designs that could be done in size 10 thread to make little bookmarks, a couple of which use only chains. The flower bookmark shown is one of them. When worked in variegated thread you can still see which is the ball thread and which is the shuttle thread. Each of these designs was created so that it is finished off with a long zigzag or rickrack chain and a tassel. If you know how to crochet you could do a crochet chain instead of a tatted one. Or you could just tie on a fine ribbon.

The Flower bookmark begins with a ring shape. So you could tat a ring. Sometimes if I am teaching a small class and I have the time I wind the thread onto throwaway shuttles that I cut out of plastic lids, like the kind you get on margarine or coffee. (I'll do a template for the throwaway shuttles in another post.) I wind the ball end of the thread onto my business card, and I tat the central ring. That way we begin class with shuttles already wound and the students only have to learn how to tat chains.

If I have a large class or I don't have the time, I wind the thread and attach a paperclip between the shuttle and the business card. Instead of beginning the bookmark with a true ring, we do a mock ring, or a Self Closing Mock Ring (SCMR). A mock ring is just a chain curled around and joined back to itself. So, hold onto the paperclip and begin tatting where marked in the diagram. Tat 3 doublestitches, then a picot, 9 times. Tat 3 more doublestitches. This will bring you back to the beginning where the paperclip is holding your place open. Pull on the paperclip to pull the core thread out enough to push the shuttle through the loop. Then pull on the shuttle to close the loop back up again and the central ring is formed.

The next row is a chain joined to alternate picots of the base ring. The point where you start has to look like it's a picot. It isn't a picot, it just looks like one and it's called a mock picot. Any time you have the shuttle thread and the ball thread forming what looks like a picot in the finished piece, it's a mock picot. Similarly, when you tat a row of split rings you have the 2 threads, one from shuttle 1 and one from shuttle 2 forming what looks like a picot between the rings. That is also a mock picot

If you just start the chain, as soon as you tighten the chain up, the gap that looks like a picot will disappear. To prevent the mock picot from disappearing you do a lock join. A lock join is created by an unflipped half stitch. Do the first half of a doublestitch, but don't flip it, then do the second half. Since the thread in a lock join isn't flipped, it won't slide. That's what makes it a lock join.

Tat a chain around the ring. Skip the first picot and shuttle join into the next picot. Usually you insert the hook into a picot, pull up a loop of the thread wrapped over your hand and then slide the shuttle through, as shown in the picture to the left. For the flower bookmark insert the hook into the picot and pull up a loop of the shuttle thread. Slide the shuttle through the loop and pull the thread tight. Shuttle joins don't move so make sure that you have pulled out all of the slack and that everything is in position before you tighten the join.

Continue the chain around the mock ring skipping one picot and doing a shuttle join into the next picot until you come back to the beginning. Join into the mock picot at the beginning of the row, pull one of the threads, either the ball thread or the shuttle thread through the mock picot and tie the ends in a square knot.

A square knot is formed when you tie the thread left over right, right over left. Or, right over left, left over right. A granny knot won't hold and you don't want it to come undone.

To complete the bookmark add a fine ribbon or crochet a chain and add a tassel or tat a chain using a Zigzag stitch. You will have noticed when tatting the flower that chains tend to curve. If you want a straight line instead of curves you need to switch back and forth between tatting the first half and tatting the second half of the doublestitch. Tat 4 or 5 first halves then 4 or 5 second halves. Repeat for the desired length. Zigzag stitches are also known as Sets or Victorian sets. Once the straight chain is completed, a tassle can be added to finish off the bookmark.

In this one small bookmark, the tatter will have learned 5 additional techniques. Mock ring, SCMR, mock picot, lockjoin, and shuttle join.

Beginners


I've been thinking about doing a series of posts including things for beginners. I really want to put the stuff on my web site but that requires intensive input from Rob. If it isn't perfect he won't put it up. Useful takes a while, perfection takes longer and I'm impatient. I really want to do this. Do I have time for it? Probably not, but if it's in a blog I can do it in little pieces and then when/if it gets moved to my web site everything will be complete. Sort of. Well my part will be complete, perfection will come by and by.

On several of the e-mail lists we've had discussions about what makes a pattern difficult and I have always maintained that a technique such as split rings ought not to be part of the equation. If a pattern calls for split rings and you can't do them the pattern isn't difficult, it's impossible. If you can do split rings the pattern may actually be very easy. So when I started doing patterns for publication I devised a legend so you can see at a glance what the pattern needs.

The picture at the top are the symbols I selected. A happy face means it should be easy for anyone to tat. The not so happy face means it will take concentration. Doesn't the little guy look like he's concentrating? The symbols that look like a pair of canoes are shuttles. There's only one when a pattern calls for one or more when more are needed. The next symbol is a ball of thread. doesn't it resemble threads going around a ball? The circle split in the middle is used for split rings. The pair of vertical lines are used for mock picots, I don't usually mark them in the pattern. I think it's overkill for something that just happens as you work. The eternity symbol is what is use for continuous thread (CTM) , no beginning no end just lots of thread. (Don't we just wish that our shuttle threads were endless!). The last symbol of linked paperclips also looks like chain links, so I use it to show split chains.

There are some other symbols I use from time to time, but so rarely that I describe them when I do. Like the symbol for a really hard pattern. I've only ever used it once or twice. The first time I used it on the Orchid pattern in the Transitions book. That pattern was such a stinker to do that I only tatted it twice. It's also the only pattern I really had to have proof tatted. The end results are pretty, but Oyyyy what a pain to work on.

I think I'm going to begin this beginners series with some of the patterns I use to teach with. I'll need to tat up some samples first and right now I really ought to be doing other stuff... If I have time after Bible Study tonight I might get to it. Bible Study has really been great, we've been going through the book of Mark looking at how Jesus operated and seeing what He did to get the results He had. It's been very thought provoking and challenging.

Tuesday, July 18, 2006

The Wedding


Aren't they a cute couple? Rick and Lora's wedding was on Sunday at Westfield Heritage Village, a very quaint locale with historical buildings and people wandering around in period costumes. We had been concerned about being rained out, but the day was bright and sunny with the temperature soaring to a skin crisping 97 degrees F. The ceremony was held in the Mountsberg Church and of course the buildings were not air conditioned.

The bride, not being satisfied with the job the hairdresser did, took the time to re-do her hair making her about one hour late for the wedding. Picture a quaint frame building packed with men in suit coats and ties, ladies in elegant finery and add 100 degree temperature and an hour wait for the bride to show up.

Fortunately, one of the wedding party had been thinking ahead, so the program was printed using stiff card stock in dark red, (to match the dresses) for the outer blades of a paper fan. They used a teardrop shape with a rivet at the base so you could spread out the pages to read the program or fan yourself. Never mind reading, we were too busy fanning! The music was provided by a very talented choral group, friends of the bride and groom. Since candles were not permitted in the village they used a sand ceremony where the mothers of the couple poured red and white sand into a large glass bowl. It was very pretty, and a nice touch to the ceremony.

The photographer, anxious to get just the right picture, took an abundance of shots at numerous locations on the grounds and the wedding party was quite wilted when he was finally done. The Inn, where the reception was held was air conditioned, but crowded with hot bodies it didn't stay cool for long. Due to the lateness of the wedding and the excesses of the photographer the reception started an hour and a half late. We were entertained with delightful live classical guitar music so the wait was enjoyable except for the grumbling tummies. The food was yummy, a buffet with lots of choice and nothing seemed to suffer for having been delayed. I think the staff knew that the wedding was late and had delayed the food preparation. All in all it was a delightful day.

The Album

I haven't posted much lately as I was working on the album cover for my niece's wedding. I was still working on it the morning of the wedding! It seems to me that the tatting is the easy part. I constructed the album covers so that they were simple sleeves that could be removed for laundering. Although I tried to buy albums that were white to start with, the best I could do was a white album with a small circular picture on the front and back.

I used white satin fabric for the cover but the picture showed through so I lined the cover to make it thicker. I didn't want any raw edges showing so I just sewed the satin and lining together like a long tube, turned it inside out and then folded the long ends in and blind stitched them together fitting it to the album as I went.

I had the choice of attaching the lace to the fabric and hoping that I got it positioned correctly or making the cover and then attaching the lace. Not wanting to spend hours sewing down picots in the wrong position, I opted for making the cover first. The difficulty of course is that I had to work from the outside of the cover sewing the lace down to the satin, but not through the lining. I used a small plastic cutting board in between the layers which worked really well. It took a little longer but I was assured of having the frame in the right position on the front of the album. It was a little off, I think because the satin was so slippery and it was hard to pin the tatting in place and then remove the cover from the album to stitch without the pins sliding out.

In the mad rush of getting dressed for the wedding I didn't have time to take a picture of the finished album but here are some scans I took earlier. The frame uses an edgings and flowers that were in earlier editions of the Tattedlace Pattern Collection newsletters. I wove a gold ribbon around the row of open rings and tacked them down under the flowers in the corners.
I was going to use a musical theme for the interior, but since I hadn't met Rick I didn't know whether he was as musically inclined as Lora was so I decided against it and went for a heart shape. I needed an open area for names and the date and began with the idea of 2 intertwining hearts that would let me embroider a name inside each one. I doodled in the drawing program with a round motif adding points at the bottom and played around with different ways of linking them together, none of which I liked the look of.

Time was running short so I tatted up my 2 round ring and chain motives as I considered how best to proceed. Once I had them done I laid them side by side I realized that the two round shapes made the 2 top curves of a heart. Adding an open point on the bottom gave me the space to embroider the date. I un-tatted the last motif until I could open it up again, linked the two motives together and joined it back together. After I added a ring and chain point to the bottom of the linked round motives, all I had to do was add another row of chains to join everything together and my heart was done.

Tuesday, July 11, 2006

It's a mystery. This afternoon I was intrigued by several shiny discs glinting on the back patio stones. They appeared to be about the same size as the plugs we removed from the junction box when we wired in the downstairs lights. There was no way the plugs could have gone from the garbage pail in the garage to the backyard, so I sent Rob out to investigate. He came back in with 3 shiny quarters. How do quarters get dropped onto the fenced in patio when no one has been in the backyard?
Three was an odd number so I sent him out to look again for the fourth quarter. He came back with 2 dimes and a nickel. Curiosity fully aroused, I went out to see this phenomenon myself. Scattered over our yard, on the lawn,in the flowerbeds and around the outside of the fence $3.70 in nickels, dimes and quarters but no pennies.
Our first thought was that the grass cutter had lost it out of his pocket, but why no pennies and why were they in the flowerbed. Even if you back up to get the lawnmower into position you don't stand in the flowerbed to do it. That explains why there would be coins on the patio, but not the flowerbeds.
Did the tooth fairy lose the coins during the night. Did someone in a fit of exuberance throw a handful of coins in the air to land where they may and if so, why only in and around our yard not in the back greensward or the neighbouring yards?
I expect we'll never know, but it would make an interesting plot for a story.

Wednesday, June 28, 2006


Row 2 - A working corner

Well, I finished row 2 and pinned out the frame, but as often happens when you work from the outside in, my internal dimensions aren't what I hoped they'd be. I want a regular 5 x 7 picture to be able to nicely sit inside the frame. My dimensions are 5 x 7.5 which means that the picture will fit, but the white border will be visible. I'm going to need another row and that's both good and bad.

Good, because I did want to have pearls outlining the picture which I couldn't comfortably do with the design I was using and now I can. Bad, because it means I need to do another row and I don't really have time to do it. Looks like the holiday weekend will be spent furiously tatting.

Before I go on to do another inside row I want to take a stab at doing the musical notes just to see how they go. If it works as expected each medallion for the note should take about 2 hours to complete. I want to see what the finished size looks like before I decide about the frame.